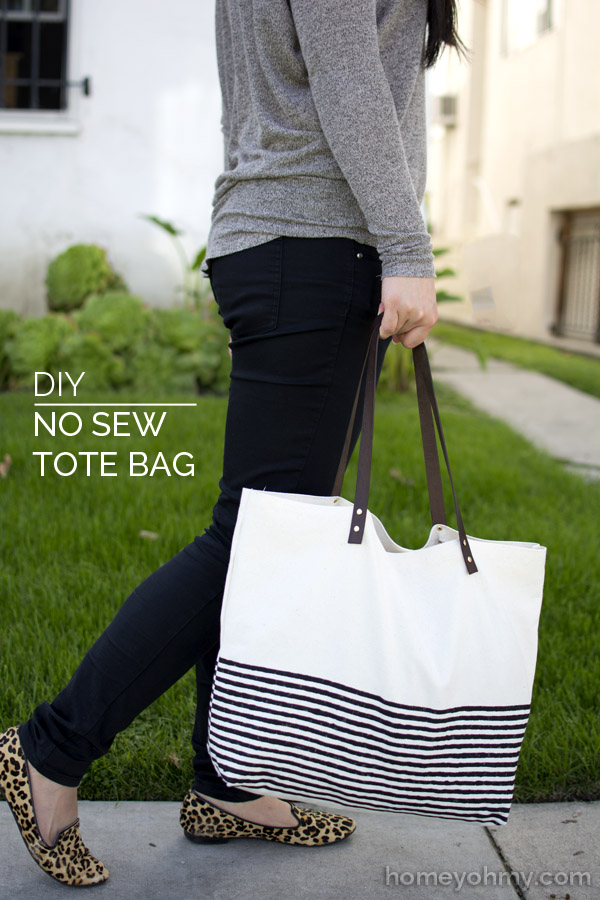
Guys, I have to say I’m really proud of this one, though it was both simple and a bit difficult. Difficult because it required a lot of steps and because I’m going to have a hard time explaining them (I apologize in advance), but simple because there is NO SEWING required! Hallelujah!
When I first set out to make this tote bag, I did some research to see what kind of no sew tutorials were out there, and to my surprise there weren’t many at all that I came across. So if you’re in the I-don’t-have-a-sewing-machine camp like I am or have a general interest in not using a sewing machine, then hopefully this DIY will help you out!
Materials:
-canvas
-ruler
-iron
–Unique Stitch Adhesive (affiliate link)
–Rivet Kit (affiliate link)
-awl
-faux leather handles with holes (I got mine with pre-made holes at the ends so that I wouldn’t have to get a leather punch)
-Martha Stewart Satin Paint in Beetle Black (I recommend this particular paint because it does not require fabric medium. You can just paint and go!)
-pouncer
-1/8″ tape
I started with two canvas pieces that I measured and cut to 18″ x 21″. The rest of the steps detailed from here on out will be done to each of these pieces.
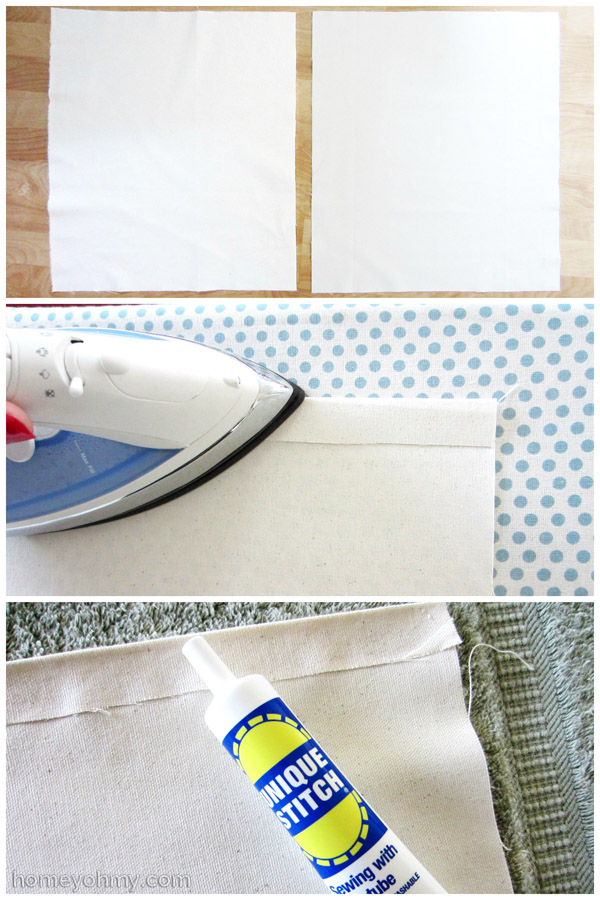
On the edge that’s 21″ long, I folded over about a half inch and ironed it down. Under this fold, I applied Unique Stitch, the one thing that made this entire DIY possible. This stuff HOLDS. The key, at least that I’ve found, is to use a generous amount, not to the point where it’s globbing out the edges of the fabric, but enough to soak through the layers of fabric that are being melded together. Make sure to protect your surface like I did in the photo above with an old towel.
The next steps are for painting the stripes. I protected my surface with a towel again since the paint will seep through the back.
I flipped the canvas over to the front side, which is the side that does not show the folded over edge that was just glued down. The top of the bag will be this folded edge, which I had to keep in mind to make sure I painted my design on the right way.
 It would take three years to smooth out the bubbling in the tape shown in the top photo above, and ain’t nobody got time for that, so I rolled with it. Since this meant that I wouldn’t be achieving clean and crisp lines, I tried to stay consistent with this “organic” look and didn’t pounce on the paint completely opaque everywhere. You can see there are some parts of the stripes that look like not enough paint was applied (I did that on purpose, I swear!). I didn’t paint stripes on the bottom three inches of the fabric since it would become the bottom of the bag, which you’ll see how later.
Next I measured where to attach the leather handles.
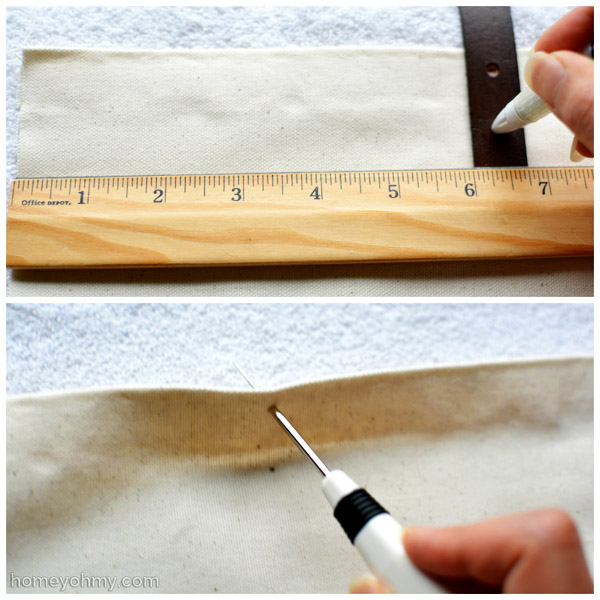
Placing the end of the handle 6 inches from the left side of the canvas and lining up the top hole near the top of the bag, I used a pen to mark where the holes were. I repeated this 6 inches from the right side of the canvas as well. Using an awl, I punctured through these pen marks to create holes just big enough for the rivets to go through.
Now for the rivets. I had the most fun with this because it was my first time working with them and now I want to rivet all the things.
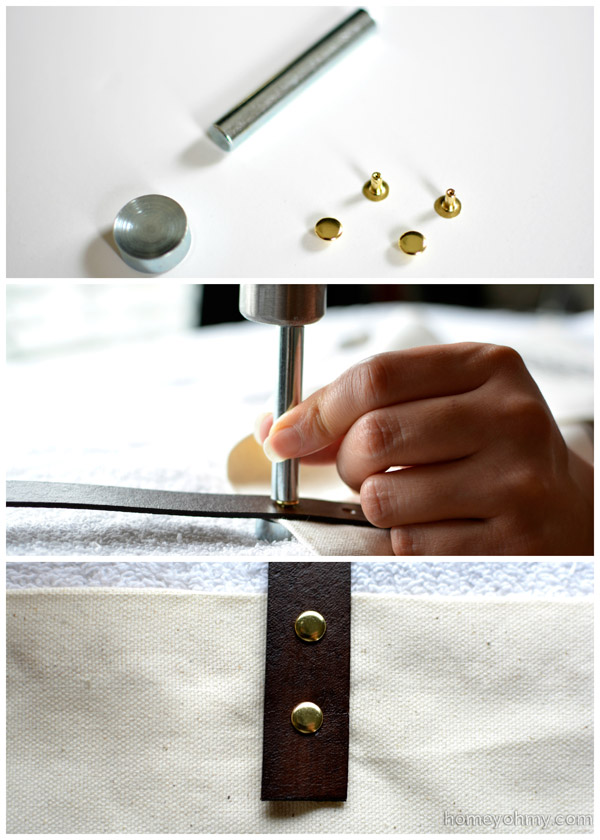
The rivet kit I used came with an anvil, setter, and rivets of several sizes. I used the smallest (~8mm) rivets. I pushed the rivet backings through the back side of the holes I previously punctured, lined them up with the holes in the leather handle, then snapped on the cap of the rivet. I placed each rivet sandwich one at a time on top of the anvil and hammered down to secure the rivet permanently. Do this on a hard surface! Not on an ironing board, like I initially tried to do.
Now with the the leather handles attached, I glued both canvas pieces together, front sides facing each other.
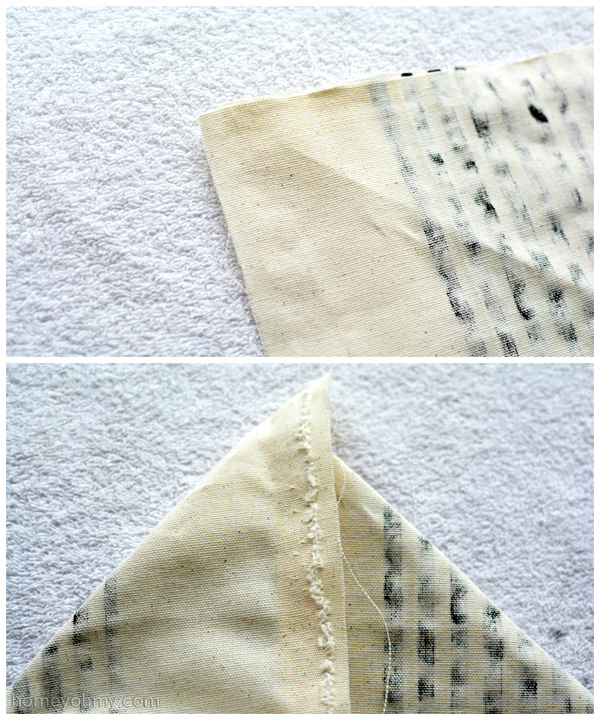
I applied the glue on all three edges (not the top edge where the opening of the bag is) and let it dry. At the bottom corners, I pinched each side of the fabric (you can see the diagonal fold on one side in the photo above and it’s also on the opposite side as well) and pulled them apart to create a triangle.
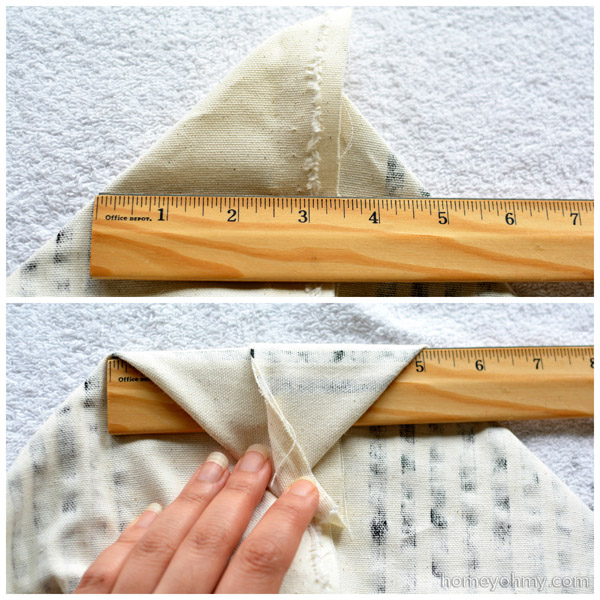
Measuring 5 inches at the base of this triangle, I folded it over to the bottom of the bag and glued it down only under the point of the triangle just to keep it in place. After doing this to both corners, I flipped the bag inside out while the glue was still fresh, then reinforced the triangle folds by pressing them down. What this does is create a flat base for the tote bag. This is where I DIDN’T paint the stripes, which I mentioned before.
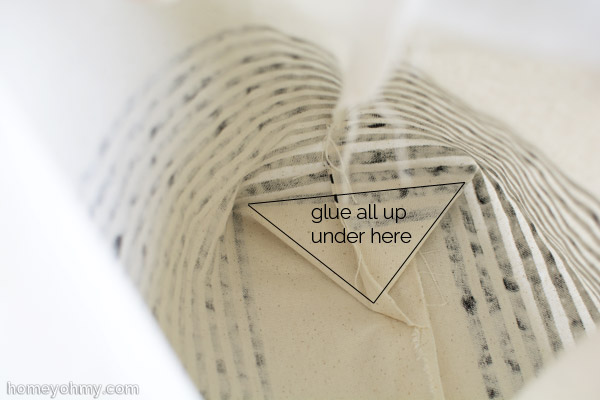
Once here, I lifted up each triangle (glue at the point is still wet) and applied glue all underneath it before pressing it down again to the bottom of the bag. I held it down a little bit to let it dry a little, then let it dry completely after letting go.
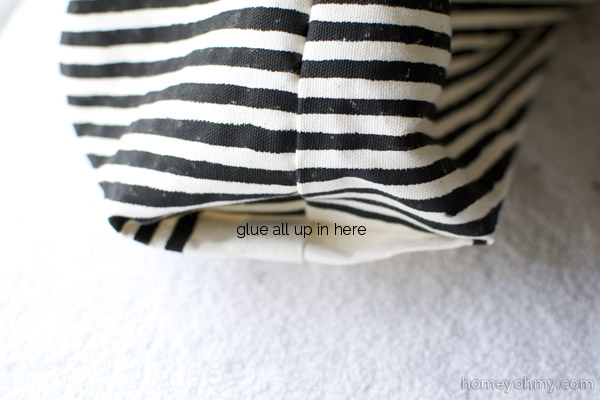
On the outside of the bag, you’ll see that the base of the triangle is unattached from the bottom of the bag. So, I applied glue in between here, pressed it down, and let the glue dry. This was done on both sides.
That. Is. It. Was that enough steps?
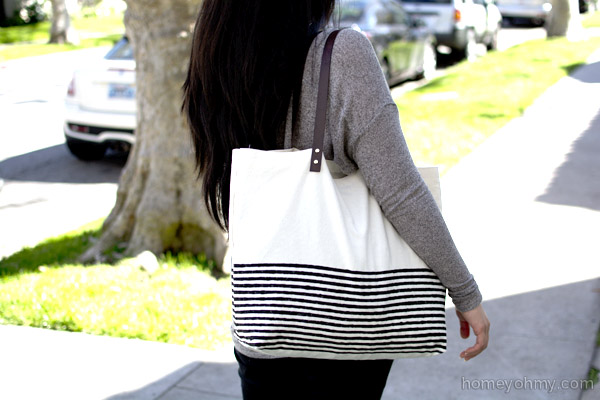
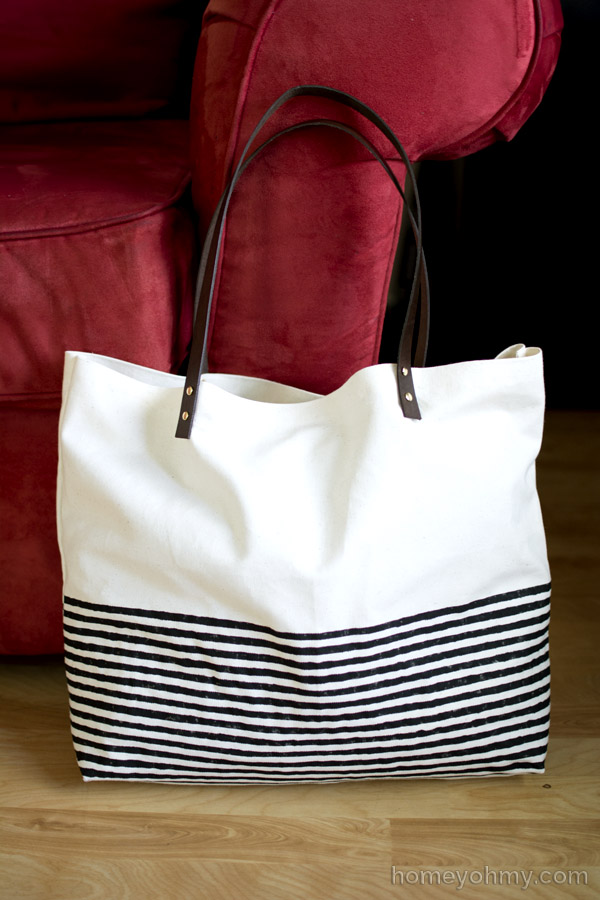
The idea for this tote bag came about when my friend suggested I make one since California now charges for paper bags. So while this tote makes an excellent, casual weekender bag, it can absolutely be a cute grocery tote as well! I take it with me to Trader Joe’s and it makes me ridiculously giddy watching the cashier load up my groceries into it because in my head I’m shouting “Yes, it works!!!” Hoping I don’t continually forget to bring it like I do with every other grocery tote.

Amy, I love this tote bag! I’ve been looking for something similar for spring, and this is so perfect! I’m definitely saving this post.
Very cute tote for both sewists and non-sewists to make!
Love this Amy! Poor Oliver, I will be asking for his help.. keke
Darling bag! Nobody will believe you made it, much less made it without sewing!
Hmmmm….I think I have top run to get a few supplies and make my own..! Super cute!♥ Wonderful job my friend.
How cute is this? Love it, great job. I would be thinking the same thing watching groceries fill it up!
Love love love! Where did you get the leather handles?
OMG. You just made my day. Never could sew! I must try this!
Lisa
This is stunning. Yay for black stripe bags!
Jaw. Droppingly. Gorgeous. I love that you created a flat base without sewing! So clever!
Rivets!! Love the rivets. I need to try rivets. Now. You did a seriously great job with this. It looks like an expensive bag to me. Can’t believe it is no-sew. Also, I’m loving the look of your blog these days! Beautiful!
Great job! Find it on Pinterest! May I ask where did you buy rivers and tools needed? Thank you!
what a cute bag and I love that it is no sew.
PS those are the cutest leopard shoes.
Really cute. I have really been wanting a striped bag this spring.
Amy! You’re so talented! I love this!
Amy, this is beautiful!! I love the stripes and the strap!
This is such a cute bag!!! I absolutely love the canvas, stripes and leather handles. Thanks for the tutorial!!!
Goldpolkadots.com
Amy,
This is absolutely amazing! Love, love, love! Thank you so much for linking up at Thursday STYLE! Awesome project as always :) Hope you have a great weekend!
I love this bag! I’ve been wanting to make my own canvas bag for our upcoming Disneyland trip. I may have to make something similar to this:)
Great job! I LOVE the rivets!
In. Love. I spiced up some heavy duty totes to take to our grocery (I really like them because they have pockets inside to corral wine) but they’re not near as sophisticated as your bag! I’m obsessed! Where did you your pre-punched leather?
Awesome bag!
Really cute and professional looking. Would make a great gift. Maybe Mother’s Day? Who couldn’t use another bag.
Have you (or anyone else) test-drove this bag yet with heavier items? Just wanted to see what the weight limit is. Such a great idea, thank you for sharing!!
Beautiful friend! I love the stripes and the straps :)
Amy I LOVE this bag! I love the fact that it is no-sew! You did a lovely job on the tutorial! Thanks for the inspiration!
Would love for you to stop by tomorrow and link this up to Fabric Frenzy Friday!
-Lindsey
Fabric Frenzy Friday
Thanks for the lesson…great job! Now I will give it a try. Where can i purchase the leather handles?
Hi Maria! I got my leather handles from this etsy shop:
http://www.etsy.com/shop/cocosheaven
Good luck with making your own tote bag!
What a fantastic bag! I love that you hand painted the material! Beautiful!
This is adorable!! I definitely want to try and make one! Thanks for sharing :)
Turned out great and no-sew projects are the best!
i am so doing this, this past yr i have been thinking more about all the plastic bags and am tired of them they just sit. iv been picking up recycle bags for my groceries, but would love to make this. ty for the idea
I love your style of creativity. I am going to try the tote bag I like it.
Where (or what brand) are your leopard loafers from?
Hi Zoey! They’re Kenneth Cole.
This is a very cute tote, however, I can’t imagine it will last very long before it falls apart. You’re putting a huge strain on the seams in a bag, and glue will not last. This is about the easiest sewing you could try – it’s all straight lines. This is so simple you could even hand sew it. Learn how to sew and make a bag that will last.
Hi Katie. I agree, sewing is always the best quality option to take, and glue would never be better than it. I like providing no sew options for people who don’t have access to sewing machines, dislike sewing, or just don’t want to sew. It’s just an option, and the steps provided can be easily adapted to sewing techniques for experienced crafters like yourself.
My tote is still intact. Granted I only use it once a week for the farmers market, so for my purposes it has held up well. I still agree with you though, it would be a very simple thing to sew and would be better quality that way.
Thanks for coming by and leaving your insight.
ABSOLUTELY OBSESSED.