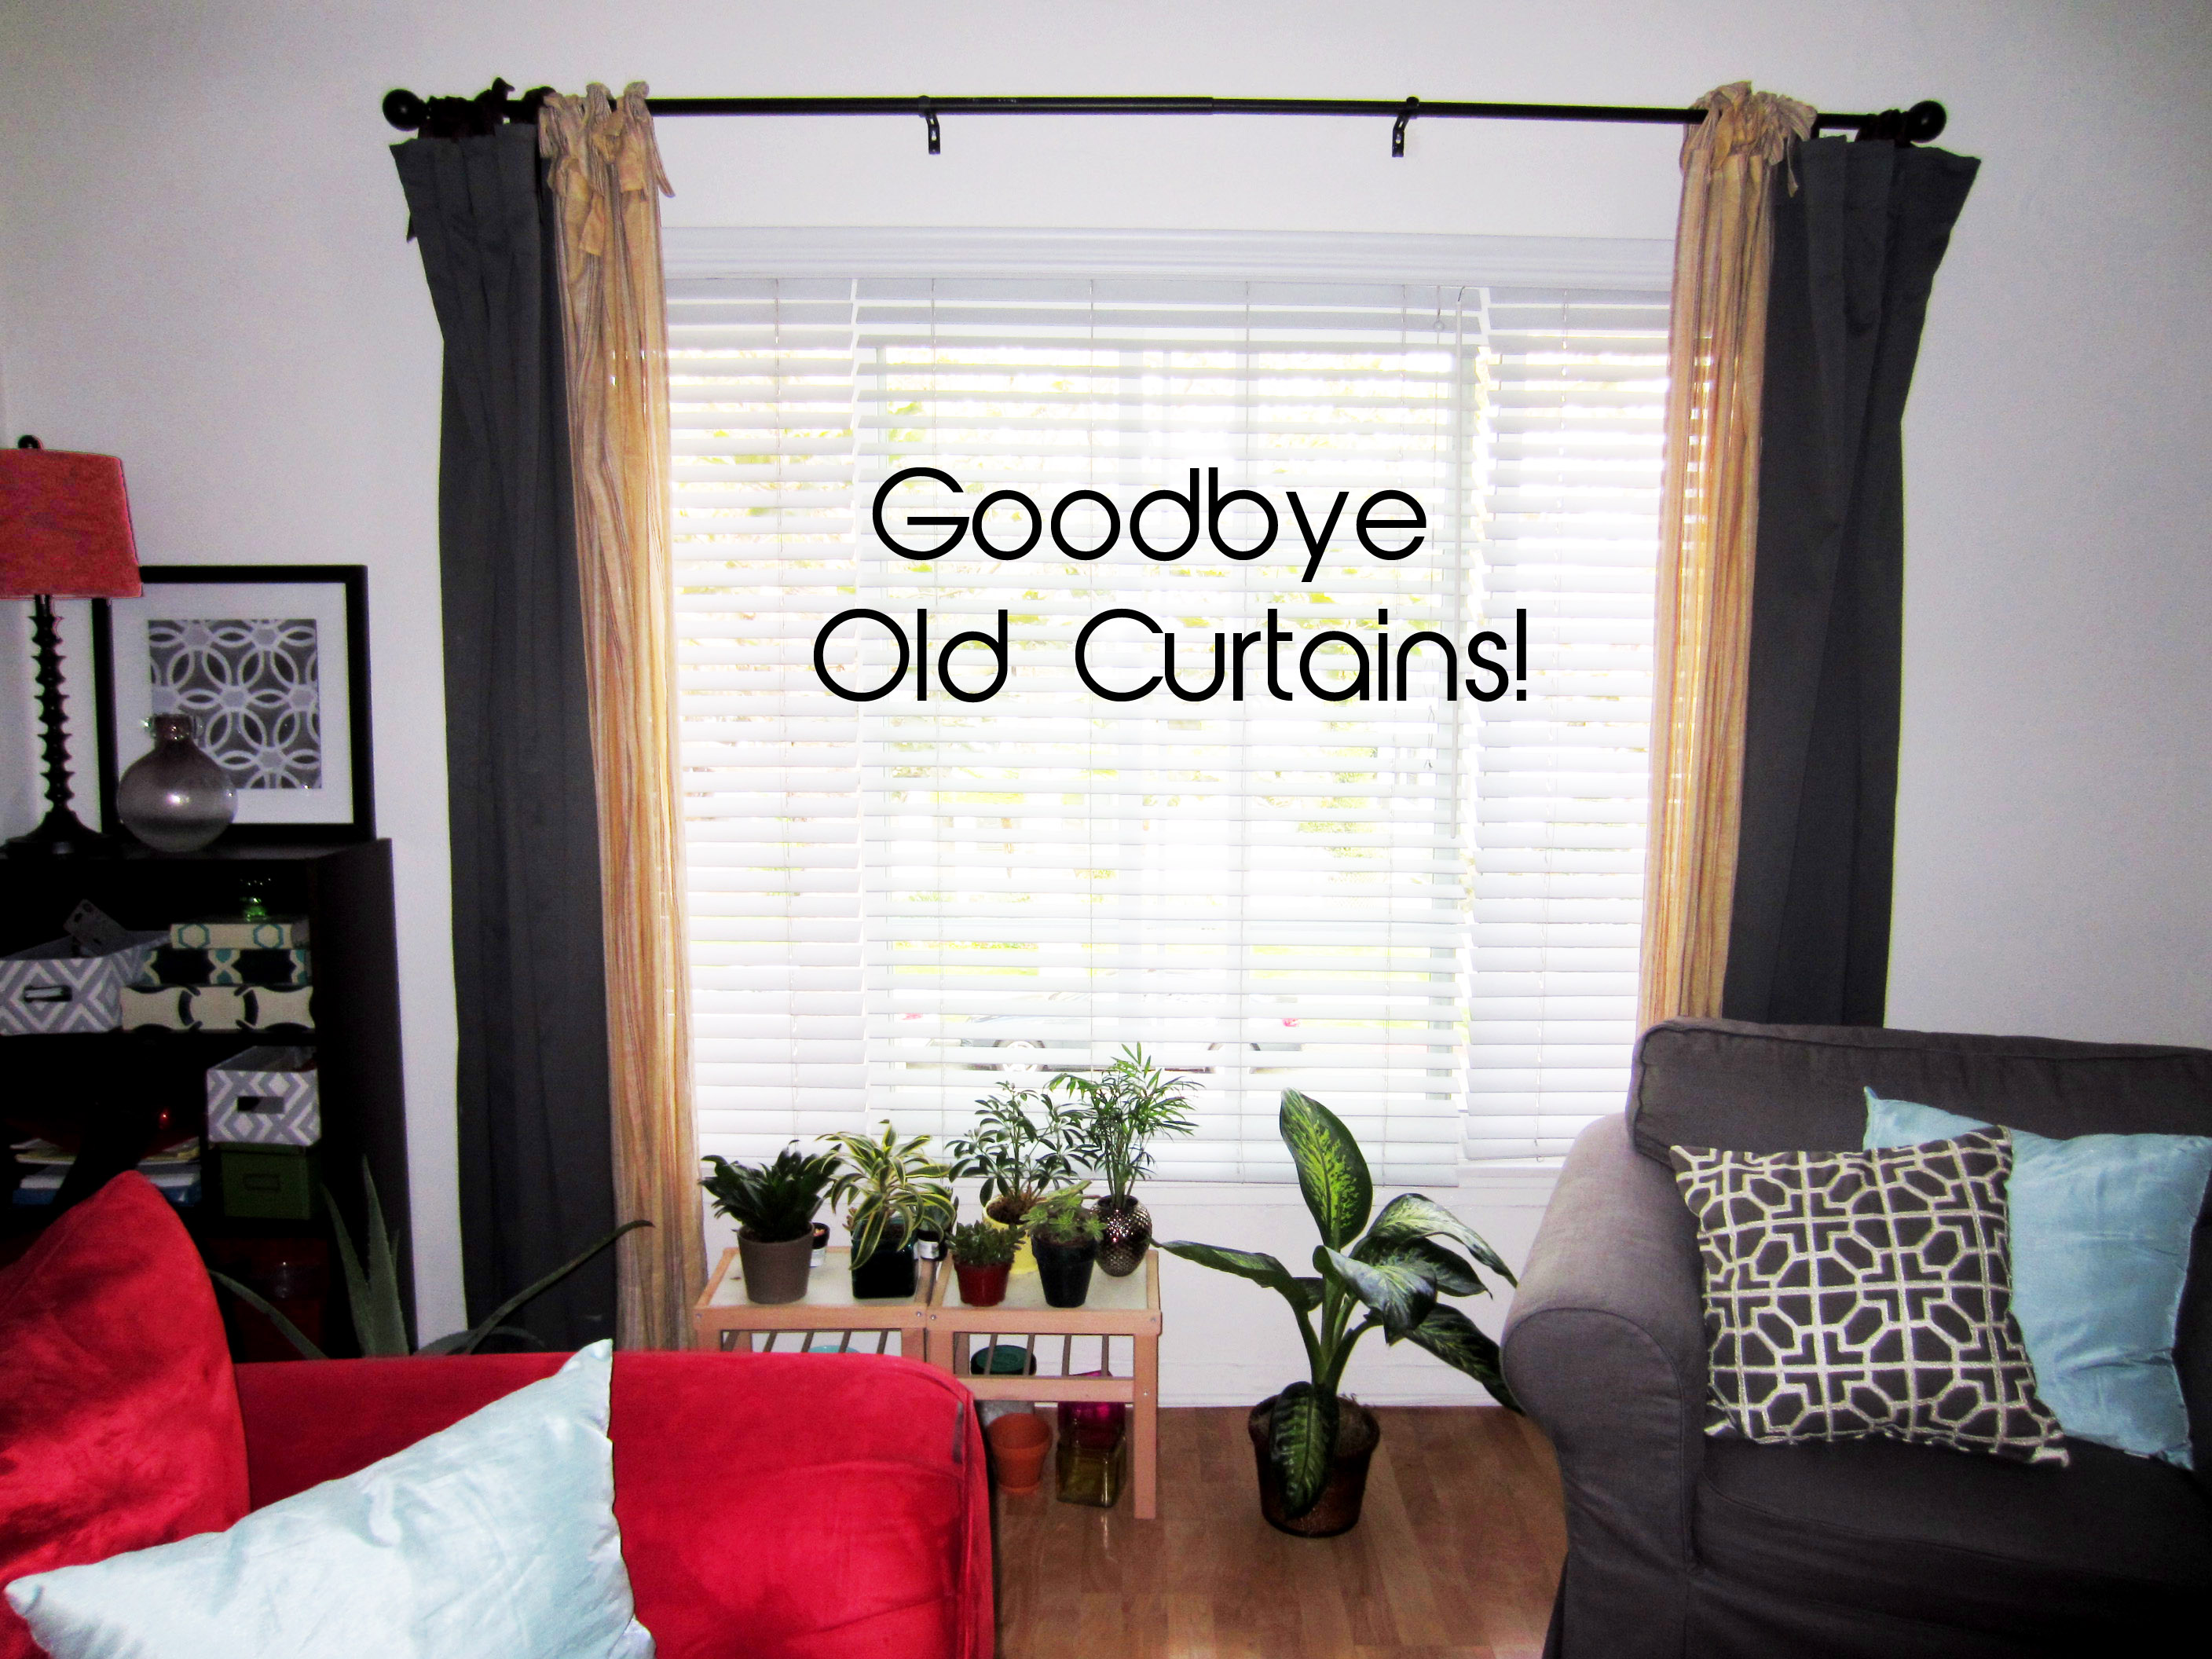
Hello new curtains!
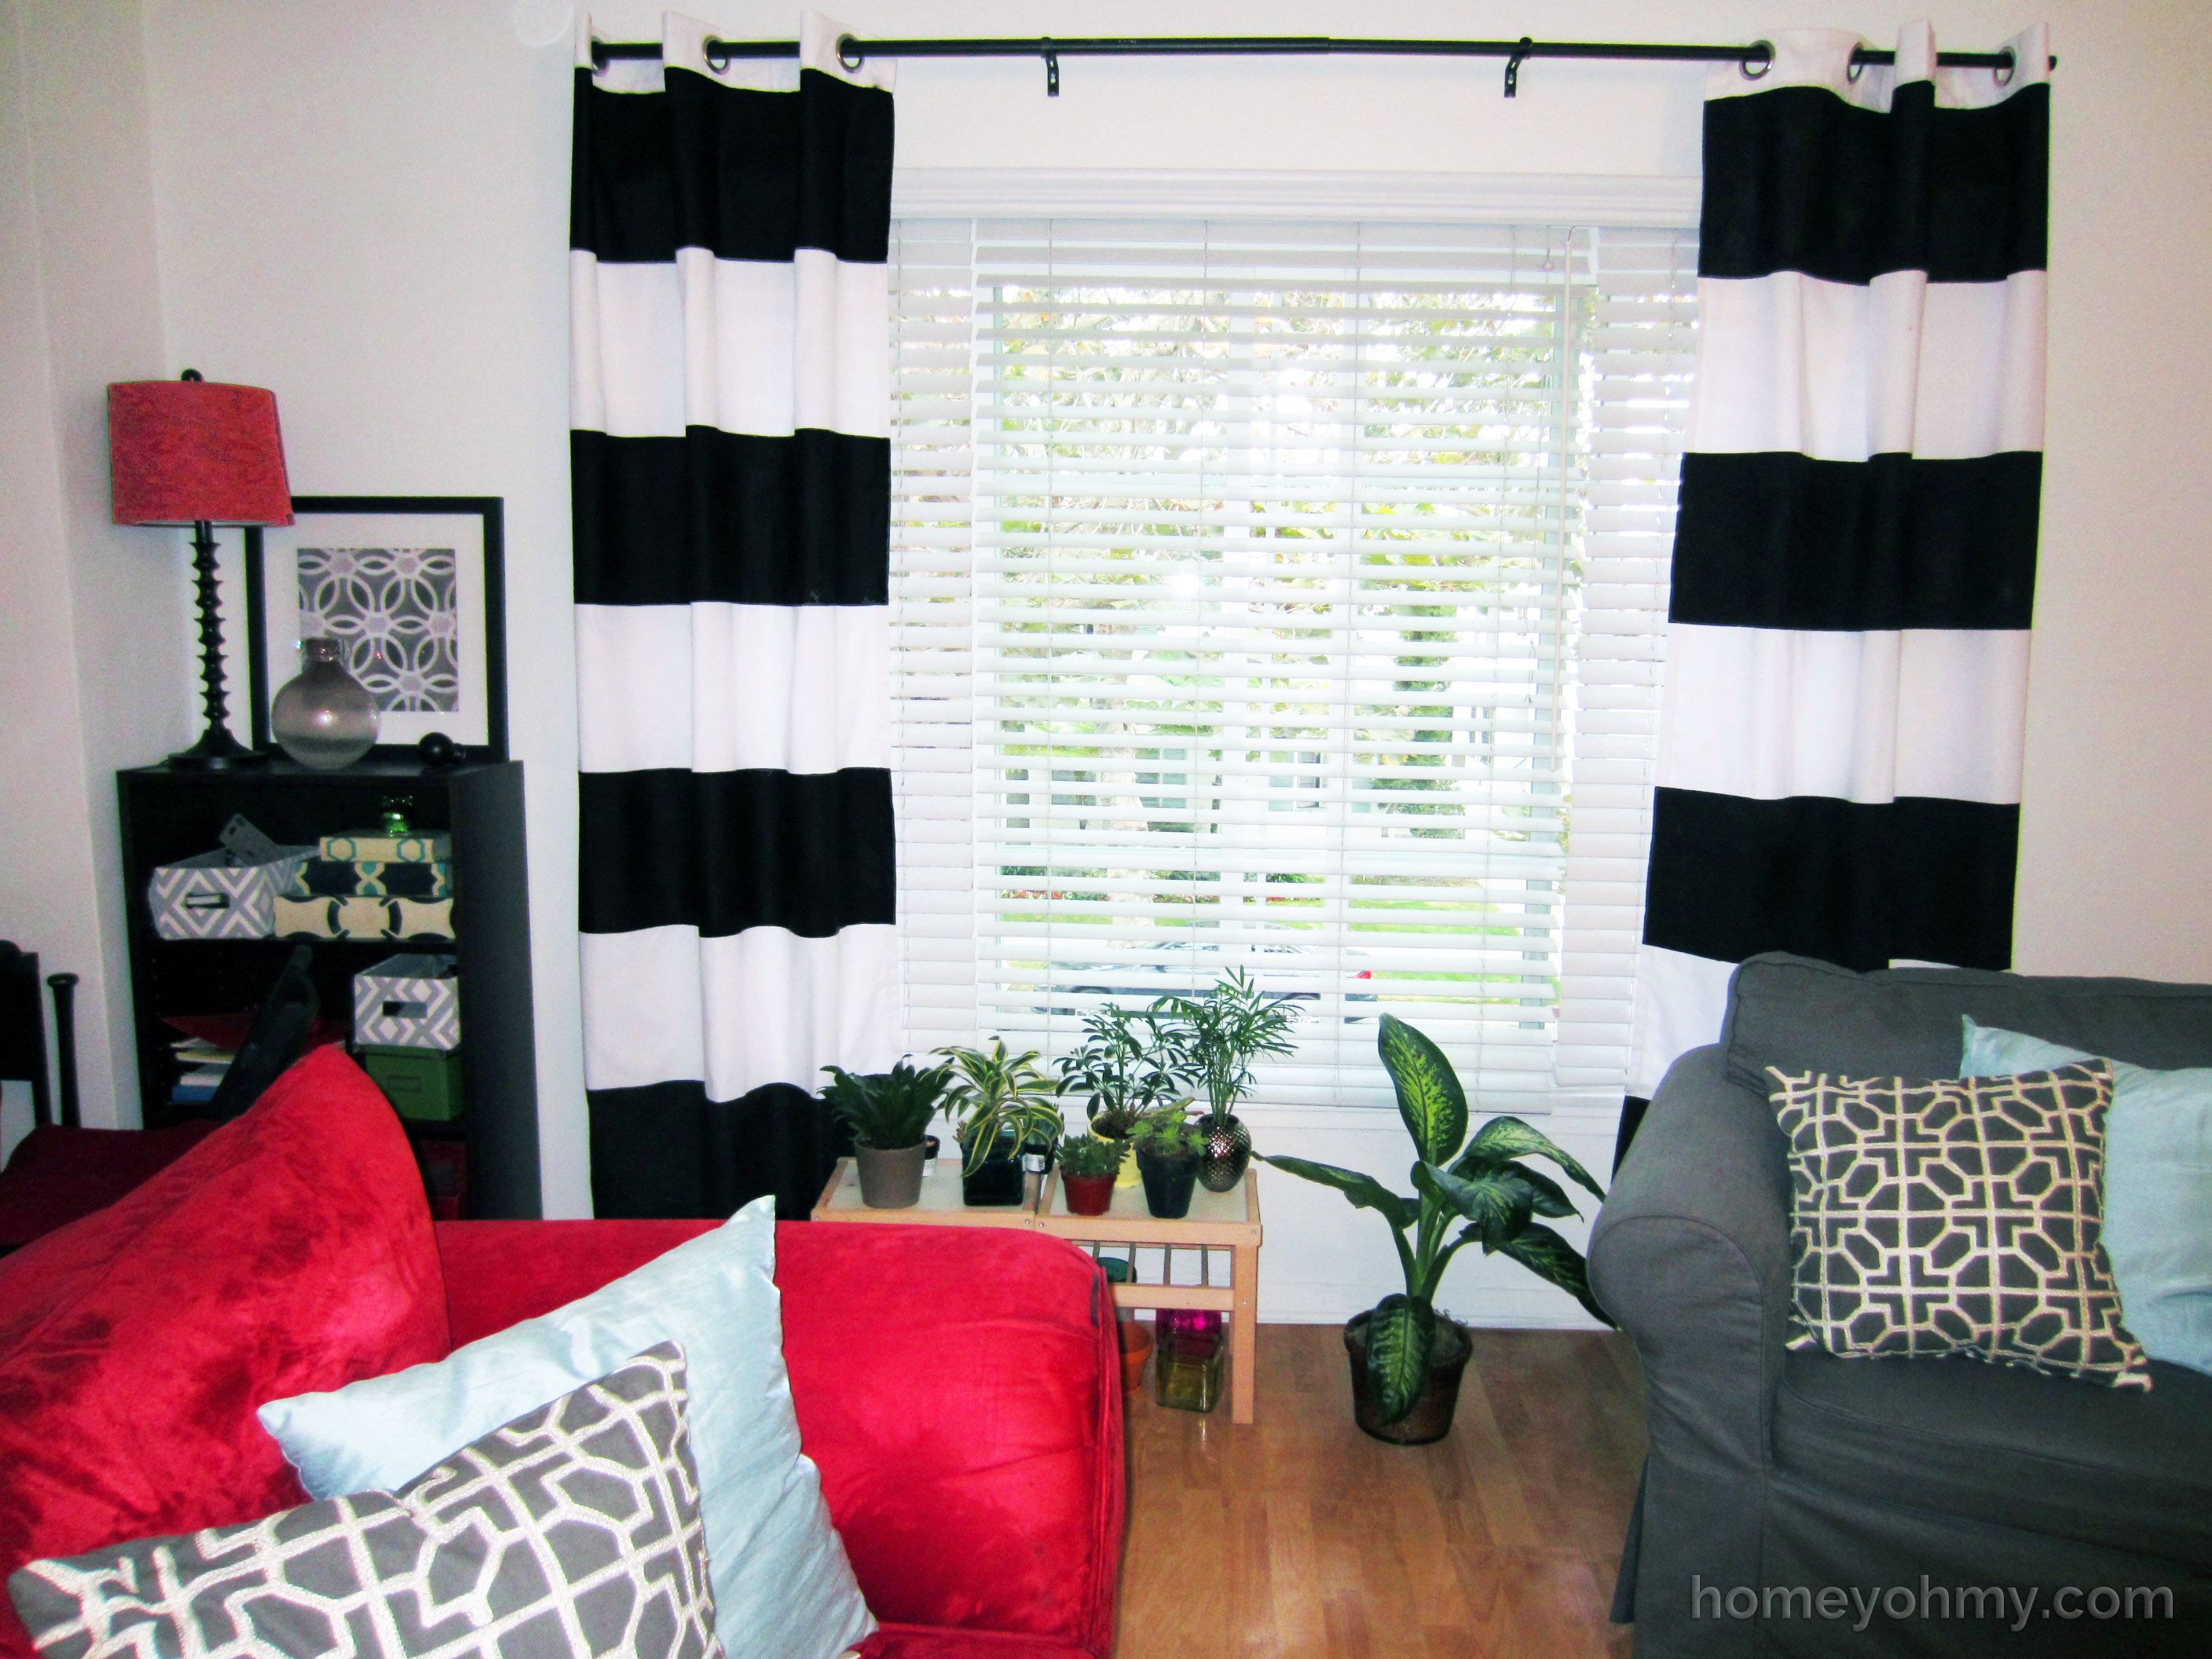
Why yes, I do want my place to look like a Sephora store.
Black and white is probably my favorite color combination and I love how it looks with red. Since my couch is red, I felt the bold, black and white stripes would fit nicely in my living room. The curtains I had before were left behind by the previous tenant and although free stuff is my favorite kind of stuff, I thought they were a bit too drab. These new curtains are a fresh change and can actually work in a lot of different spaces. I’m a huge fan of that kind of versatility.
Before we get started, let’s have a moment of keeping it real. This project was not easy for me nor did I complete it with the finesse I’d want to make it seem like (you are, after all, my cherished reader that I’d like to impress ;)). At one point, I had unknowingly stepped in some paint and left footprints all over my hardwood floor. I don’t know how many times I yelled “I ruined it!!!” during this project, but I’m glad to report that they weren’t ruined to the point where I couldn’t use them. As the saying goes, don’t let perfect get in the way of good. I actually saw that on Pinterest and am now wishing I re-pinned it. Darn it.
On to the project!

Materials:
- paint roller
- paint tray
- white curtains
- painters tape
- acrylic paint- I used about 18oz (9 bottles) of Folk Art Pure Black
- textile medium- I used 9oz (1.5 bottles) of Martha Stewart’s Fabric Medium
- measuring tape
- garbage bags, or whatever you want to use to protect your floor
First, measure out the length of the curtains and figure out how thick you want each stripe to be. I hit frustration in this step because the curtains, which I got from Target, were supposed to be 84″ long but were actually shorter.
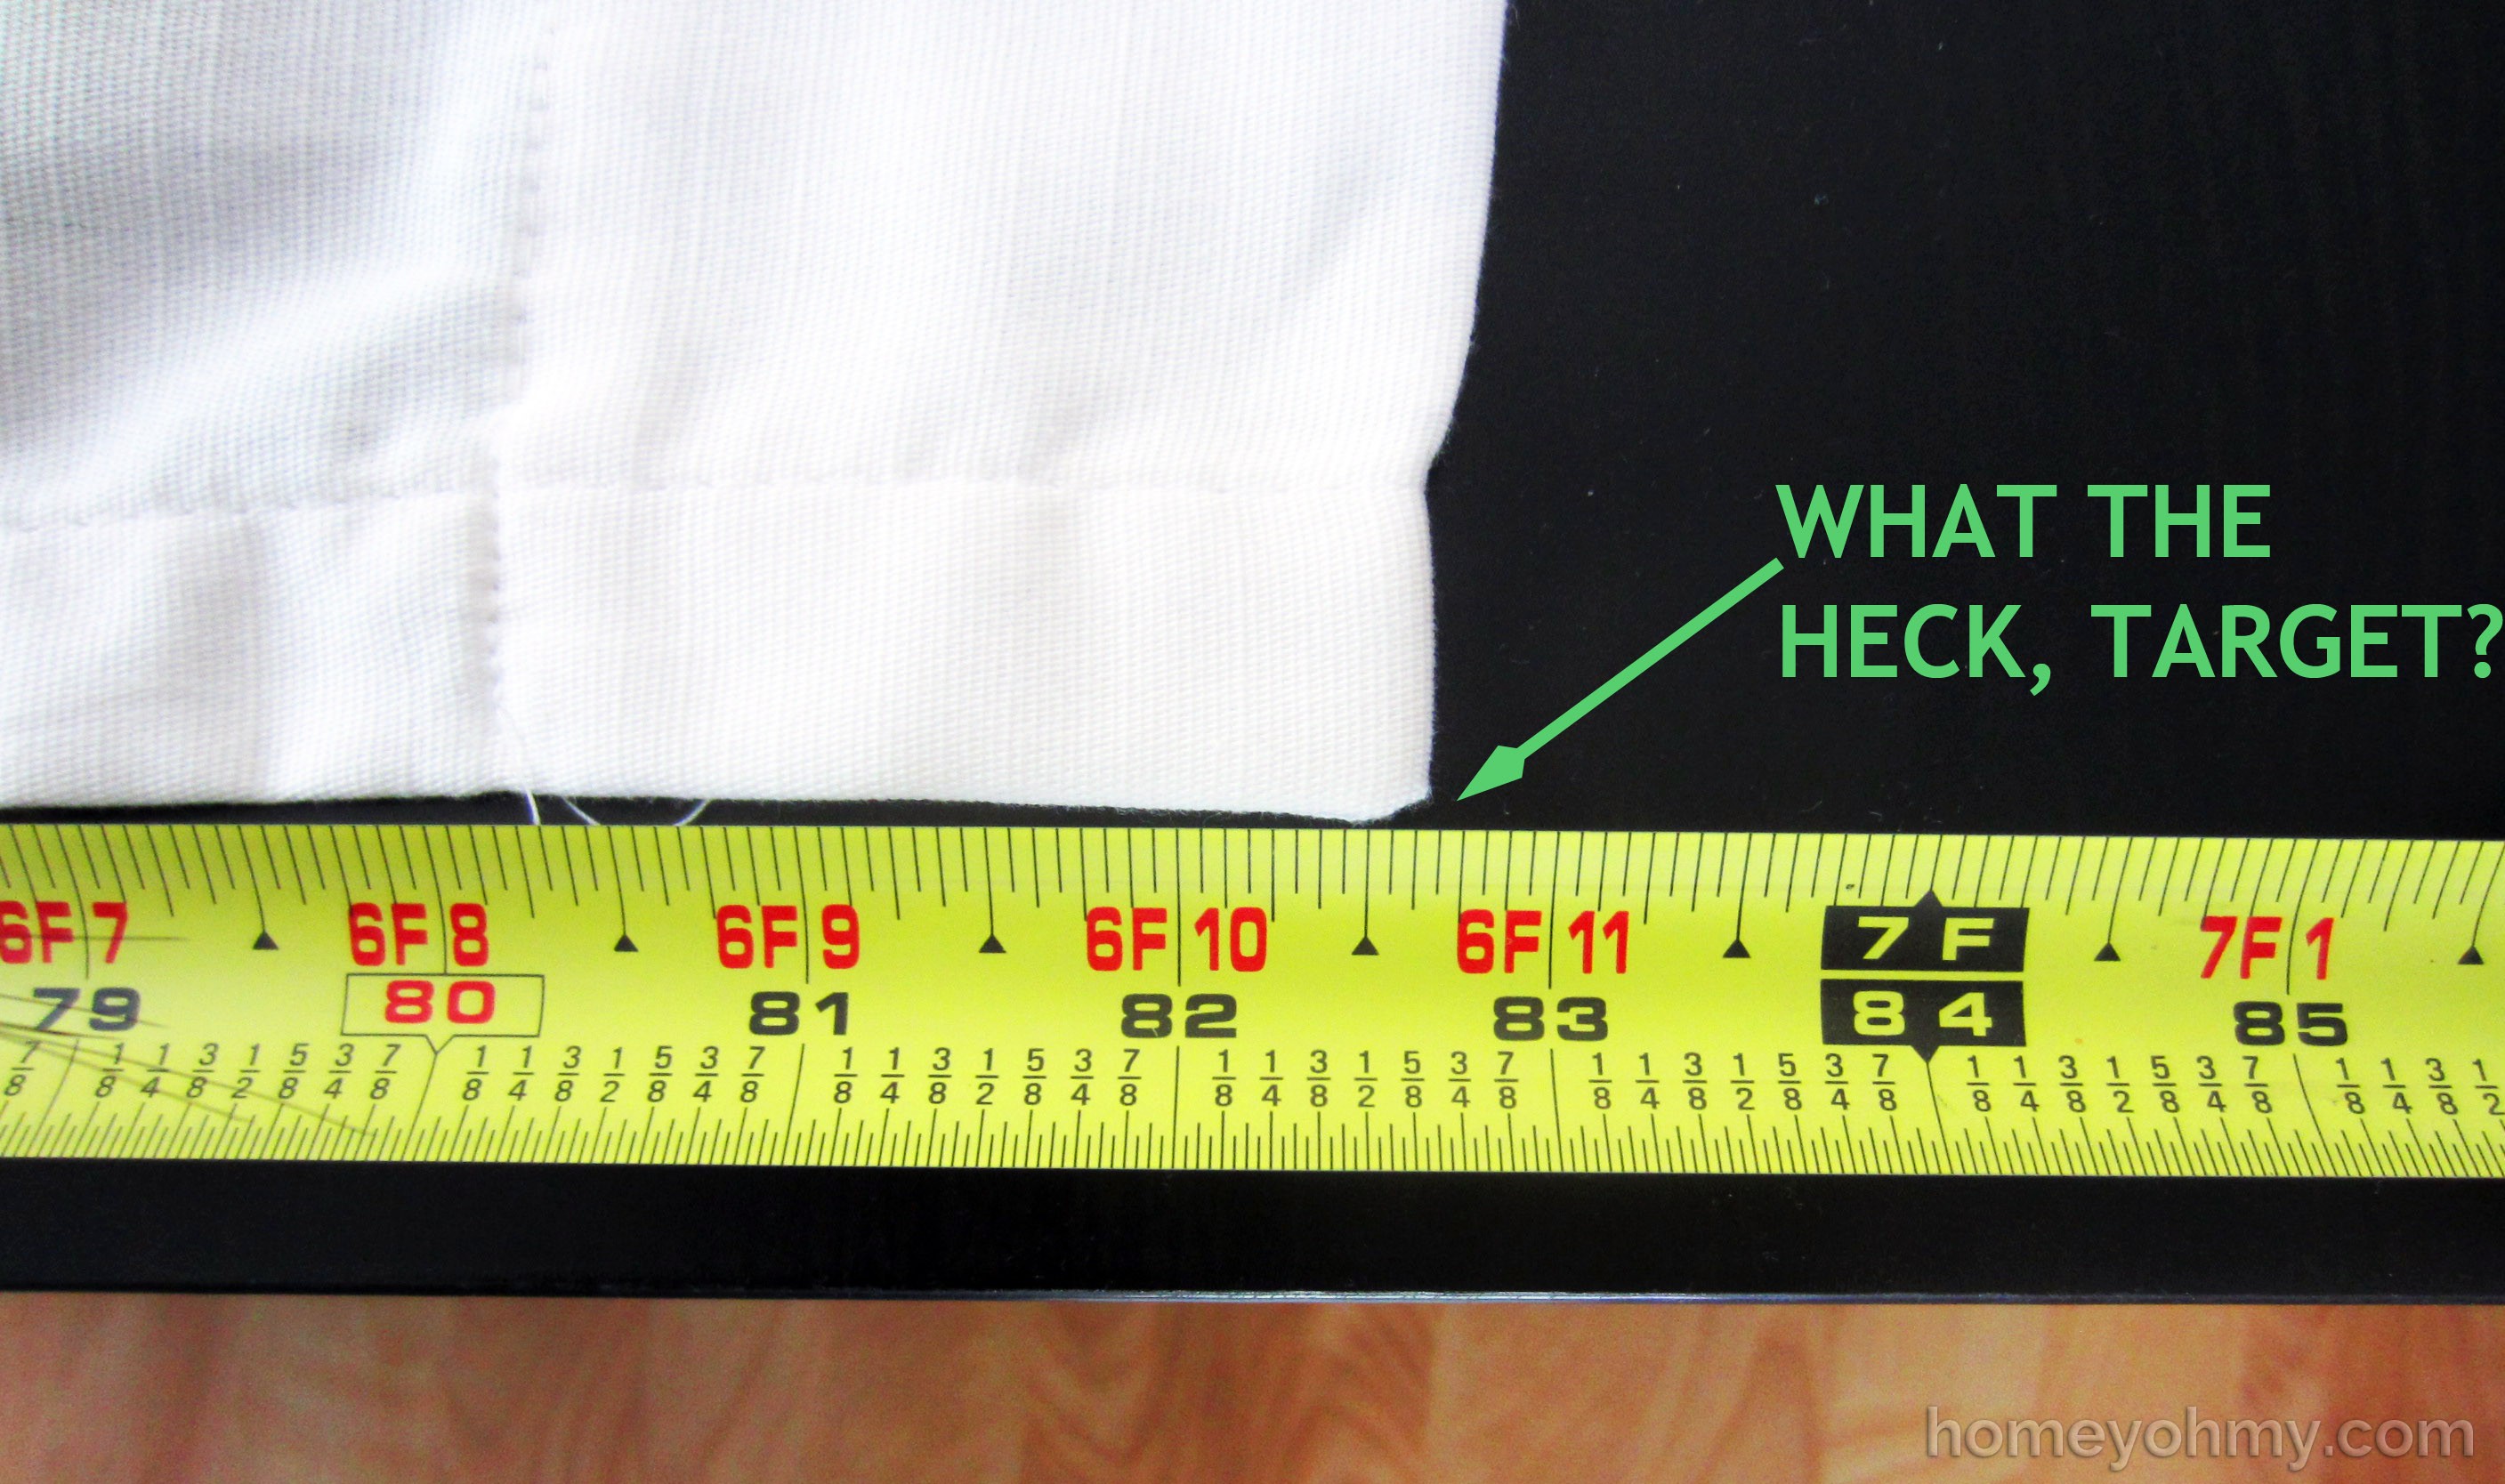
Most of the reviews online actually mention that these curtains run short, which I wish I had read beforehand so that I could have gotten the 95″ ones! But never mind that now.
I decided to make each stripe 11.3″ wide starting just below the grommets since I didn’t want to paint around them. With a pencil, I marked the edges of each side of the curtains at 11.3″ intervals. These marks act as a guide for where to place the painters tape. The key thing to keep in mind is that you want the tape to lay on the parts of the curtain that will not be painted. Thus, the tape should not look evenly spaced but should be closer together between the edges of the stripes that will remain white.
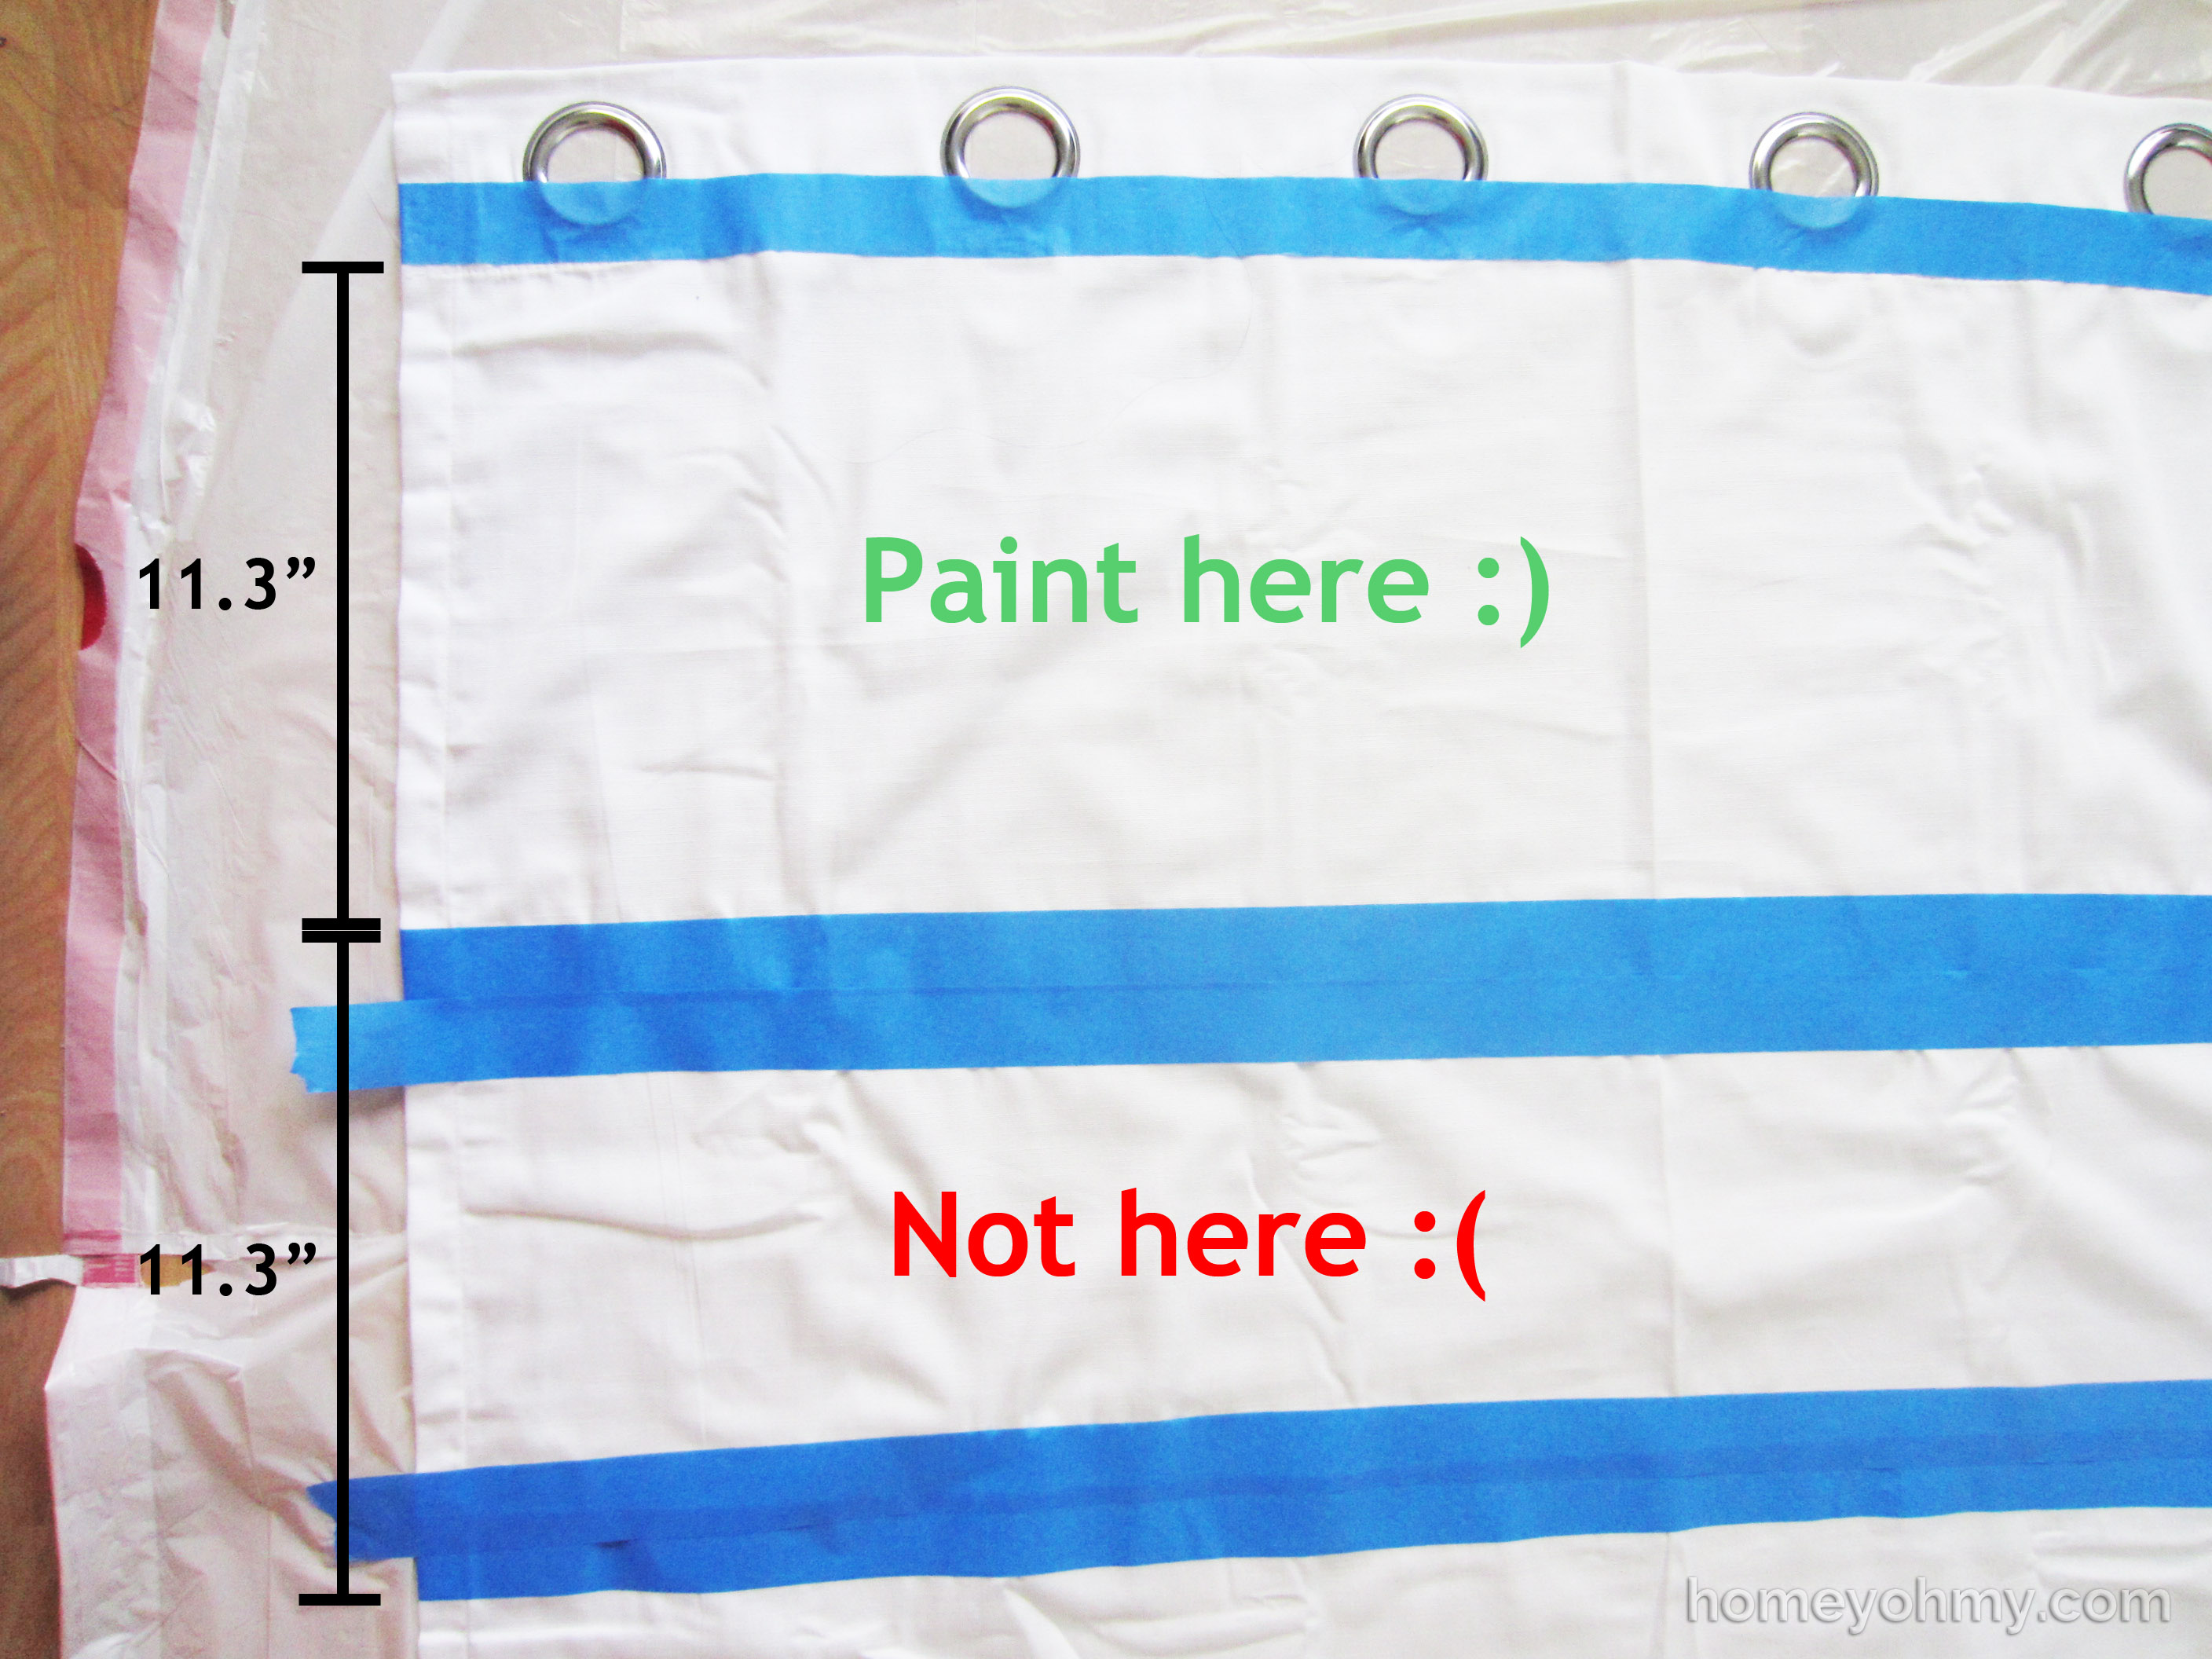
I doubled up on the tape in the “Not here :(” area as a reminder to myself that it should remain white.
After the curtains are all taped up, they should look something like this:
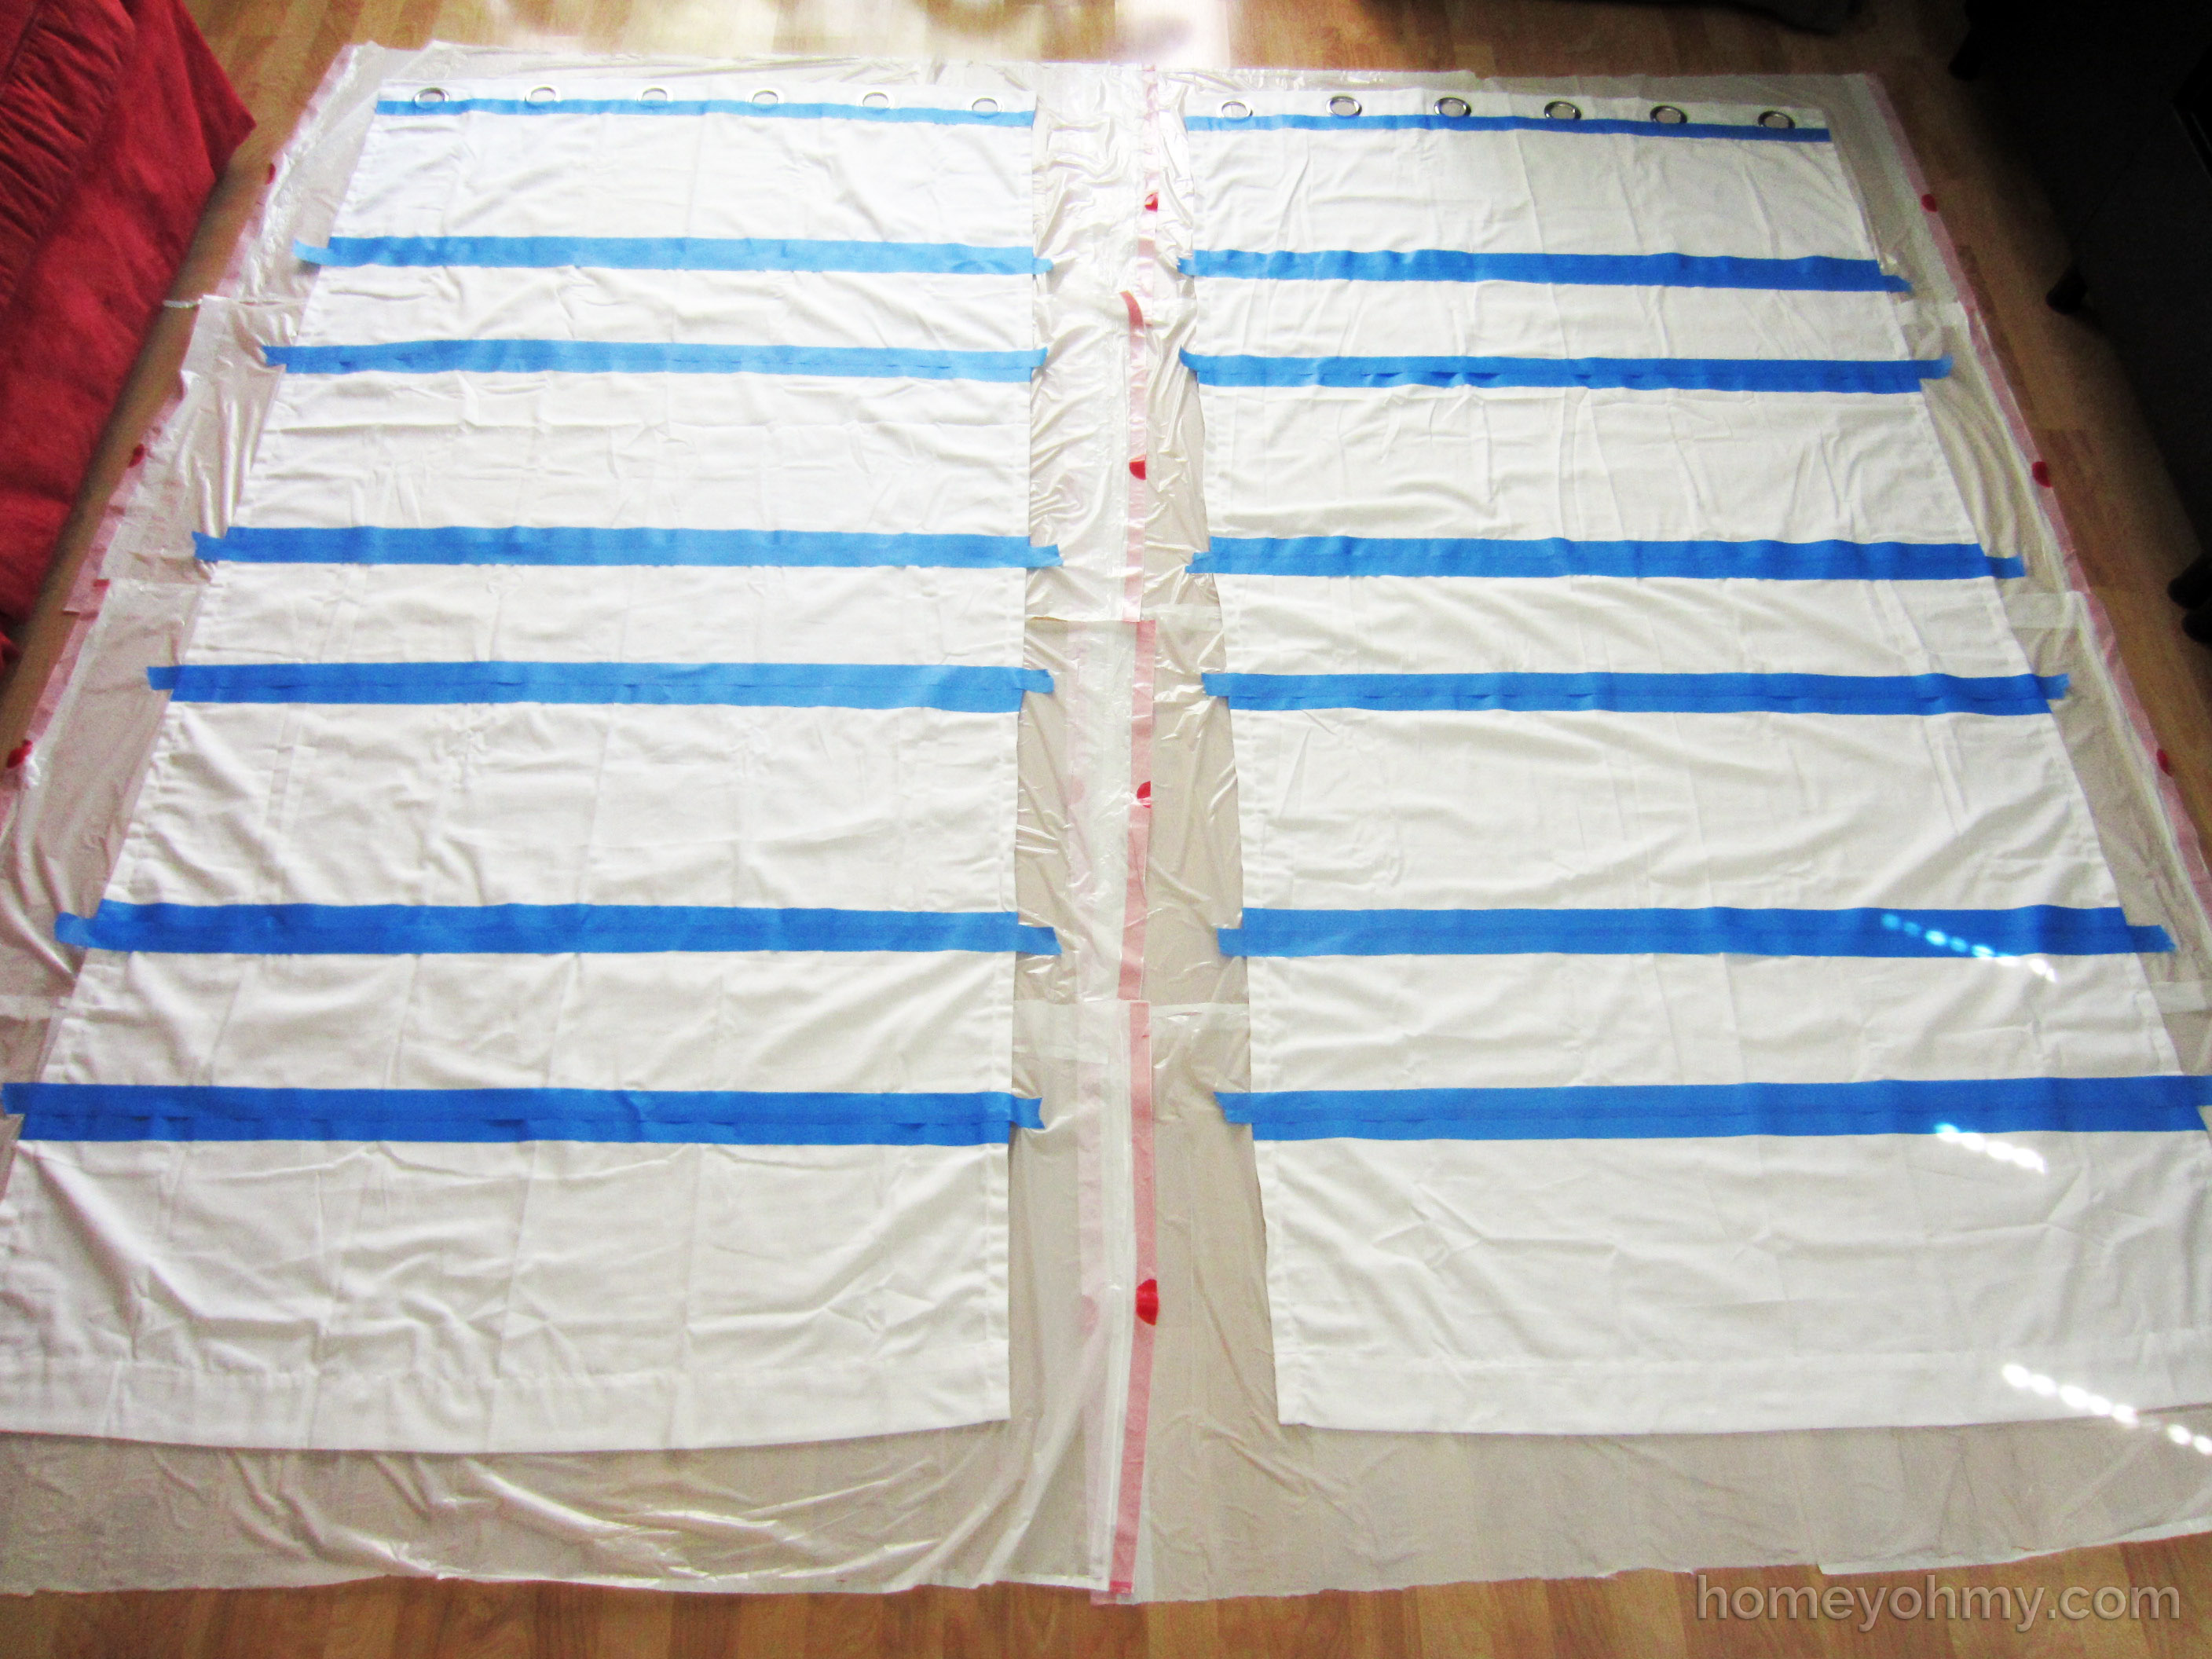
Try to stick the tape down as flat as possible with minimal bumps and ridges in the fabric. This is so that there is little to no paint that leaks past the edges of the tape. Smooth over the tape with your hands to reinforce the adhesion.
Before painting, make sure you have something covering your floor under the entire area of the curtains. The paint WILL leak through the back so make sure your floor is protected. I used garbage bags that I cut open, which ended up being the perfect width for each curtain.
Mix 2 parts paint with 1 part fabric medium in your paint tray and paint away!

Lay the paint on thick. I thought I had used too much paint on the first stripe so I slimmed down on the rest of them, but that first stripe actually turned out the best. I probably could have afforded another coat of paint on all the stripes. The thicker the coat, the more opaque the stripes will be and most likely the more even the coverage will be.
Remove the tape after painting all the stripes and let the curtains dry thoroughly, at least 24 hours. The instructions on the fabric medium say to to heat set the paint with a dry iron, which is useful if you want your curtains to be washable. I probably will never wash these curtains because I’m lazy, but I dry ironed them anyway to smooth out the wrinkles.
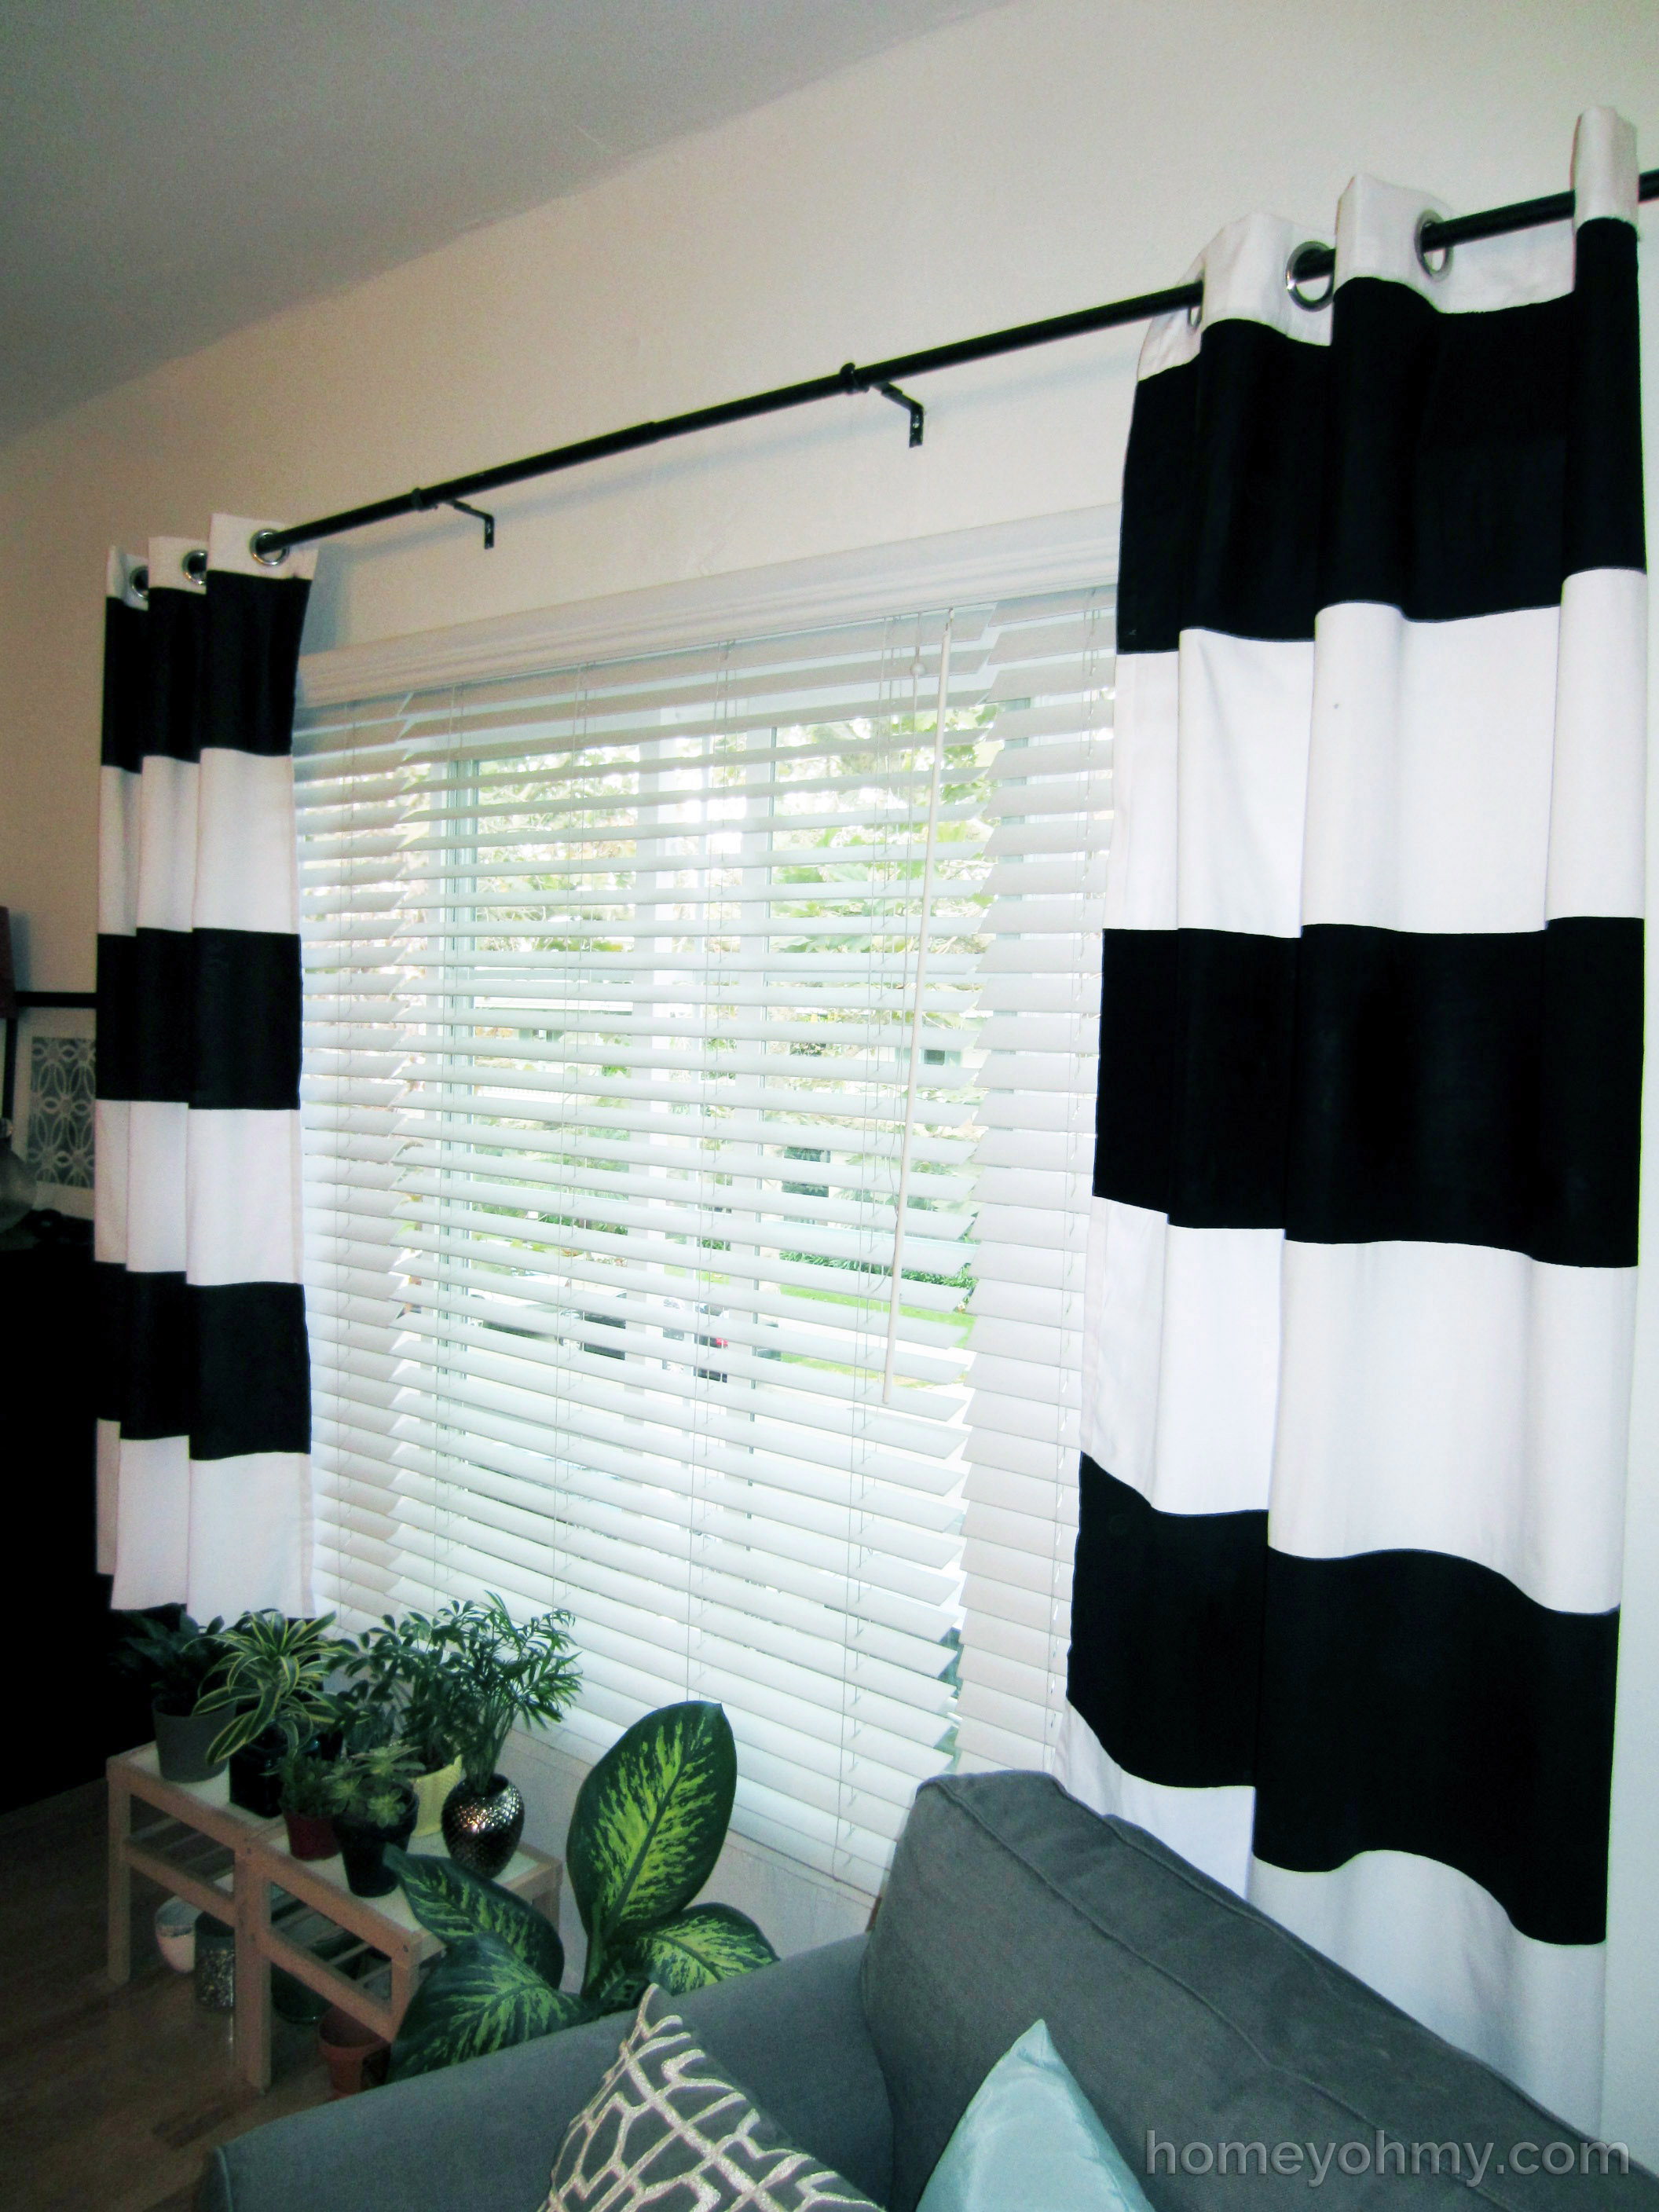
Lovely. They came out exactly as I had envisioned and were a nice and inexpensive upgrade from the previous curtains. Forget what they looked like? Here’s a refresher.
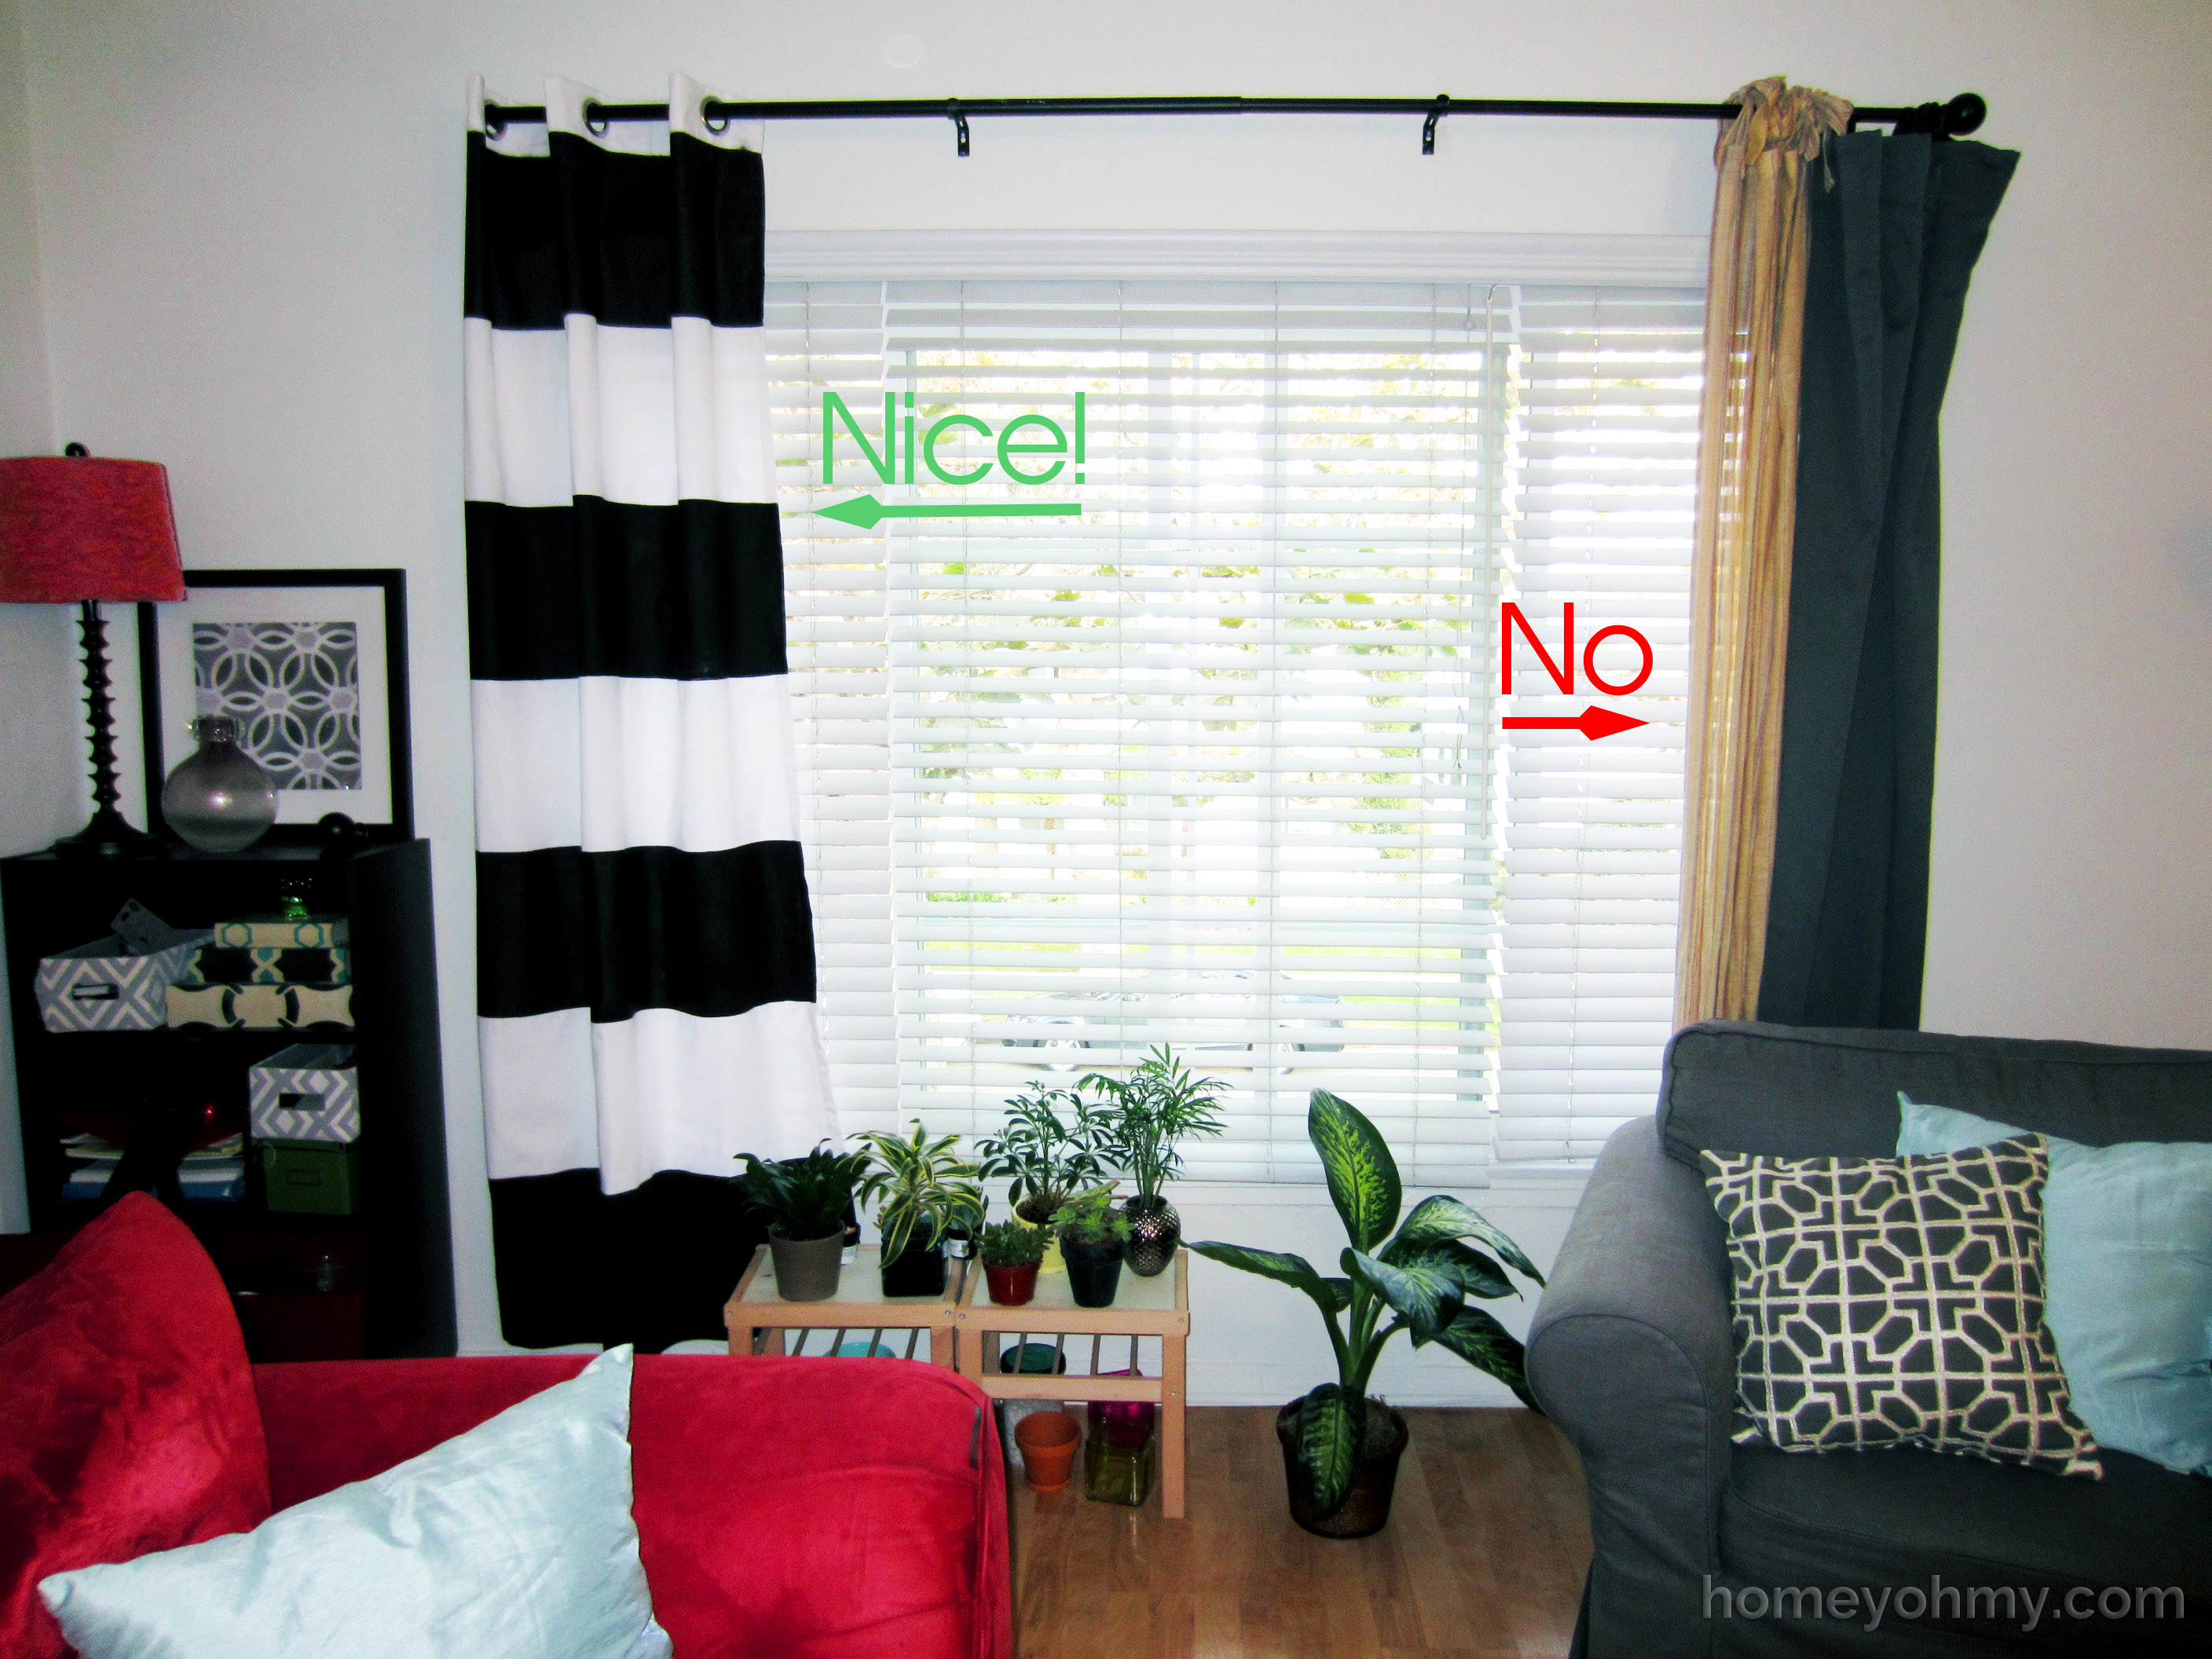
Especially when it comes to apartment decorating, it’s best not to do things that are TOO permanent, such as painting the walls (one of the many things I look forward to as a future homeowner). Adding decorative window curtains is a great, temporary alternative that can make just as much of an impact.
What do you think of my new curtains? Do you prefer them to the old ones? Leave me a comment with your thoughts!
Thanks so much for reading!


This post was featured on:


nice! and I’m glad I saw you at TELL ME TUESDAY:)
Kissesfromhome
http://kissesfromhome.com
Sweet! I had a little trouble leaving a comment on one of your posts but I’m hoping it went through… Because of you I’m about to go on an ice cream run to curb my cravings :P
I prefer the new ones. Black and white is a classic combo. How did u come up with the .3 in 11.3? I would just round down to 11″?:P Your place looks “simple and clean”
HAHA I was wondering if someone might ask about that. I wanted seven stripes and measuring from under the grommets to the bottom of the curtains, each stripe had to be exactly 11.3″. The perfectionist in me wouldn’t have it any other way :)
Great job! I did the same thing for our living room, only in grey. And they took FOREVER. Don’t forget to link up to The DIY’ers. http://homecomingmn.blogspot.com/2013/09/the-diyers-30.html
YES, it took much longer than I thought it would.
Just joined your party! Thank you!
Just wanted you to know, I loved these so much they’re being featured on The DIY’ers now!
Im a stripe fan from way back, these looks fantastic! Iv always been a bit cautious of how it would be to paint on fabric but these have come out really nice. I painted stripes on my hallway and absolutely love them :)
Oh man, I dream of painting my future hallway in stripes. Unfortunately living in an apartment doesn’t easily allow for that :\. Thank you for your compliments!
They looks so great! I am working on stripes to but decided to do it with fabric because ultimately I chickened out on the painting:) I have to say, so far all I am doing is measuring and measuring, lol. Can’t wait to be done and have them hanging like you! I even put a post about saying goodbye and am just as happy as you were to get rid of them –http://holdtheoffice.com/saying-goodbye-to-my-dirty-little-secret/.
Nicole @ HoldtheOffice.com
Okay – I did a very similar project a few months ago (except vertical, coral stripes) and haven’t blogged about it yet because it was such a beast and did not turn out so perfectly (love that pinterest quote by the way…). I think I had to go back to the store for paint twice because I seriously underestimated the amount of paint I would need. It was not my favorite project, but I like the way they look (from far away – ha!) Yours turned out great! I’m not seeing any imperfections.
Great job!