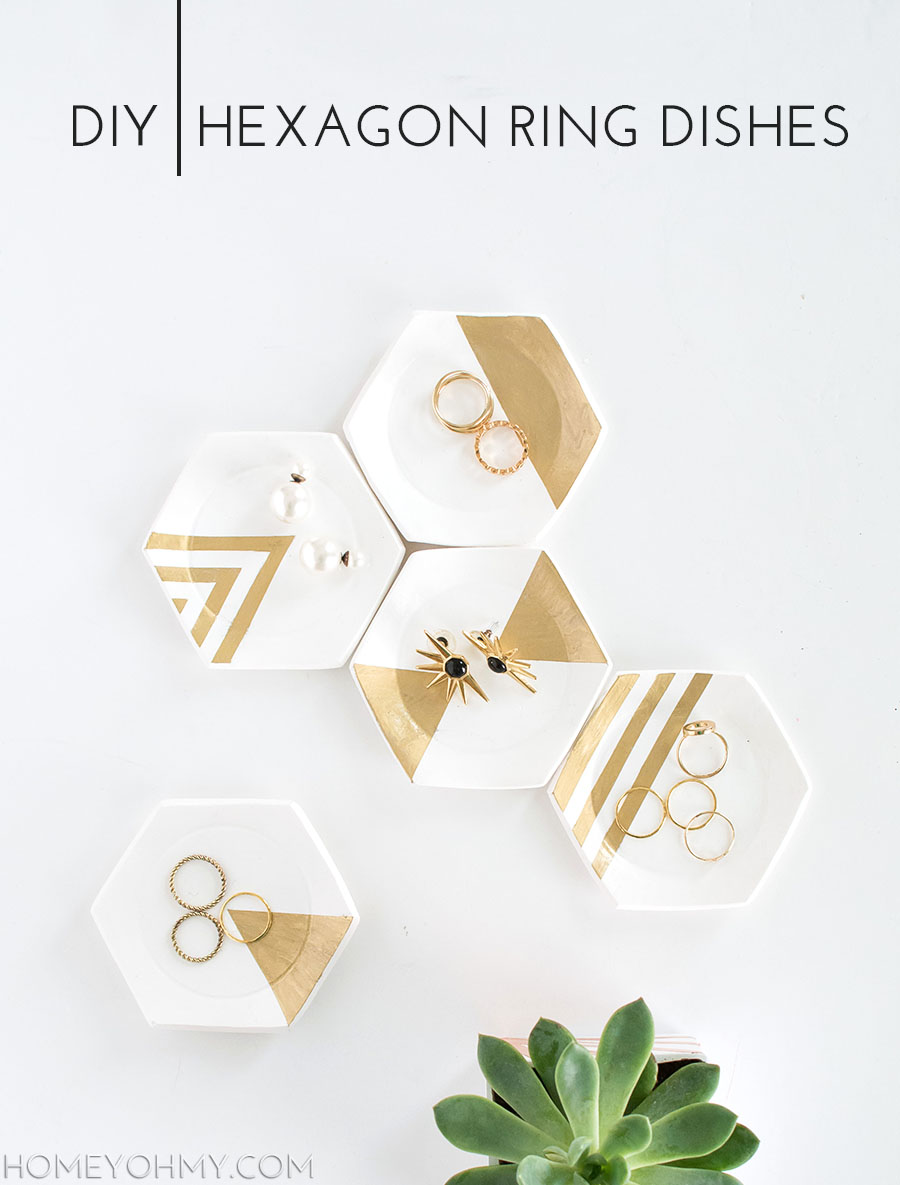
 It recently occurred to me that I don’t have a single ring dish in the apartment, and that crazy realization happened after I spent forever looking for a ring I couldn’t remember where I last placed. Will making a bunch of small clay dishes to sprinkle around the apartment 100% prevent me from putting my rings on random surfaces? Maybe, maybe not, but I gotta at least try. These dishes are cute anyway to keep around, and while they’re intended for rings, they can be catchalls for anything tiny that would be annoying to lose!
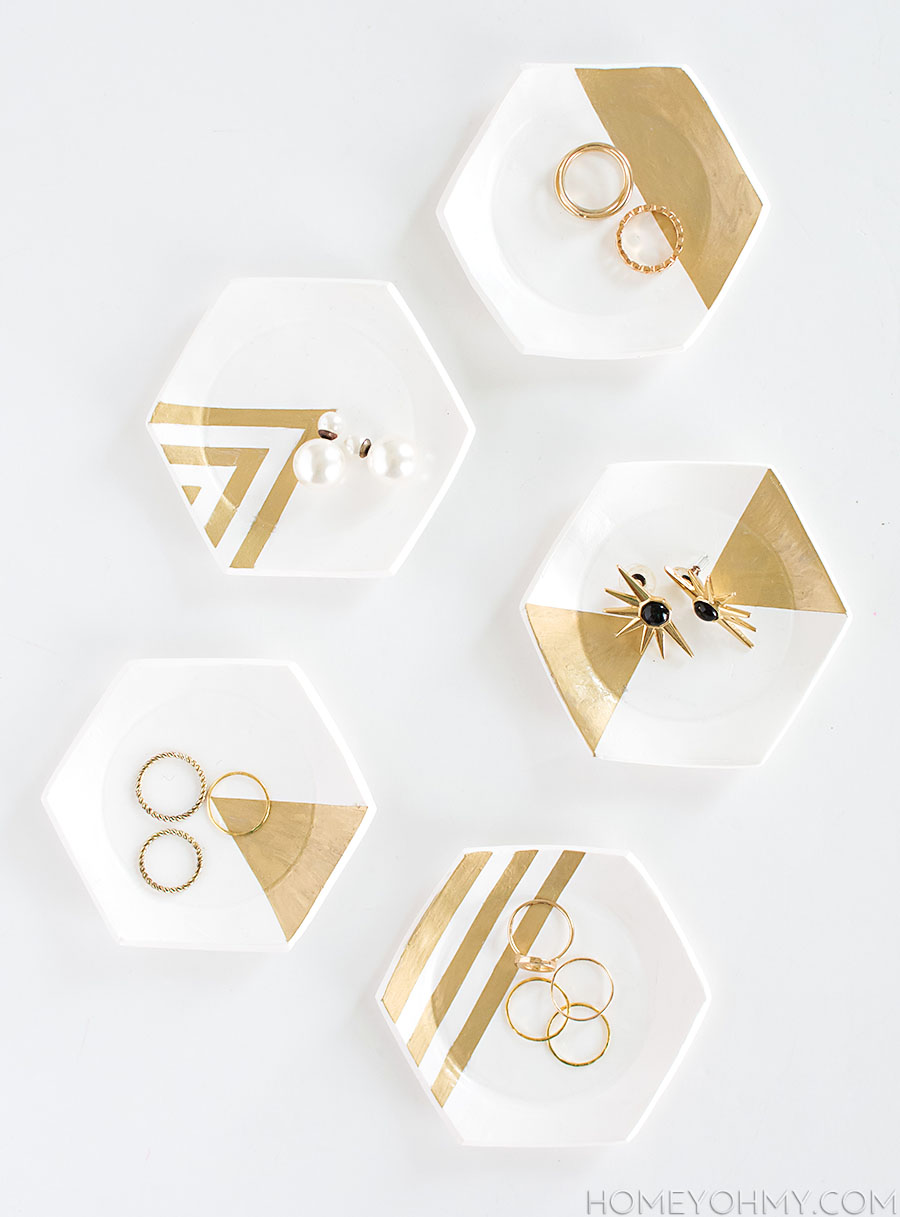
Also, five might be overkill for one household, but I actually ended up making 10 total, reason being because I messed up the first five, then made five more hoping at least three would turn out alright, then I liked how all five turned out, so this turned into a real ring dish party. Point is, I’ve shared a couple tips and “don’t do what I first did” stories in the how-to below!
Material
–white clay
–parchment paper
-rolling pin
-cutting mat
-hexagon box (about 3.5″ width, found at JoAnn for $1)
–X-ACTO knife
-oven safe bowl (the base of my bowl was 2.5″ in diameter)
–white spray paint
–1/4″ tape
–gold leaf pen
First thing, I recommend rolling the clay out on parchment paper on top of a cutting mat. The parchment paper will keep the clay from sticking to whatever surface you’re working on and will peel right off of the clay.
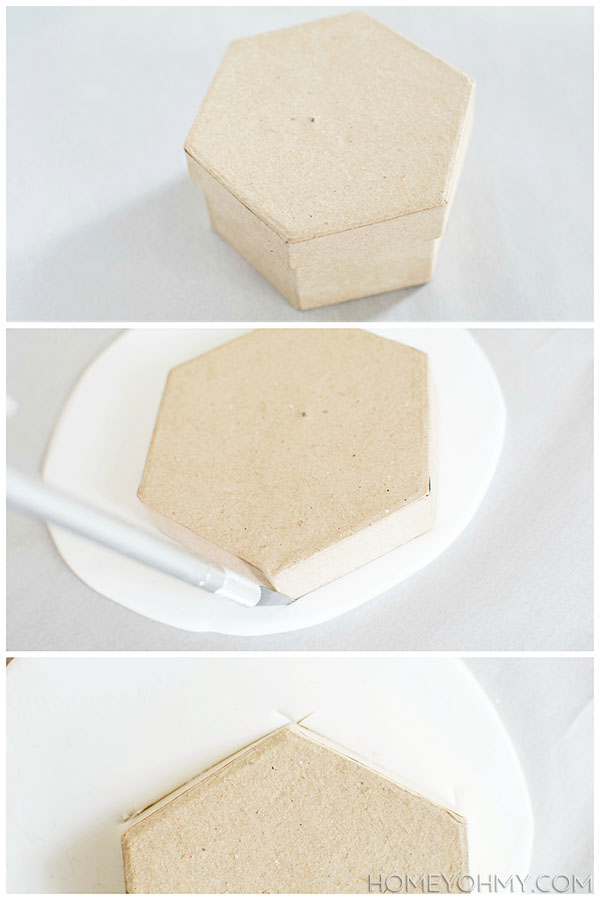 I traced the lid of a papier mache hexagon box (found at JoAnn fabrics) with an X-Acto knife into the clay, which I rolled out to about 4mm in thickness. At first I tried using one of those plastic clay cutting tools, and it didn’t work nearly as good as the X-Acto, so definitely, definitely, use an X-Acto.
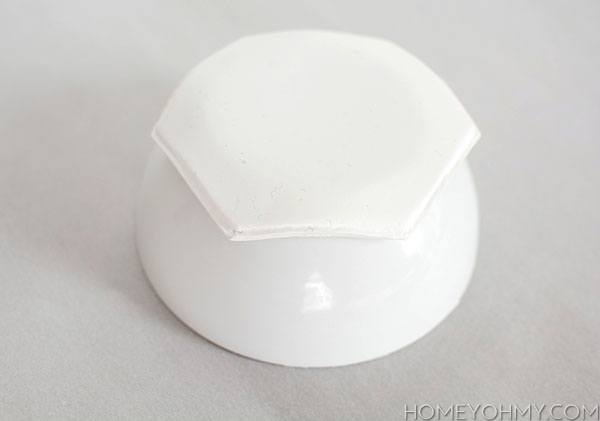 The clay lifts off with the lid, so after carefully peeling it off and removing the parchment paper, I draped the hexagon clay on top of the bottom of a bowl and baked in the oven according to the clay packaging instructions (230F for 30 minutes). I used the bottom of the bowl so that it would create a flat base for the ring dish.
After baking, I spray painted the dishes white, only because every dust bunny and fuzzball in the world somehow ended up in the clay and it looked dirty (anyone know if it’s possible to completely prevent this? I think I already know that the answer is no.)
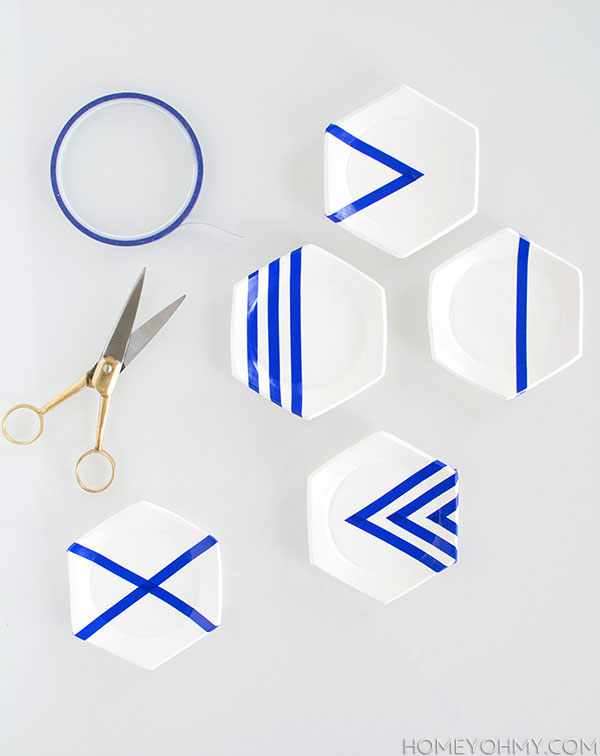 After letting the white paint fully dry, I taped a different design on to each dish using 1/4″ tape. Really, really, really, really make sure to go over the edges of the tape with a finger nail to make sure the seal is tight.
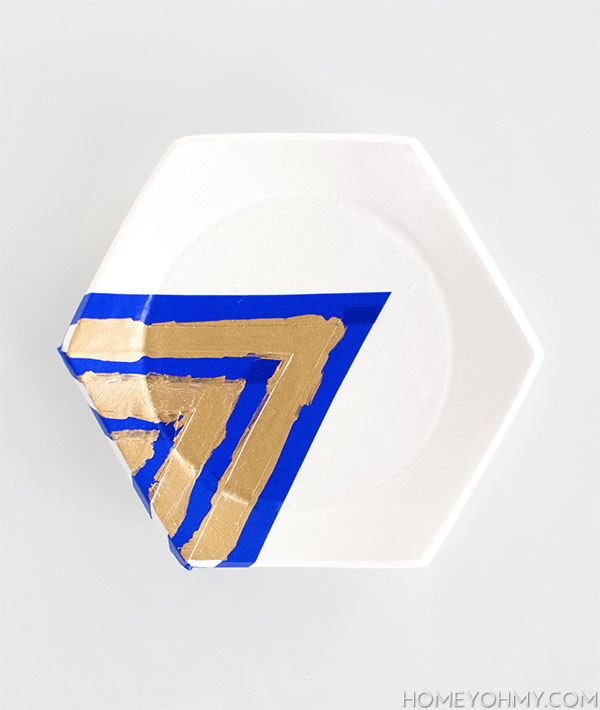 I colored in the designs with a gold leaf pen, which does leave a more textured appearance. If you want that airbrushed flawless finish, spray paint is definitely the way to go, but will require extra steps to cover the parts of the dish you want to keep white. It’s definitely possible that I was too lazy to do this and thus used a gold leaf pen instead.
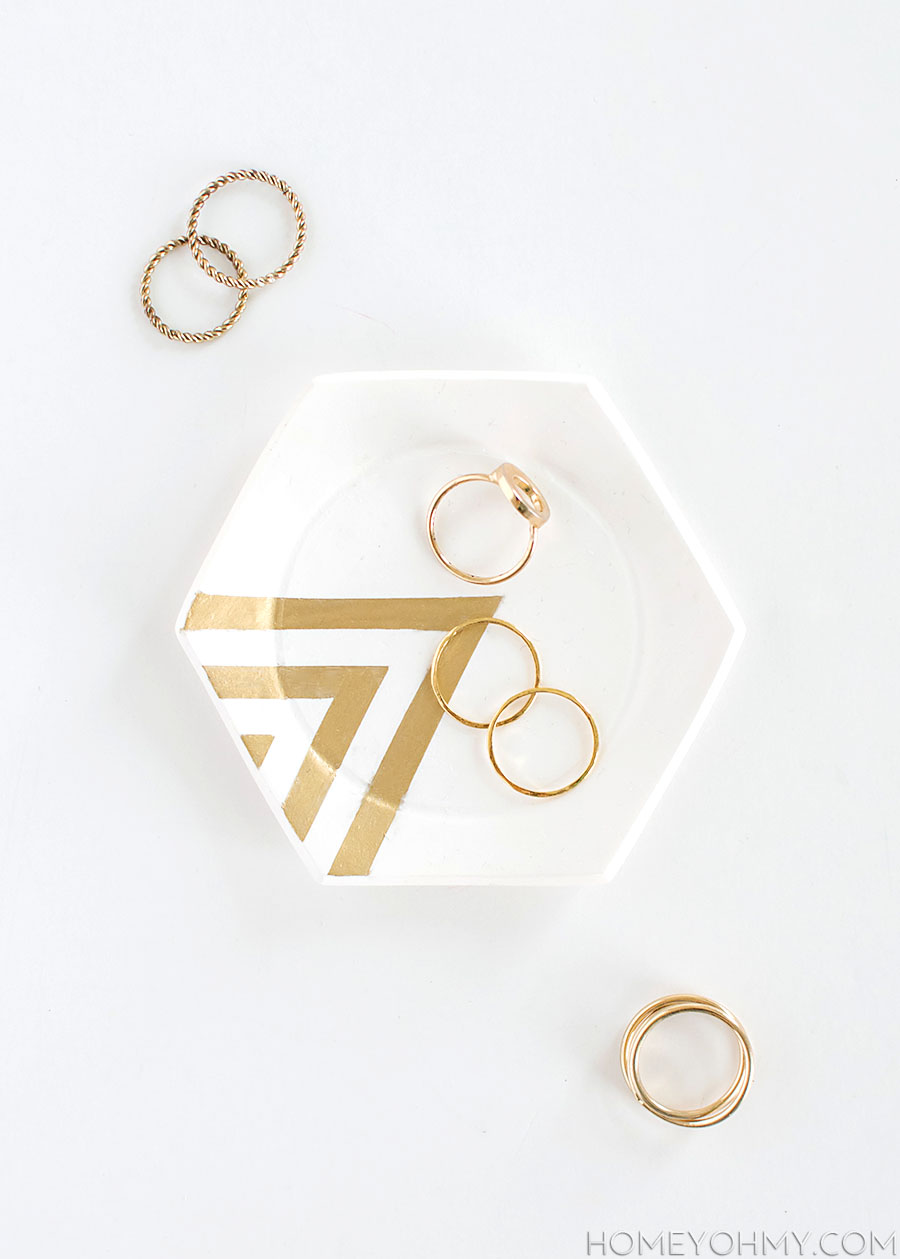
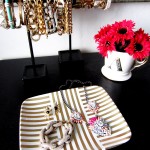
After peeling off the tape, I let the gold leaf fully dry before dumping stuff on to the dishes.
Also, anyone notice there hasn’t been a lot of gold around here on the blog lately? What happened there?? It’s like I’m going back to my roots with this one HA. I like it. I like it a lot.
We’re two for two on a jewelry themed DIY here, which wasn’t intentional, but accessorizing is a pretty huge part of my life so it’s not surprising that happened. Which reminds me, I completely forgot to share this video with you guys at the end of my multi-strand bracelet DIY. It was stuck in my head the entire time I was making those bracelets, and then again when I was making these dishes, even though these dishes aren’t jewelry… Any Portlandia fans??
Amy these are amazing! Love the patterns and the hexagon shape and especially the gold leaf <3
Aw YAY! Thanks, Steph!
I lost my wedding ring for a week, and then found it in a random basket in my daughter’s bathroom where I had taken it off to wash her hair. I think I could probably put ten of these cute dishes to work – one in each room! (Also I just ordered those black and gold earrings last night. Can’t wait to get them!)
Hahaha that’s a very hard to remember place to put a wedding ring. Forget what I said, you should probably go ahead and make ten. Good call on the earrings- they’re my FAVORITE EVER.
Love the simple patterns and I’m crazy for Portlandia! Loved “she’s making jewelry now.”
Haha NICE. Fred Armisen always makes me laugh!
I always love your DIY’s they just look so lovely and this one is stunning!
Thank you so much, Gilly!!
These are fantastic!!! I totally need one of these for my rings :)
Every girl needs at least one! Thanks, Melissa <3
This is great! I really do love this. Perfect for inspiration for a creative blog thing I’m doing with a few other Swedish bloggers, called Monthly Makers. Will definitely post about this with links back here!
So happy to hear that you’d like to share this project! Thank you, Beatrice. Keep me updated on when that goes up, I’d love to see!
Beautiful! Love the hexagon shape! I’ve been wanting to make something like this with liquid gold leaf, but I keep messing up (air bubbles, random fuzz!). Your post is encouraging — sounds like my third try will be better :)
Yes, air bubbles were an issue too! Glad my mistakes could help you see that sometimes things take a few tries :). Let me know how the third try goes!
Raises hand! Portlandia fan right here! I’ll hafta to remember you’re a fan cause I don’t have nearly enough IRL friends to make references to that show with.
These are flawless! I can’t believe you made these! Nice job : ]
YESSSSSS I don’t have a single friend that closely follows the show, so this is good that we now have established this <3
Thanks, Jennifer!!
I love these ring dishes! So cute and I adore the different patterns you used!
Thank you!! I love doing different patterns, it’s basically like doodling :)
Ok now I need a hexagon box! great project as usual amy!
love love love it
Thanks so much, Irene! I don’t know what else I’d do with the box though hm…
These are gorgeous and I love them all together! So pretty and functional too, plus gold and white always looks good! x
Yea! Gold and white is a crowd pleaser for sure. Thanks, Kate!
Wow, I would have never thought about using a box top for the mold. So great!
I read a tip one time that to really ensure the tape works when painting furniture to repaint the under color over the tape to make sure there is no bleed through – this might work for this as well.
Yup, that works! Not sure it would work with this tape because it’s plastic and thicker in height than painters tape, but definitely a good tip to keep in mind when painting any designs. Thanks for sharing, Mandy!
Love all the gold. Good you keep the gold from chipping after spraying it?
Thanks
Hi Nida! The gold hasn’t chipped at all yet, so far so good!
Love these! Planning on trying this on my own, but I was wondering if you suggested a certain kindof paint instead of the golf leaf pen? Like would Pebo paint be a good option, and if so which one of their paints? Thank you!!
Hi Amanda! I haven’t used Pebo paint so can’t recommend one. The only paint-like alternative that I can think of that’s close to the pen is liquid leaf. What was your concern about using the pen? Let me know so I can help you out as best as possible!
My only concern was that a pen would leave streaks. I thought using paint could help leave a smoother finish on the surface. Unless you have a trick for getting it to not look streak-y?
Gotcha. Yea the pen isn’t perfectly streak-free, but doing a couple layers with drying in between looks great, especially on smaller designs, but not so much on covering larger areas. Paint wouldn’t be entirely streak-free either unless you dabbed it on with a foam pouncer, but in my experience that still creates a textured finish and isn’t entirely smooth. The smoothest possible result would be with spray paint, which would just require an additional step in covering the rest of the tray that won’t be painted. Whatever you decide to do, let me know how it goes- I’m curious to see how it turns out!
Thank you so much for sharing this! I came across this on pinterest when I was trying to find some inspiration to paint a dish I thrifted to put necklaces in and I really fell in love with your designs! (link here if you’d like to see: http://laughlovelivedance.blogspot.com/2015/08/my-diy-painted-jewelry-dish.html )
Thanks again! The ring dishes look beautiful!
Just commented on your IG, but seriously can’t wait to try this! This looks like it would be great for making xmas gifts en masse too… ;)
What kind of bowl did you put in the oven? I am going to be making a few of these types of things but I was under the impression that only something like pyrex or anchor would be appropriate as they are oven safe.
Hi, Becky. I used a porcelain bowl that is oven safe. Usually this will be indicated on the bottom of the item or on the item page if it’s online.
Hi there! I really love the bowls! They’re so pretty and i was wondering if I could make these bowls on my own, at my own house and possibly sell them on Etsy or just to friends as a way to earn pocket money? I would use different designs on the bowls for the ones I make. But I just wanted to see if I could get your permission before selling them. And if I’m not allowed to sell them, that is totally understandable. Thank you for your time!
Hi June! You can totally make them in your own designs. Hexagon trays are a common thing in the handmade world and as long as they’re not exactly the same as these, you’re ok to sell them!