11/25 DIY Projects

DIY Typography Wall Art- Be Brave

With typography art, my criteria is that it should be simple and something that I will probably never get tired of looking at.  Although the latter can’t always be accurately predicted, I try to stay true to messages or themes that are close to my heart.  I’ll explain more on that at the end of this post, but for now let me show you what I came up with.

DIY Typography Wall Art- Be Brave

Straight to the point, just how I like it :).

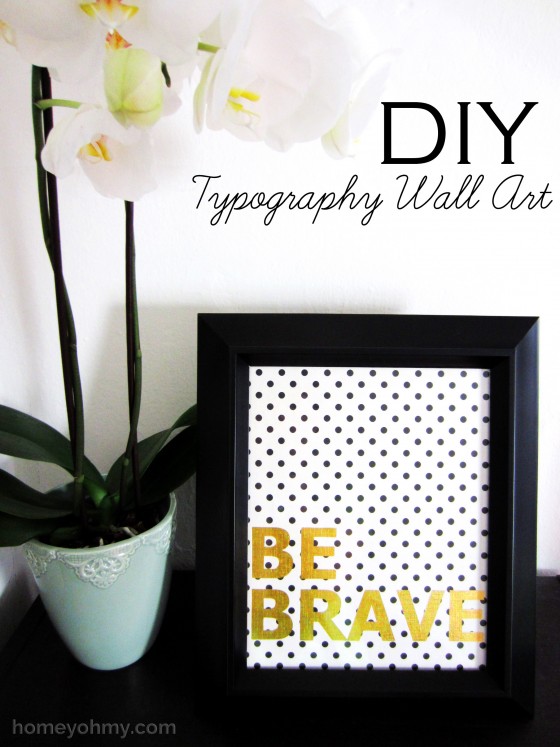
I started out by typing the words “Be Brave” in a Word document and played around with fonts and sizes.  I went with a bottom-left alignment and adjusted the margins accordingly.  To make this project easier, I chose an 8×10 frame so that it would closely match the size of a regular sheet of paper.

After printing out the Word document, I used painters tape to attach it to a sheet of polka dotted paper.

Be Brave taped

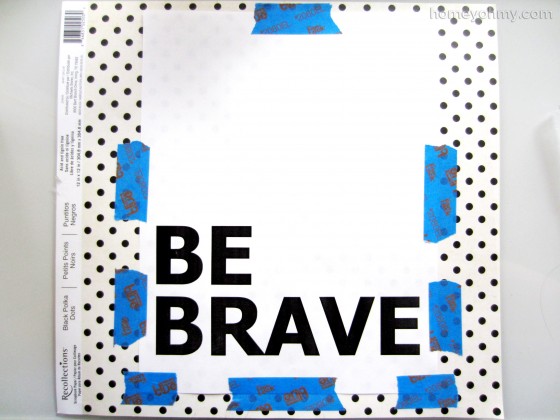
I added extra tape around the words for more stability since that’s where I would be cutting.  Using an X-acto knife, I first cut out any holes in the letters (in this case, the holes in the B’s, R, and A) and saved those for later.  These are floating pieces that will need to be added back in at the end.

*A little tip for cutting with an X-acto knife-  Especially if your blade is fresh, you don’t need to apply much pressure to cut through both sheets of paper.  I have a tendency to press too hard with my knife and it can end up warping the blade, making it more difficult to cut in straight lines.  Practice first on a scrap piece of paper to become familiar with how much pressure you need to apply and try to keep it consistent. 

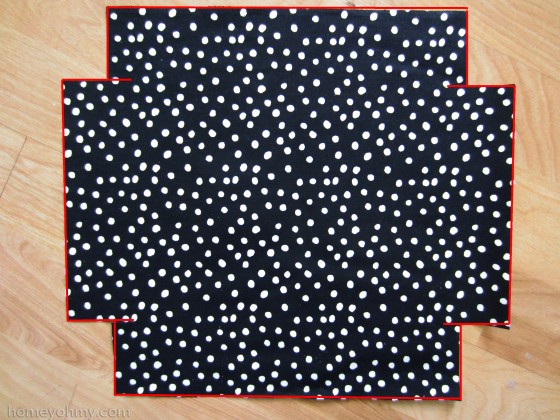
After cutting out all the letters, I used scissors to cut the polka dotted paper along the edges of the paper taped on top.  Removing the paper on top, I was left with this cut-out.

Be Brave cut out

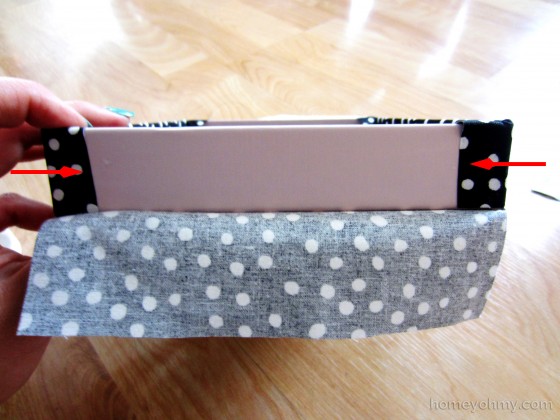
Since a sheet of paper is 8.5×11″ and my frame is 8×10″, I had to cut a little more off of the edges so that it would fit in the frame.  After adjusting the cut-out to the proper size, I traced the edges onto some gold paper, cut out the gold paper, and then glued the polka dot cut-out on top of it with a glue stick.  The glue stick only needed to be applied on the edges and not on the entire back side of the polka dot cut-out.

With the glue stick again, I glued on the floating pieces I saved from earlier back into the B, R, and A letters (on top of the gold paper that is now peaking through the letters).  While the glue is still wet, it makes it easy to slide the pieces around after you stick them on, so you can take the time to accurately adjust their placements.  I used my finger nail to make the tiny adjustments.  Once that’s dry, all that’s left is to put the art in the frame.

Be Brave Wall Art

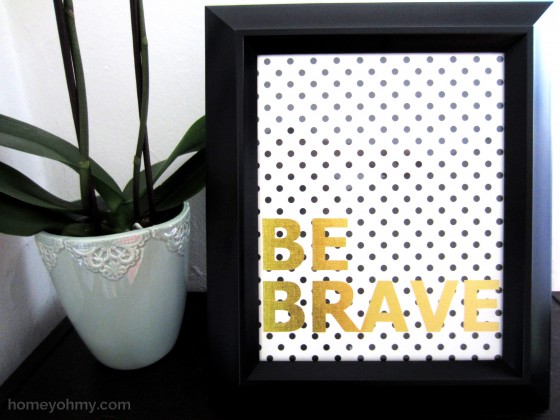
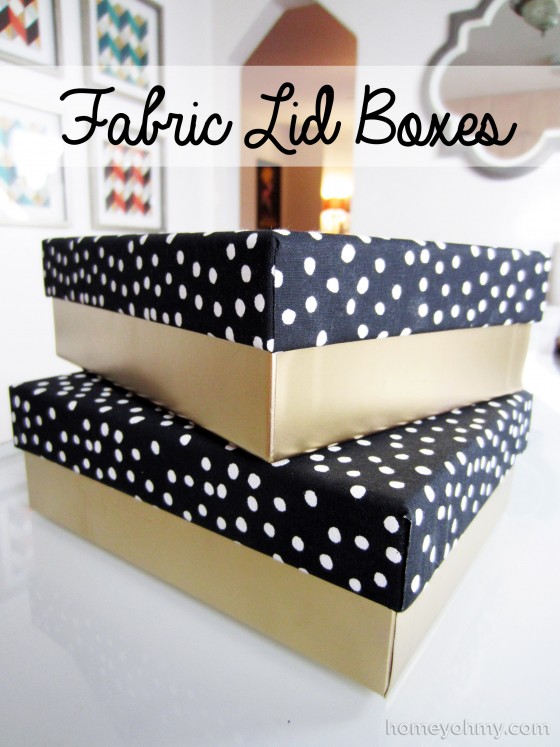
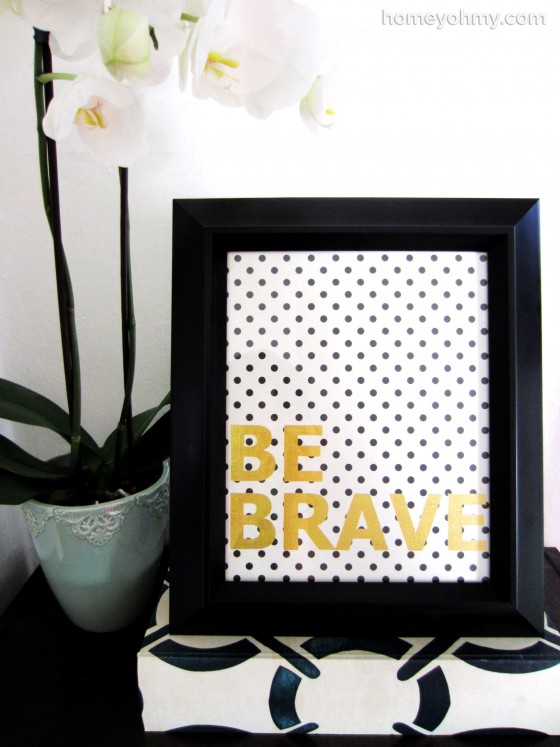
Black, white, gold, AND polka dots??  Instant love for me right there.  The gold paper has a linen texture ,which you can kind of see in the letters that are shadowed a bit.  It’s not showing as well in the photos as I would have liked, but trust me- it’s pretty!  I’m so pleased with it.

DIY Be Brave Wall Art

So why the “Be Brave” choice of words?

I’ve talked a lot with a good friend of mine about what it takes to share your creativity.  We agreed that expressing your ideas and vision is like baring your soul.  Your creativity is one of the most precious and personal things you own, and to expose it to the subjective views of strangers can be just plain scary.  Still now, I’ll sometimes feel a bit of that fear before I click the “Publish” button on a new blog post.

I spent a long time being afraid of starting this blog.  I want to say years.  While there’s a long list of reasons why, the heart of it all was that I simply didn’t think I could do it.  As I read over that now, as the creator of this blog that has become one the most amazing endeavors of my life that I cannot live without, I’m wishing I could travel back in time to tell the old me that there was nothing to be afraid of.

Looking at this artwork, I’m reminded of how I got here and what I need to do to keep going.  As short as the words are, they swell me up with confidence and inspiration.  I smile not only because I’ve accomplished these words, but also because of the powerful things some paper and an X-acto knife can make me feel ;).

To my friends, fellow bloggers, loyal readers, and new visitors, all of you who I cherish so deeply, thank you for helping me see that I have something of value to share.  In the spirit of this upcoming Thanksgiving holiday, I want you to know how grateful I am for your support and positive vibes.  You all have made me more brave.


Like what you see? Stay connected with me:

FacebookGoogle +InstagramPinterestRSSTwitter

11/21 Seasonal/Holiday

Thanksgiving Table

Thanksgiving Table

This year will be my first time hosting a Thanksgiving dinner and it’s only right that I decorate for it!  I’m still going home to my mom’s on Thanksgiving day (mom’s food is the best food), but my friends and I organized a potluck dinner this weekend to celebrate thanks together.  Hence the “Friends-giving” sign you see on my table :).

I set up my dining table to be buffet-style with the decorations pushed to the back so that friends can place the dishes they bring at the front.

Table runner

I laid down some burlap with this polka dot kraft wrapping paper on top to serve as a runner.  I got the wrapping paper at Marshalls without knowing if I’d have a use for it and am so glad I did!  Can’t say no to polka dots.

Chalkboard

This chalkboard used to be a picture frame.  I got it at Marshalls (are you noticing a trend here?) to put some artwork in it, but the second I brought it home I dropped it on the floor and shattered the glass :(.  I kept the frame and it bothered me terribly, so I turned it into a chalkboard.  All I did was cut out a piece of poster board, apply a few layers of chalkboard paint, and place it in the frame that I spray painted gold.  And not going to lie… but that arrangement of marigolds is mostly there to help keep the chalkboard standing straight.  Resourceful, indeed!

Pumpkin stands

I made these display stands with dollar store candle holders!  You can find the tutorial at The Thinking Closet.  I love how Lauren used Looking Glass spray paint, which is what I was initially going to use as well, but I went with white spray paint instead since I think it fits better with the decor.

If you were wondering about that mini white pumpkin, it is the lone survivor from my gold dipped pumpkin vase centerpiece.  Still going strong!

Medallions

The paper medallions ended up being my favorite part.  I made them with card stock, which is a sturdier alternative to tissue paper.  That wall between the two windows in my kitchen has remained bare since the day I moved in and I haven’t been able to figure out what to put there.  For now, I like the idea of changing it out regularly with decorations (foreshadowing??????).

As for the centerpiece and candle holders on the table, I’ve already written posts about those so check them out if you’d like!

I hope you’re all inspired to add your own special touches to Thanksgiving this year!  Stay thankful, my friends (said in the voice of the most interesting man in the world.  I really hope y’all know what I’m talking about haha!)

Like what you see? Stay connected with me:

FacebookGoogle +InstagramPinterestRSSTwitter

11/18 DIY Projects

DIY Gold Vinyl Coasters

DIY Gold Vinyl Coasters

Before getting these coasters, I had a set of six that would occasionally get outnumbered by the amount of people that came over.  With the holidays coming up, this dilemma is likely to occur more often, so I decided to prepare ahead of time and make sure that extra guests will have a cute and stylish coaster to place their drinks on top of.  Priorities, people!  ;)

Coasters and gold adhesive vinyl

I used adhesive gold vinyl, which you can get here (affiliate link), and cork coasters that I got from here (affiliate link).  The coasters are a bit on the thin side, but it doesn’t bother me.  For the price I think they’re great, and you can easily double up on the coasters by gluing them together if you want them to be thicker.  As for the vinyl, if  I didn’t already have it I would have just used some gold paper from the craft store and applied it with Mod Podge.  You can do the exact same steps I’m about to show you but with paper and Mod Podge instead if you’d like!

Using a pencil, I traced out one of the coasters on the backside of the adhesive vinyl and drew out my design.

Coaster design

Then I cut out the pieces with scissors and applied them to the coaster.

Gold vinyl coaster

How easy is that??  The hardest part is coming up with the designs, but that’s also the funnest part.  For the final step, I applied a layer of Mod Podge on top to seal in and protect the vinyl.

DIY Gold Vinyl Coasters 6

I used lever punches for the polka dots and the large scalloped circle, but everything else I drew by hand, which wasn’t difficult at all since I kept the designs simple.

May I also mention that these would make a fantastic gift??

Coasters gift wrapped

I tied the stack of coasters together with green ribbon and added a gift tag that I cut out from a scrap piece of cardboard.  At the end of the tag I applied a piece of black and white striped Washi tape.  Sometimes I wish I could keep things tied in bows all the time, as impractical as that is, but bows are just so cute.

Which coaster design is your favorite?  I’m curious to know!

Like what you see? Stay connected with me:

FacebookGoogle +InstagramPinterestRSSTwitter

11/15 DIY Projects

A Handmade Holiday Link Party


It’s time to link up all of YOUR handmade holiday goodness! Yummy recipes, handmade gift ideas, gorgeous wrapping, ornaments, advents, decor and more – we want to see it all!

Your links will be shared across four blogs, and we will be pinning and sharing our favorite projects on our blogs and social media sites right up until Christmas. Follow our Handmade Holiday group boards for loads of festive inspiration.

We’d love if you used the links below to follow along with us so you don’t miss any highlights or features!


Amy at Delineate Your Dwelling
Corey at Tiny Sidekick
Amy at Homey Oh My!
Alexis at Persia Lou

 
And if you wanted to grab a button for your sidebar, it would be like an early Christmas gift! :)


Remember! This link party is staying open until December 22nd, so make sure to keep coming back to link up all your holiday projects! Now let’s get linking!


11/12 DIY Projects

DIY Fabric Lid Boxes

Fabric Lid Boxes

Something I love just as much as repurposing is upcycling- taking something old or disposable and making it new and beautiful.  Now these cardboard boxes I had are pretty nice, and far from being considered trash, but the one problem I had with them is the color.  There are very few instances where I prefer the color pink, and this isn’t one of them.

Boxes before

I love the simple design of the boxes and the quality is higher than most, but they just weren’t me.  So how do I make something more me?  I paint it gold, baby.

I spray painted the boxes with my favorite gold spray paint leaving the lids aside for later.

 Gold painted boxes

 Next I placed a box lid on top of my fabric and marked in pencil a larger rectangle around it.  I drew the lines at a distance of about ¾” longer than the height of the sides of the lids.  These are the fabric flaps that are going to wrap over the sides of the lid.

Fabric markings

 The above photo isn’t the most perfect angle to show this, but the red lines show where I made my pencil markings.  It’s better to refer to the left side of the photo since the lid is covering the right side of the fabric more.  An important thing to note is that I measured about a half inch of excess fabric on the longer sides of the fabric so that they can wrap around the corners (I’ll show you that in a bit).  The reason I did this is to ensure that the corners are completely covered without any exposure to the pink underneath it.

Below is my fabric piece with red markings again to show where I cut.  You’ll notice that the horizontal red lines on the left and right sides go in further to create little slits at the corners.

Fabric piece

I applied Mod Podge on the inner edges of the long sides of the lids and tightly wrapped the fabric flaps over.  I did the same thing on the short sides of the lids but did one extra step first.  Remember the excess fabric I measured out with the slit in the corners?  I applied Mod Podge under them and folded them over the lid corners as shown by the red arrows below.

Side flaps

After those were secure, I tightly wrapped and Mod Podged the remaining fabric flap over.  I repeated it on the other side and then repeated all steps with the second lid.  After letting the Mod Podge dry, I reunited the lids with their boxes.

Fabric lid boxes 2

Fabulous.  I’m in love with the fabric I picked too.  I think what made this project easier is that my fabric didn’t have any straight lines or patterns.  The random, confetti-like placements of the white dots allowed me the luxury of not having to care about how I laid out the fabric.

And lastly… How could I not mention the potential of this being a great gift idea?

Fabric lid boxes tied with ribbon

Empty boxes never looked so good to me!  Wrap around some ribbon and tie it into a bow and you’ve got yourself an insta-gift with whatever you want (or don’t want) to put inside of the boxes.  I’m SO giddy about the way the green ribbon looks with these boxes.

Did you know green is my favorite color?  You might be thinking, “Wait, I thought it was gold,” which I’m very grateful that you’ve been paying attention, but to me gold is in a category of its own.  It’s a lifestyle.  So if for some reason we are caught in a life or death situation that requires you to know what my favorite color is, it’s green :).

Thanks for stopping by!

Like what you see? Stay connected with me:

FacebookInstagramPinterestRSSTwitter