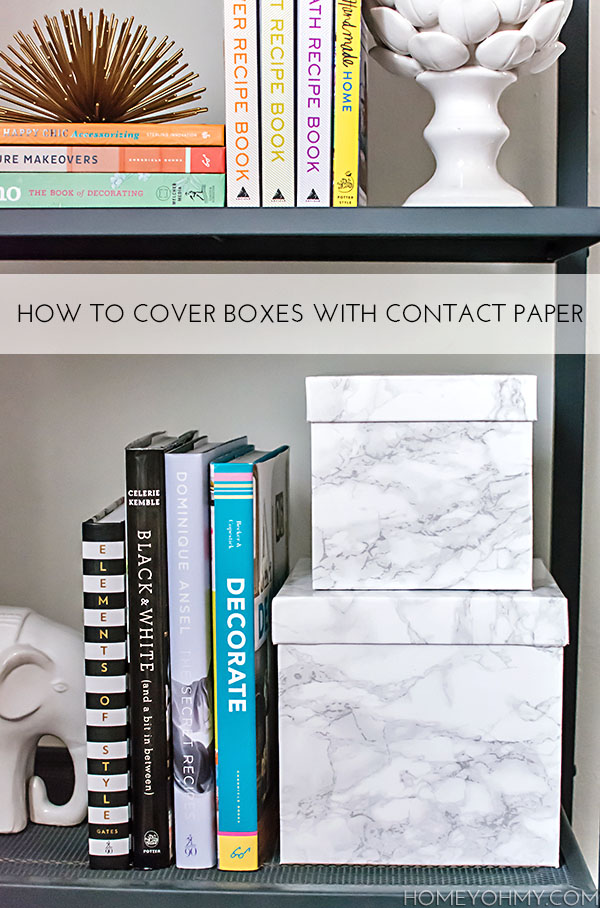
 I believe in two things: 1) beautiful storage is exciting and 2) a good, sturdy box should never be tossed. I was reminded of this after receiving a couple gifts this past Christmas that came in some nice boxes, and I was almost more excited about how I was going to re-use the boxes for storage. Call it weird, because it kind of is, but it’s also fun (and useful!), and maybe you kept some boxes from this past holiday season too and need a simple idea on how to make them prettier. Try this one out!
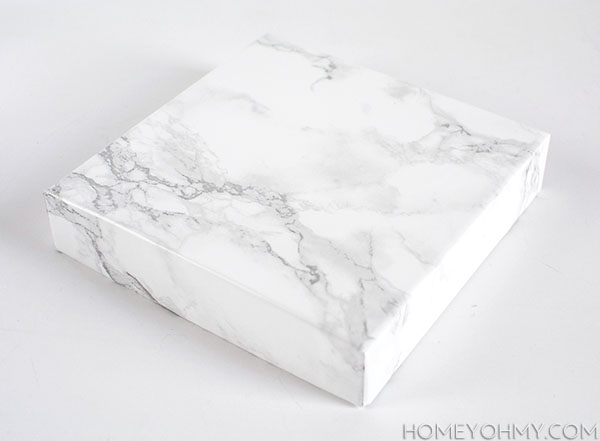
 I already liked that the boxes were all white, but I had this marble contact paper hanging around for a while and it was shouting at me to use it already, so I did.
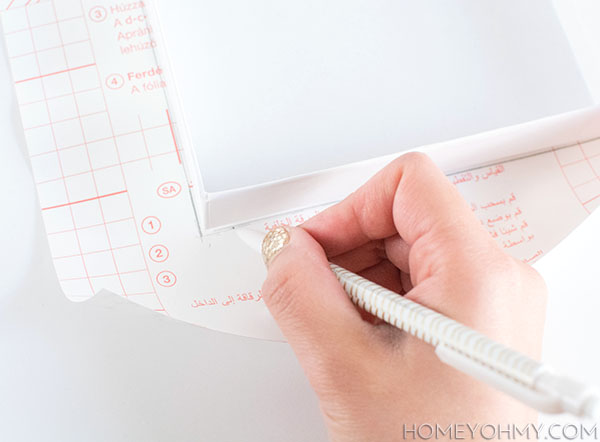 Trace the lid of the box on the contact paper, then measure around the box about twice the height of the side of the lid.
 So for example, the height of my box lid is 3cm, so I measured and cut the contact paper about 6cm further out from the lid on each side, as shown in the photo above. Since the lid is shallow, twice the height was appropriate, but for something deeper, like the bottom of my box, I measured out the height of the box + 6cm. Twice the height of the box would’ve been unnecessarily long, so keep that in mind for your box.
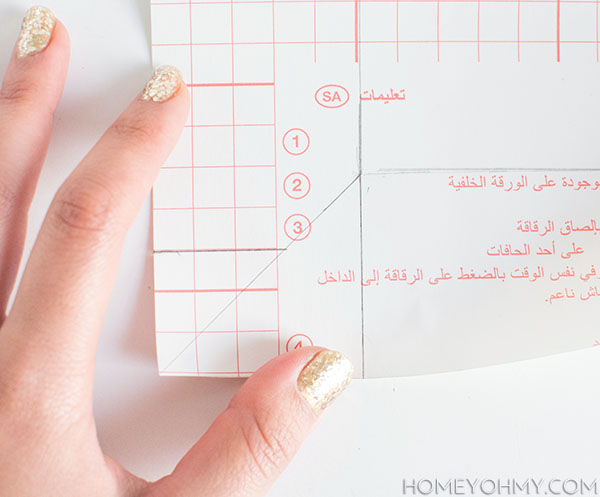 Use a pencil to draw three lines at each corner of the contact paper as shown above- a diagonal line, a horizontal line, and a vertical line. This creates a tab to wrap around the corner of the lid, which I’ll show you in a little bit.
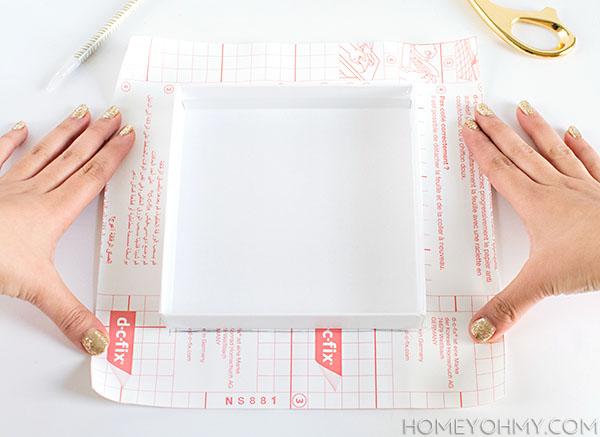
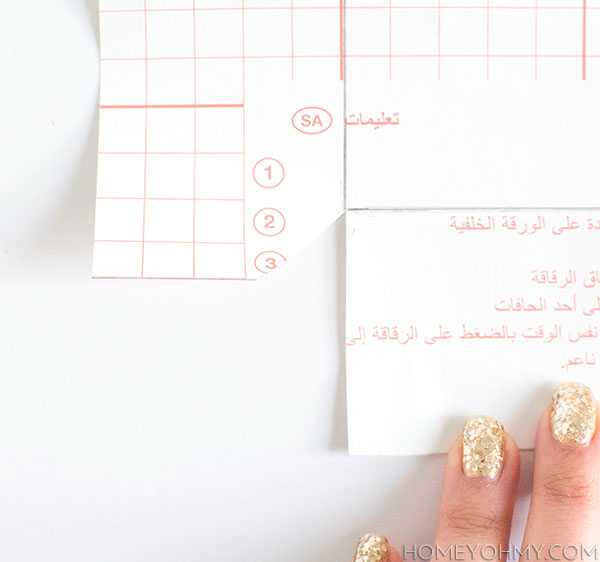 Once cut along the lines, each corner should look like this.
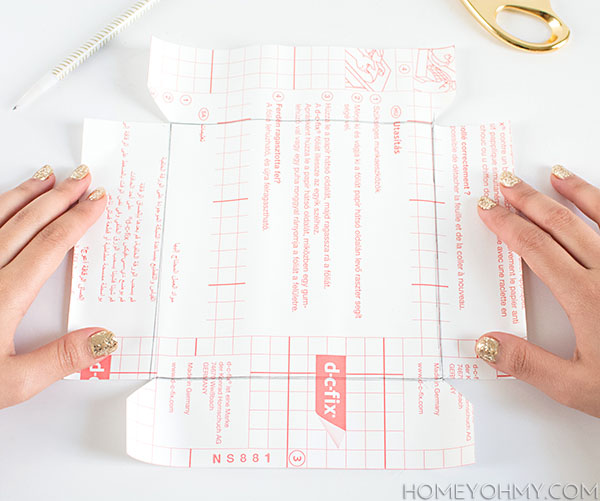 Make sure that the opposite ends of the contact paper are mirror images of each other, meaning that the tabs are on opposite ends of the paper, as shown above.
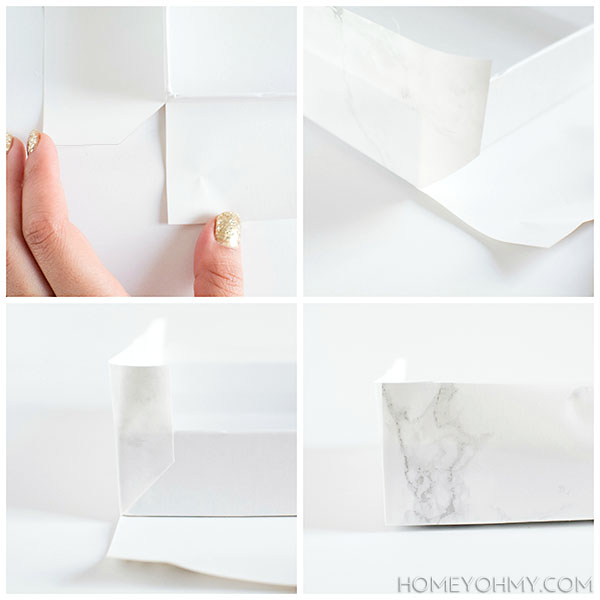 The fun part. Peel the backing off the paper and lay it face down. Press the top of the lid onto the center of the adhesive, making sure the corners of the lid line up with the inner corners of the paper. Fold the sides of adhesive with the tabs straight up and smooth it over to stick firmly onto the side of the lid, then fold the tabs over each corner. Next, fold the other sides up, which will effectively cover the tabs and give you nice, clean corners.
 To fold the the adhesive over the edges (that extra 6cm I measured out), cut a slit down each corner, then fold each side over.
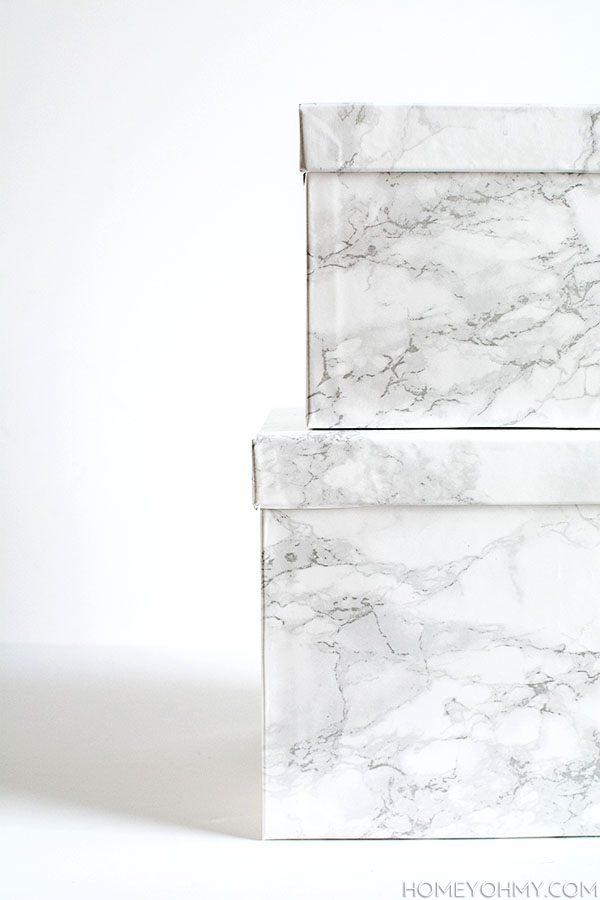
 Lid complete. Repeat with the bottom of the box and the transformation is done.
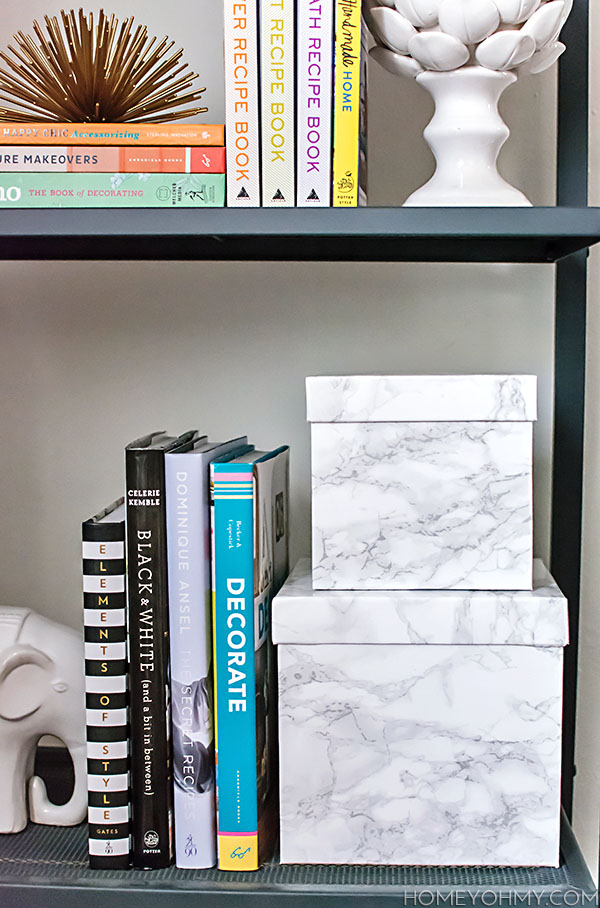
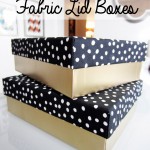
This could absolutely be done with fabric and Mod Podge as well, which I did a long time ago with the lids on these boxes. The design options are a lot more diverse with fabric, but contact paper is definitely less messy. Have you crafted with this stuff before? Are you as obsessed with boxes as I am?

Great job of explaining! Very clear and concise. I am definitely going to do this now that I have great instructions. Good work!
Oh wow, what a relief to hear that! I’m always concerned about whether my directions are clear, so thanks for the excellent feedback, Linda! Have fun trying this one out!!
Such a cute way to dress up plain boxes! That marble paper is gorgeous!
Thanks, Rachel! I sense a marble paper binge coming soon…
Love how simple this is and what an impact it makes! Thank you for inspiring me all the time!
Thank you, Ruthie! You’re so sweet!!
Ohhh! I love these! What a great idea to add a little something extra to these boxes! Doesn’t look too tough either!
Thanks, Bri! It definitely isn’t too tough, and especially if the box really needs a cover up, it’s more than worth it!
This tutorial is awesome! I’m now inspired to dress up some of the shoeboxes I have lying around my closet to use for storage.
Felicia | Beloved Style
Yup, this is totally the thing to do with shoeboxes!! Happy to hear you’ll be trying it out. Thanks, Felicia!
Good morning Amy.
I agree with you, a good sturdy box should never be tossed, we can always come up with an idea to reuse it, and using contact paper do cover is a great idea.
Thanks, Regina! Always happy to meet a fellow box lover ;)
Love this! Also loving your nails too!
Thanks, Sarah!! The nails were left over from NYE haha!
what a great idea! I just got a couple of great boxes and I just couldn’t toss them. Now I know what to do with them. Thanks! PS where’s that great little elephant bookend from? Love! Thanks again!!
Thanks, Veronica! The elephant bookend was a TJ Maxx impulse buy :)
So glad you found this tutorial helpful. Have fun covering your boxes!
This is a really great DIY and thanks for sharing your source for the marble contact paper. Just like you, I too, have a thing for re-using boxes. Glad you like to make them pretty too. ;)
Aw thanks, Rosie! Box lover high five.
Brilliant! No need to constantly but super-expensive boxes and then try to find matching ones later! definitely putting this to good use. Thank you!
Yup, that’s exactly the spirit! Thank you Elisa! Happy you found this helpful.
Those crisp corners! I am super impressed and your tutorial is so clear and helpful. Love these!
Crisp might be one of my favorite words. Thanks, Marlene <3 Such a big compliment.
These boxes are fabulous, Amy! I actually saw it on Yahoo and had to come over here to see for myself. They are beautiful. I’m pinning to try very soon. I’d love for you to share these at one of my next Creative Ways Link Parties. They go live on Wednesdays at 8pm central. Hope to see you there!
Blessings,
Nici
Oh how cool!! Happy you stumbled upon this :) Thanks for coming by, Nici!
Very easy and very useful! Thanks! I love the boxes!
Thank you!! Hope you’ll give it a try!
Thank you for this. Did you double the length of the paper for the bottom of the box also? And cover the entire inside of the box sides? Thank you.
Hi Karen! I did not double the length for the bottom of the box. Because it was on the taller side, I measured out the length + 6cm. I did not cover the insides of the boxes. Thanks for your question!
Amazing idea!!!