The infamous Malm dresser… This guy is everywhere, and while I think that’s part of why it gets a bad rap, it’s hard to deny that it provides a great amount of storage, which was a key deciding point for why I chose them to double as dressers and nightstands in our storage-deficient apartment.
I would agree with anyone who would call the dresser boring, but I see it as an opportunity, like a blank slate calling out for customization. I believe in you, Malm!!
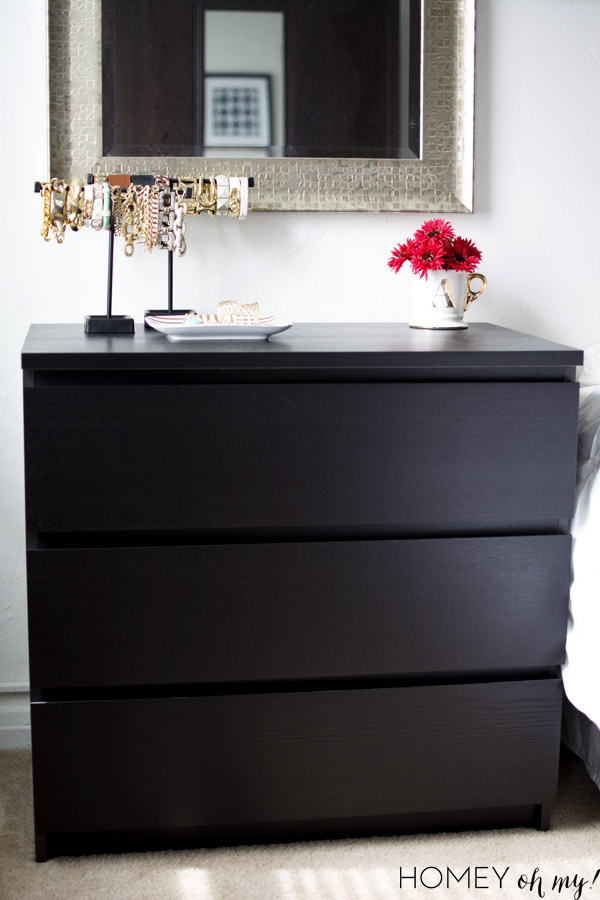
What stuck out to me was how dark the dresser was, which I wouldn’t mind so much if our apartment wasn’t already dark in general. To remedy this, my mind was made up to lighten up the look of the dresser, and when I came across this early post from the Hunted Interior (LOVE everything Kristin does!), I was sold on going campaign style with it.
I removed all the drawers and taped the back side edges of the front panels, then taped on aluminum foil.
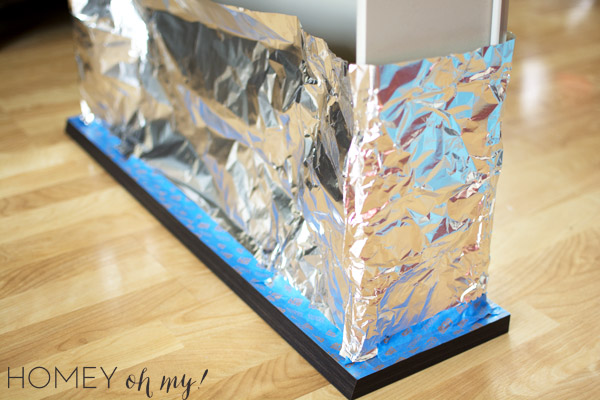
This wasn’t about creating clean edges, but more about protecting the insides of the drawer from spray paint over-spray. I didn’t mind having a little over-spray, and the one layer of foil I applied blocked the majority of it.
Now THIS needs to be mentioned.
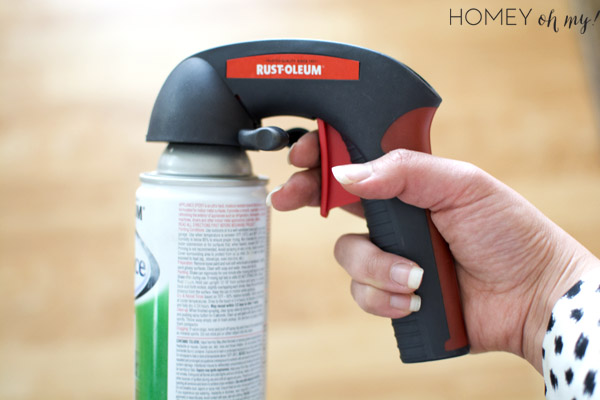
Guys… this is such a huge game changer that I feel like I’ve got to be the last person on Earth to know about it. I had already accepted that my spray paint addiction meant that I would forever live with a blistered and swollen index finger resulting from spray paint fatigue, but now I know… life can be better. Divine intervention helped me cross paths with the Rust-Oleum Spray Comfort Grip (affiliate link). It attaches to a regular spray paint can and allows you to control the spray via the grip and trigger. It’s my new best friend.
Using Rust-Oleum Appliance Epoxy in Biscuit (affiliate link), I spray painted the front and the sides of the drawer panels. This stuff is amazing. It doesn’t show your strokes and it dries to a hard, enamel finish. Even when my ponytail fell onto the wet paint, it morphed back into its smooth, factory finish. Some of the paint is still on the ends of my hair by the way.
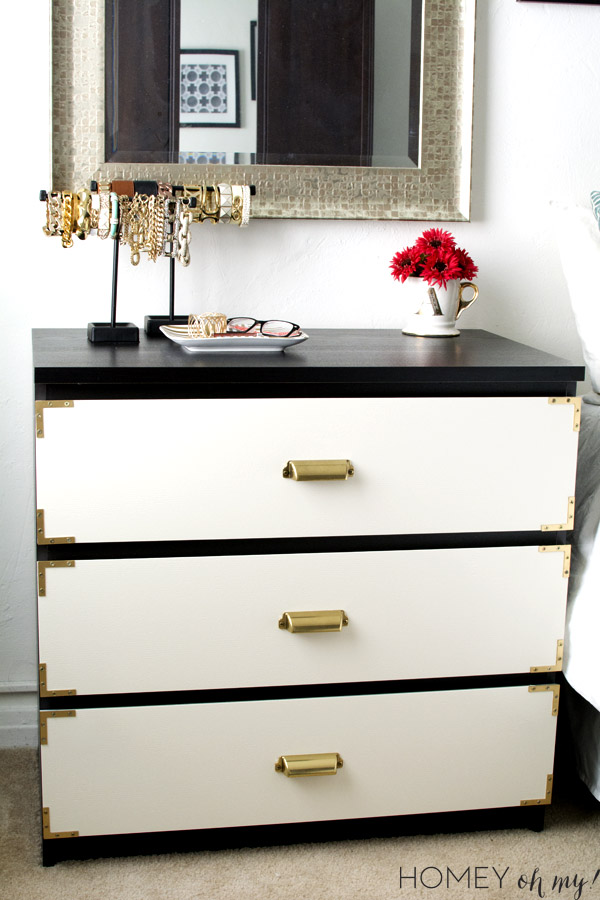
After letting the paint dry overnight, I screwed on the brass corners. They had a coppery green tinge to them that I didn’t like, so I spray painted them gold (isn’t that the answer to everything?)
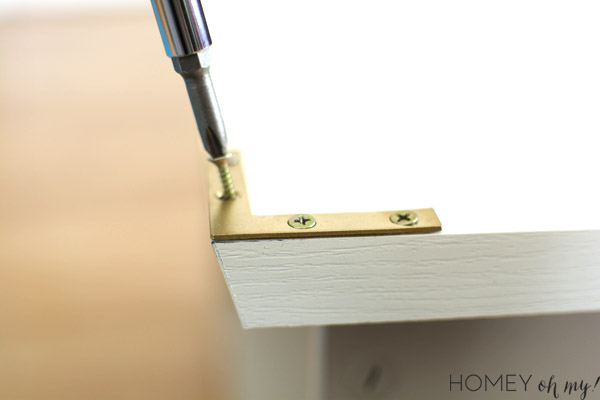
The top sides of the Malm dressers are slanted as shown in the photo above, so I had to screw in the screws here at the same angle. This is so that they wouldn’t poke out through the slanted side (I know this because it happened on the first screw I tried!). Since all the other edges of the panel are straight, those screws were just screwed in straight down.
For the drawer pulls, they’re meant to be screwed in but I was too lazy to do that. Instead, I glued them on with E6000. This would be the appropriate time to say that these pulls are entirely meant for show, and that’s okay. I do not plan on ever pulling on them, so we should be good to go!

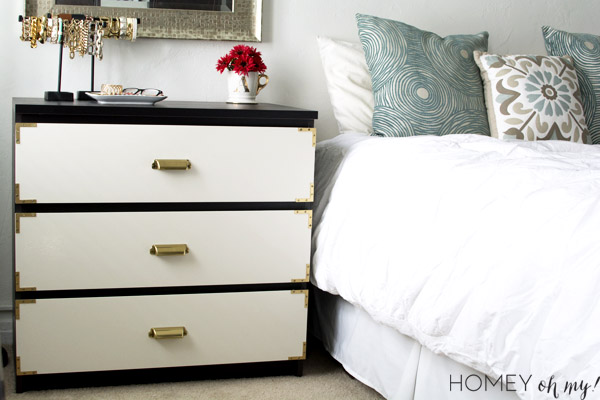
I LOVE how the dressers turned out and how they make our bedroom look lighter. They’re also boyfriend approved, judging from how he described them as “awesome”. That never happens! His is on the other side, which you might see in a potential bedroom update later.
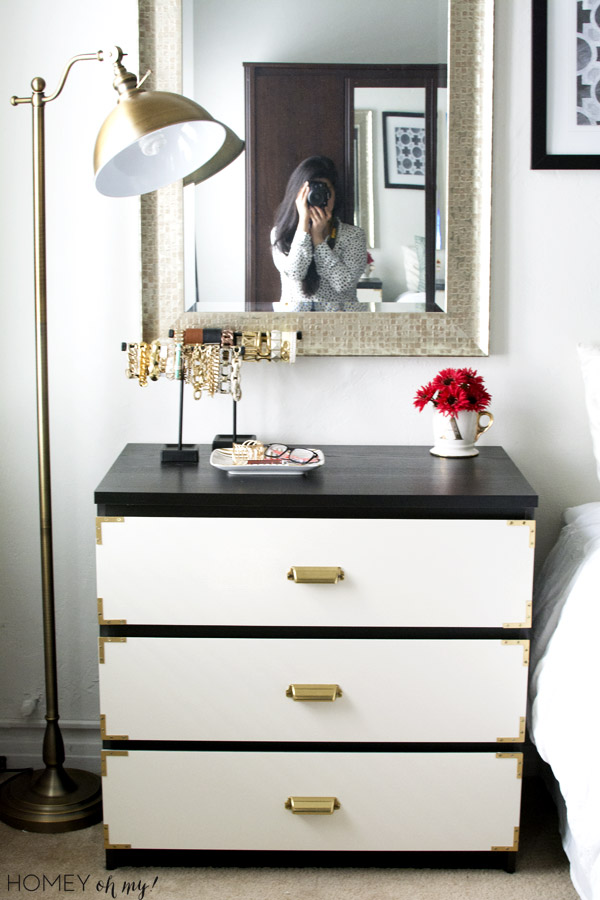 One last thing. I’ve been on a lamp craze lately (did you see my new desk lamp that I shared on Instagram?) and I need to talk about this one. Please excuse my photo-bomb, unless you like it, then hello! I recently found it at HomeGoods and am SO excited about how well it goes with my dresser. It’s a unique version of a nightstand lamp, don’t you think? Except this one is bright enough to light up most of the room :P. I thought about moving it to the living room, but I think it’s here to stay in the bedroom. What do you think about it being here?
Any questions, comments, thoughts about the dresser (or lamp!!) leave them below and let’s chat!


Amy! This is gorgeous! I love the idea of using appliance paint. That’ll make it so much more durable. I totally have lamp envy, too. ;)
Amy, you did a beautiful job. I love the idea of the new spray paint device and when I decide to get one I’ll return to you for your affiliate link. I have to wait until fall 2015 for an Ikea to be built here in St. Louis. Until then I make an annual trip to Chicago. May have to try your idea!
Amy this turned out gorgeous!!! As always pure perfection :D
Oooooh this is fabulous and I will definitely have to try the enamel spray! Pinned :)
What a great project. I’m loving your bracelet/watch organizer!
love it amy!!! always impeccable work :)
*as always, impeccable work
Beautiful job! It looks really fantastic. Are you saying you didn’t have to sand or prime with that paint???
Oh girl this is so good! Sometimes I feel like the dark ikea furniture is too heavy. This is an excellent fix!
It turned out great! I like how you styled the top.
This post couldn’t have come at a more perfect time! I am getting ready to paint my IKEA Expedit and I think I’m going to give that appliance paint a shot! Thanks for the tips!
AWESOME! I really like it.I also love the ideal of using appliance paint, this paint would be great to use in a boys room. Thanks for sharing Amy.
Amy, your boyfriend is right! The dresser came out awesome. It looks like it came right from a high end furniture boutique!
It turned out gorgeous, Amy! Love that you used the appliance paint. So smart! I am totally going to have to use that idea. And I love the lamp. I think it looks perfect by your dresser.
Amy, your Malm makeover is GORGEOUS! I’ve been dreaming of campaign style night stands and I might need to borrow this tutorial this summer when I work on them :)
I freakin love this dresser! Great job,
I absolutely LOVE your style! And this dresser makeover is so cool! I might have to hire you to come redo my bedroom. Where did you get your floor lamp?
Wauww great job, love it, thinking about getting my own Malm now haha.
Where did you get your jewelry stand?
That came out so classic. I love the gold touches you added, The color contrast is out of this world. I’d love if you would link this up to the party we have going.
Seriously never would have known that was from IKEA! So pretty and lovely details like always! Pinned :)
I love what you did with this dresser, Amy!!! And I’ll have to get that spray can handle!!! I’ve seen it but have yet to try it!! I guess I ‘m the last person on Earth to try it!
Goegeous! Love me some corner braces. I just used some on a bookshelf. They’re awesome!
Such a fun update! I love brass corners and I’ve restrained myself from adding them everywhere ;) Love how you transformed the malm dresser!
how fab amy! ♥♥
This is just absolutely amazing! What a fabulous transformation!! I actually will be copying this very soon. I have a black dresser in need of some major TLC, so I’ll be doing a Homey Oh My! knock off :) Thank you so much for linking up at Thursday STYLE! I so look forward to your projects every week! Have a wonderful weekend.
It looks A-MAZE-ing Amy!! So suits your classy beautiful style:)
Fantastic! It doesn’t even look like the same dresser! Love the new details!
Amy, this is gorgeous! I have those same dressers in my boys’ closets and sometimes wonder if there is a way to make them less boring. This is such a great idea!
This turned out so good Amy!! I love how you use gold, it always looks so sophisticated but still really fun. Great job on this dress, it is amazing!
Love this makeover! This exactly what I would need in my bedroom! :)
I also want to let you know that I nominated you for the ‘Liebster blog award’…hope you don’t mind :))) and that you will find a little bit of time to join in! :) Have a great day.
http://passionshake.blogspot.com/2014/04/liebster-award-and-11-questions.html
Kisses x
I love this sooo much!!!
This is the look I’m looking for! Hate dark furniture but boys will be boys! Where can I get those hinges??
Hi Judy! I got both the brass corners and pulls from Home Depot. So glad this project inspired you! Let me know if you end up doing something similar :D
FYI I found the Martha pulls from Home Depot at this website, ordered them, held my breath hoping it wasn’t too good to be true….and they arrived as presented in less than a week.
The pulls are nearly $5 each at HD and just $1.39 at this site.
http://ow.ly/yXsDI
*Not an affiliate, just love a great deal!!
Amazing find!!! Thanks for sharing, Melissa!
I was wondering how you chose the paint you used here? I have a malm dresser and would love to do something like this, but want to make sure I paint/prime it correctly. This seems like the fastest and easiest solution I’ve come across so far. Has the paint worked out well since you posted this (hasn’t peeled off or anything like that)? I read that it is really meant to be used with metal appliances but it looks great in the pics! Please let me know, thanks!
Hi Marlee!
I chose the paint because it’s the same one Kristen from The Hunted Interior used, but after using it myself, I’m positive it was the best choice because it does not require priming or a finish- easy as cake. Just a warning, the odor is STRONG while it’s wet. That would be my only complaint. Otherwise, it has held up well, no peeling or cracking and looks just as it did when I first painted it :) Hope this helps! Good luck!
Amazing makeover. Where did you find the center handles??
Thanks, Natalie! I got them from Home Depot: http://bit.ly/1pMW8C8
love your makeover, it turned out gorgeous, and the two- toned looks fantastic,
i would love to feature it, if that would be ok please let me know
lauren
Seriously in love with this, My boyfriend and I have those exact dressers and bought them mostly for the price, and color because we were blending our styles when we moved in together, now i hate them and i want a change but not to re purchase. Thank you for this! <3
Amazing ! Where did you get the handles and corners ?
Hi Janie! I got the handles here and the corners here.