Dang, three posts in a row now where I’m featuring a grid pattern. I told you I was getting into it! I mentioned recently that I wanted to do something with the pattern, and you guys know planter DIYs are a favorite around here, so this had to happen, naturally.
Really though, this one kind of fell on to my lap. I had gotten these plain white planters a while ago thinking I’d repot a couple of my plants, but with a lot of them dying on me recently (is it the heat??) I’m pretty much looking at starting over with my “indoor garden”. So yay to new planters and plant friends (RIP previous plant friends).
The materials list will tell you how easy this DIY is.
Materials:
–1/8″ black tape (one roll was enough for both of my planters)
-ruler
-scissors
-planters
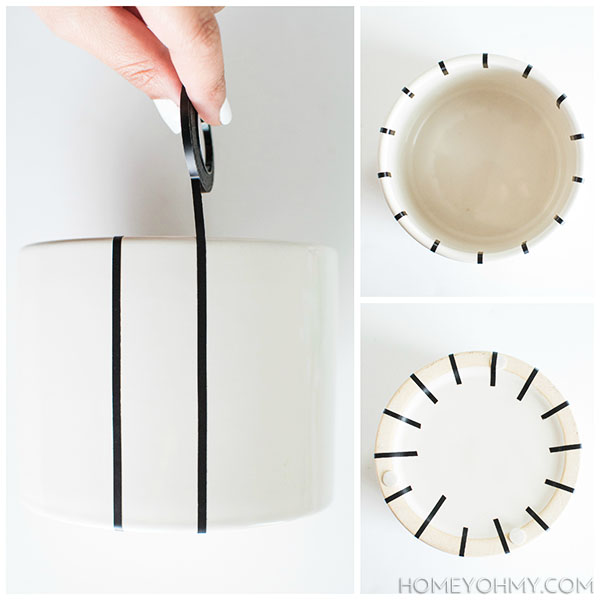 I started by vertically taping down pieces of the black tape about one inch apart, making sure the ends of the tape overlapped both the top edge and bottom of the planter. I used a ruler between each piece to roughly measure each inch. This planter was perfectly 14 inches in circumference, so one inch increments were easy to fit in.
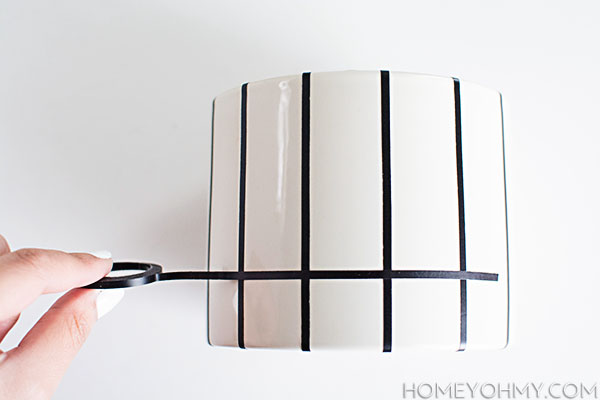 Then I taped down the horizontal lines, also one inch apart, which was made conveniently possible by the four inch height of this planter. When the tape came back around to the front end, I overlapped the end of the tape on top of it just a bit to complete the circle, then cut off the the rest of the roll.
Bam.
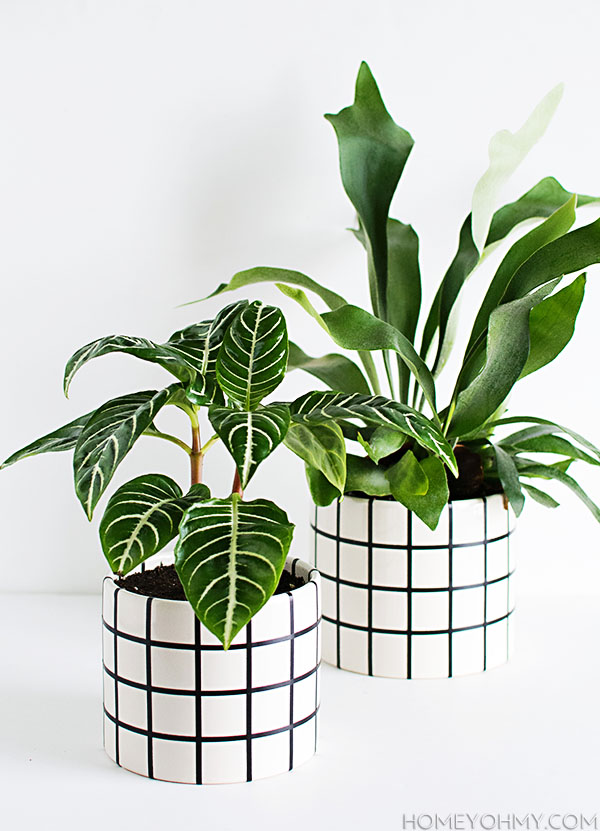 The measurements on the larger planter were a little less perfect, so I went for keeping a slightly larger than one inch square grid pattern to the middle two rows, then left the top and bottom rows a little longer/more rectangular. Still good!
I really didn’t need to include this many photos, but I couldn’t decide which plant I liked more, so let’s have a vote.
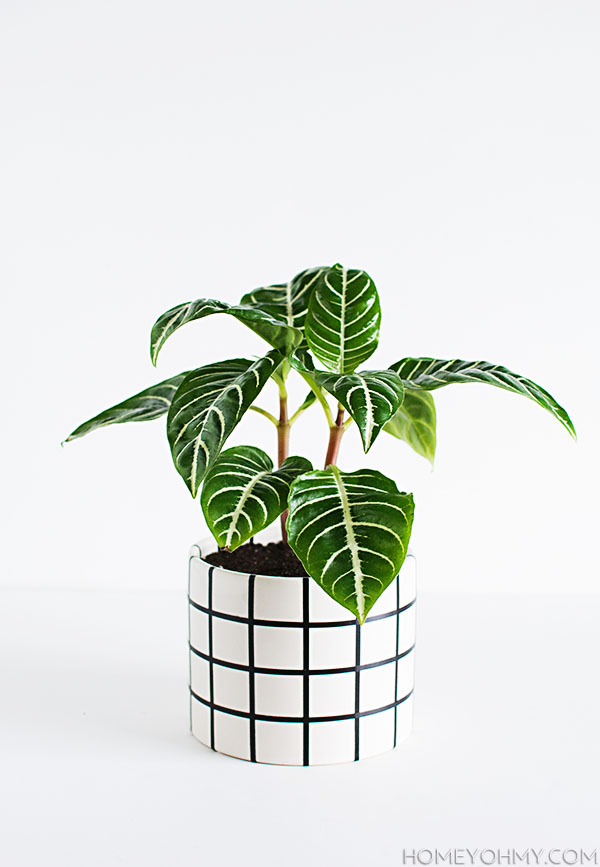
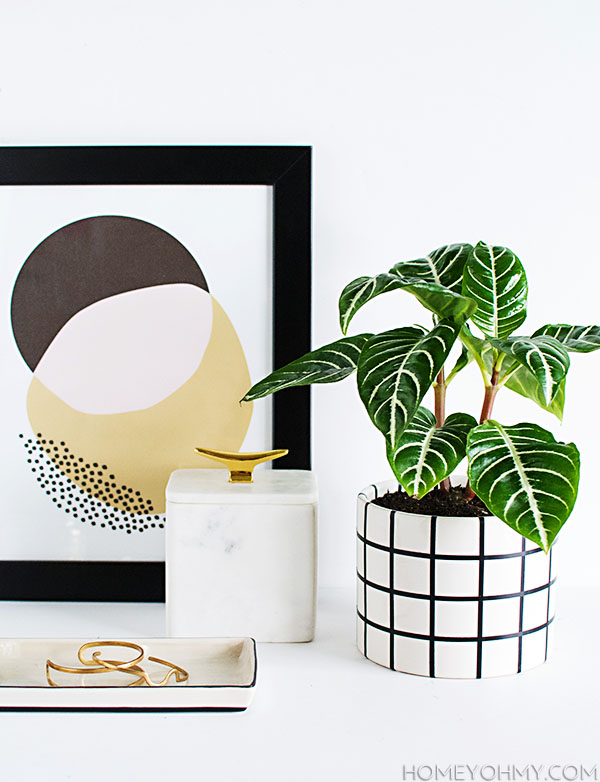
Do you like plant #1 better?
Or plant #2?
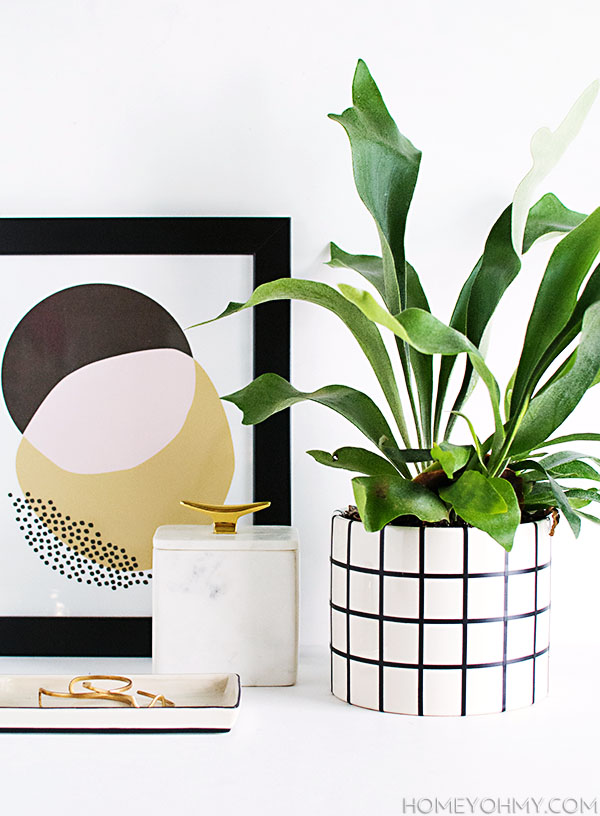
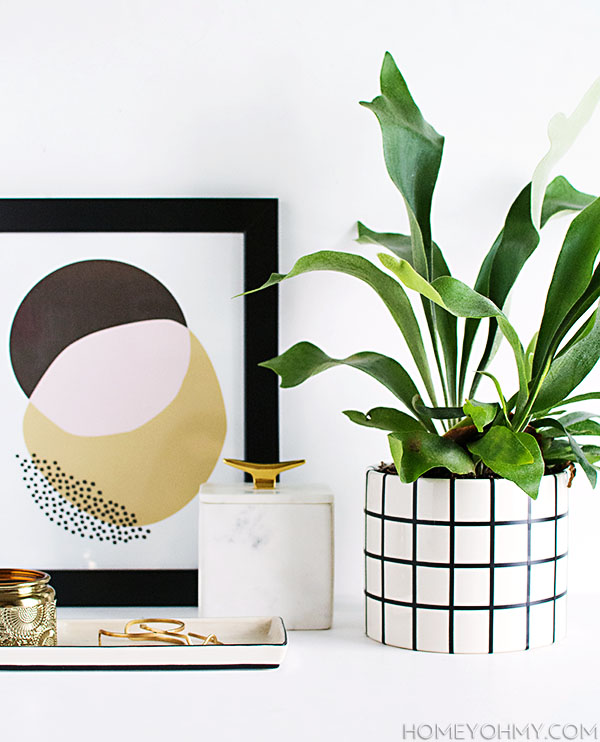 You know what, I actually made my decision just now while asking you guys to vote. Plant #2 for me. I brought it up to the cashier and I was like yo, tell me more about this strange fuzzy plant because I’m intrigued. She told me it’s a staghorn fern (oh that’s it, I remember now- a great name always steals my attention) and gave me some tips on how to care for it. After she rang me up and handed it over, she mentioned that they’re very fickle and hard to care for. Hm.
I still love plant #1, though I didn’t catch the name of it (anyone know?). The graphic lines on the leaves pair so well with the grid pattern of the planter. Really happy about that combo. Boyfriend is too, seeing as though I made him vote and he picked that one.
So what’s it gonna be, guys- plant #1 or #2?
PS.
Art print is from my friend Britt Castellano’s amazing shop: A Handcrafted Home


Love these Amy! So simple and super cute!
Thanks so much, Jamie <3
I have already said this to you, but I will say it again – You give a whole new meaning to “simple Idea to Brilliant Product” . I was planning to paint grids on my bulletinboard after the previous post :-)
Thank you thank you, really appreciate you seeing the value in what I do :) Love that bulletin board idea. It’s a simple change that will make a huge difference!
This is super cute! I love how easy it is since I can get a bit lazy when it comes to DIY’s, haha. Love your plants too.
Thank you! I think a lot of us feel the same way you do haha.
Wow, such a simple project yet such a wonderful result!! Oops she did it again :)
Thank you, Marcela!
So simple but so chic! I’ll definitely have to give this tutorial a try!
Let’s Mingle Blog
Thanks for the lovely compliment, Ashley! Hope you give it a try.
AMAZING! Honestly, wow. I love this so much I may need to just do it myself :) Thanks for the inspiration friend!
XOXO
My dear sweet Lidy, thank you!! I can totally see you doing this <3
Such perfection! And your styling here is top notch!
I pick plant 2 too! And that print is great!
so simple and so perfect!!! I love it Amy!!
I’d choose plant #1! Funny how different the tastes can be from one person to another.
I am really stunned by these planters, they look so good! I’d bnever had guesse the black lines were tape! And you know what, I actually thinks that the bigger one looks bette even though not all the rows are squares!
This idea is really beautiful idea! I love the look of this stand of plant.
Thanks
Love this tutorial! Where are the planters from?
<3
Thank you, Julie! I got them from a local nursery in LA called Rolling Greens.
Great idea with the tape to keep the lines so straight! Don’t know if you still want to know, but the #1 plant is an Aphelandra or ‘Zebra Plant’ :)
YUP, still want to know! Love it when plant names make complete sense :) Thank you!
Where did you purchase the chic lidded marble box?
Hi Victoria! It’s from West Elm and you can find it here.
just found your blog and I LOVE it! Where can I find the tape? Thanks!
Hi Amy! Thank you so much! I linked to the tape in the post. You can find it here
Wow, so simple but it has a huge effect! I’m going to try something similar with black paint and a mudcloth design :)