November is here! This month is all about Thanksgiving frenzy but it’s also the time to start thinking about that other big holiday… I’m talking about planning for Christmas gifts. If you’re like me and want to avoid the mall at all costs during the month of December, now is the time to start figuring out those gifts. This is especially important if you’re going the DIY route, because let’s be real- these projects don’t always turn out as planned, and if you have a lot gifts to make, it’s always better to start sooner to give yourself more wiggle room.
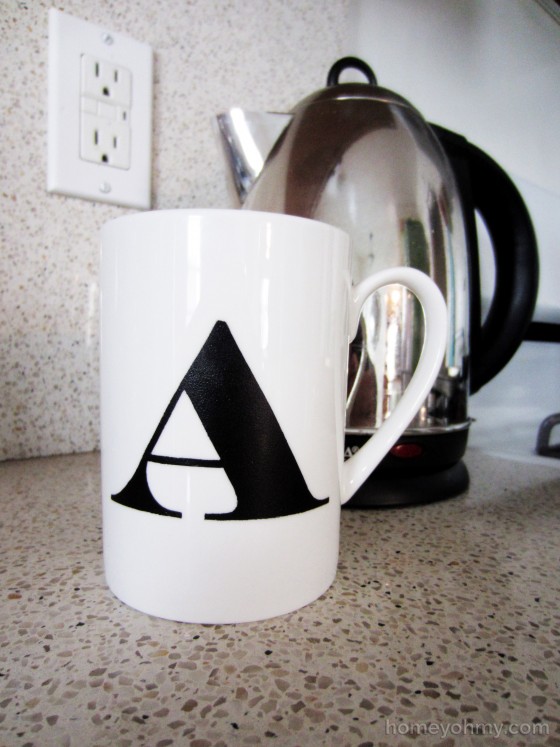
This monogrammed cup can be a really easy project if you use a pre-made adhesive stencil, but I’m going to show you how you can make your own stencil in case you want to go with a unique font or a design (or if you don’t feel like buying a pack of alphabet stencils).
I made my stencil from one of these mailing label stickers.
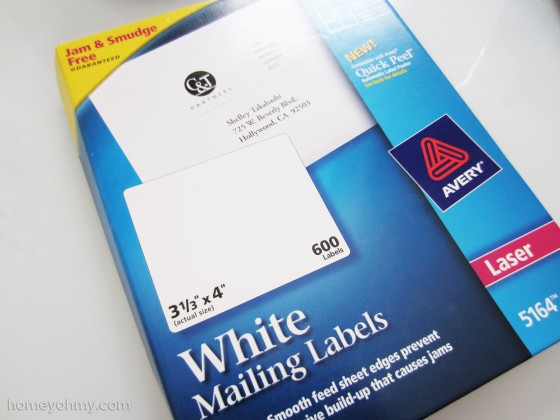
The decision to use these was a spontaneous one. I didn’t even know I had them when I came across them in my desk drawer, and the light shined down and I heard a voice say, “Use it to make a stencil.”
Print the monogram on a piece of paper in a font you like to your desired size and tape it with painters tape to one of the mailing labels.
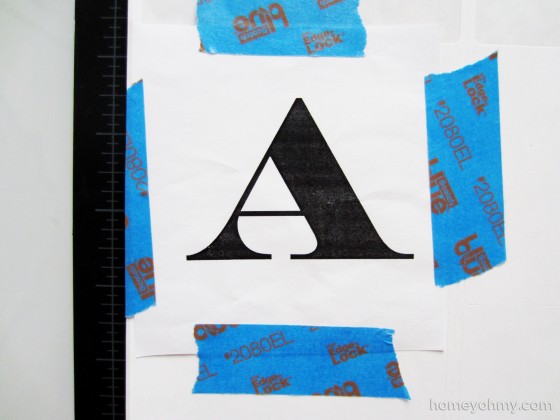
Working on top of a cutting mat, cut out the letter with an X-acto knife. If your letter has a hole in it like the letter “A”, cut that piece out first and save it since you will need to apply it later.
Remove the paper and you should be left with the mailing label stencil with the letter cut out of it. Peel it off and apply it to your cup.
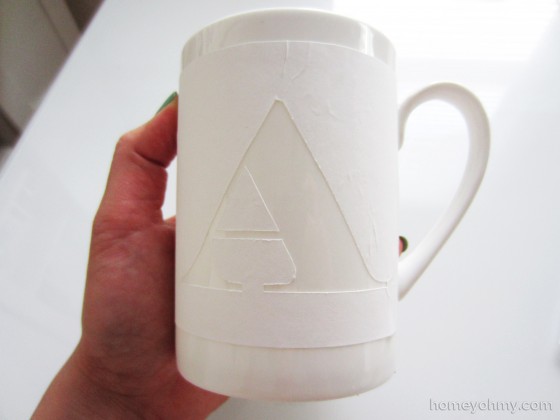
As I mentioned earlier, if your letter has a hole in it, that piece you initially cut out will need to be applied free-handed since it’s a floating piece. It took me several tries to apply it just right.
This next step is the most important part. Use a dauber or any foam material that allows you to dab on the acrylic paint. I used Martha Stewart Satin Acrylic Paint in Beetle Black , which has a slight sheen to its finish.
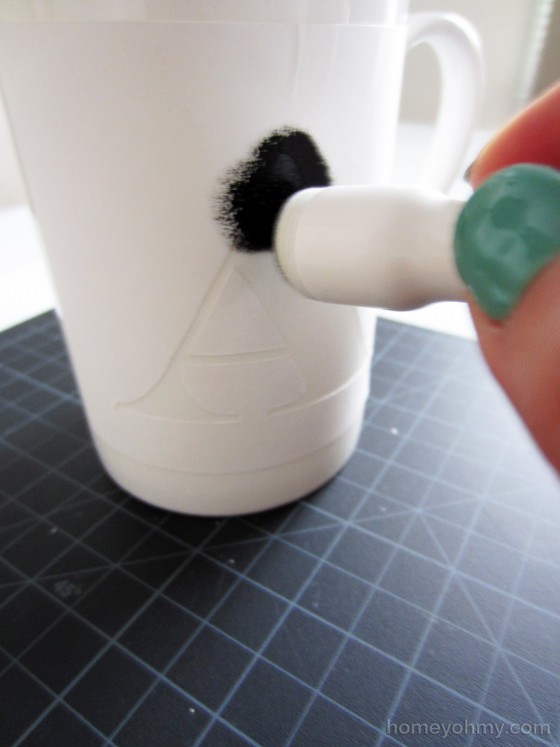
There are two reasons for why daubing is important. First, it helps minimize the paint from otherwise being brushed under the stencil edges, thus will help you achieve cleaner lines. Secondly, paint slips and slides on a surface like this ceramic cup and if you use a bristle brush, you’ll find that the paint applies unevenly and will require multiple coats in order to get opaque coverage with even texture. Not with a dauber. I only needed to apply one coat to get the color opaque.
Remove the stencil while the paint is still wet. The first time I tried this project, I applied two layers of paint and had to wait for it to dry in between layers, so when I removed the stencil, it stripped off some of the paint with it . So, it is super important that you apply one good coat of paint and remove the stencil immediately. Lesson learned.
Finally, you can either cure the paint by air-drying for 21 days or by baking it. The directions are to place the cup in the oven before turning it on to 350 degrees. Once the oven reaches 350, bake the cup for 30 minutes before turning the oven off. Leave the cup in the oven until it is completely cooled down before removing (This takes hours. Go run errands or do this before you go to bed.) Your monogrammed cup should now be dishwasher safe!
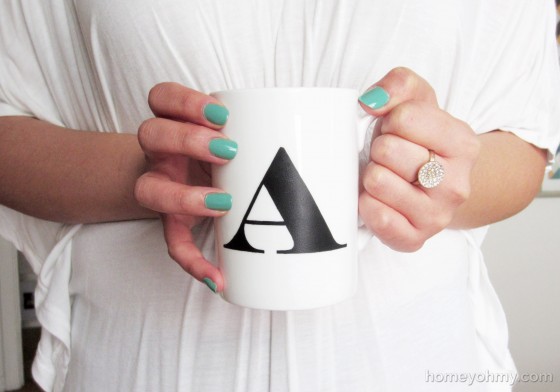
I’ll be honest- this cup is a gift to myself . If I were to gift it to someone else however, I think it would be cute to put in a small bag of baked goodies tied with a bow (yay bows!) or you could keep to the theme of the cup and put in packets of hot cocoa or coffee with cute stirrers. This could even be re-purposed as a pencil cup to place on your desk, which is how I might use mine.
Get working on those gifts! And of course, don’t forget to get yourself a little something as a reward for all that hard work . Treat yo’self.
Like what you see? Stay connected with me:


love this easy stencil idea. Gonna try it with my porcelin markers! thanks for sharing.-aimee
gifts for myself are my FAVORITE ;)
Thank you for the great directions! One question: where did you find that fabulous ring that’s in the last photo? Merry Christmas!
Hey Amy!
Have you tried doing this method to make it waterproof on a glass cup, say a mason jar? Would an acrylic Sharpie work as well?
This is a super cute idea!! Love this!! And… is the “treat yo’self” from Parks and Rec? :)
Girl, of course!!! Only my favorite episode of TV ever ;). I’ve still got a batman suit on my wish list.
Hi there! I love your cup! What font did you use? The A looks super sharp:)
hey i love your diy hom blog. the diy wine bottles led me here and i cant seem to get off. i love the monogrammed tea mug idea and i tried to create it, but im having a problem with cutting out the first letter of my name Q. How would you go about cutting it out. please let me know thanks.
Q is pretty tricky and I don’t really have a lot of specifics on how, but I think I’d definitely start with the inside of the Q since it’s a pretty large opening. Having that extra paper around the Q to hold down on will also help, as opposed to cutting that all off first and only having the “Q” part to hold on to while cutting the center. Does that make sense? Hope that helps!