
Popping in for a quick DIY before we all head out for some Halloween shenanigans! This was a bit of a last minute project I did for a last minute need, which was wanting to display things at different levels… I really have no idea if anyone else can relate to that, but being that I love styling and creating displays, I found myself needing some simple pedestals to use during this season of entertaining. They’re very easy to make, and pretty versatile for all kinds of varying level needs (thank you for pretending to know what I mean).
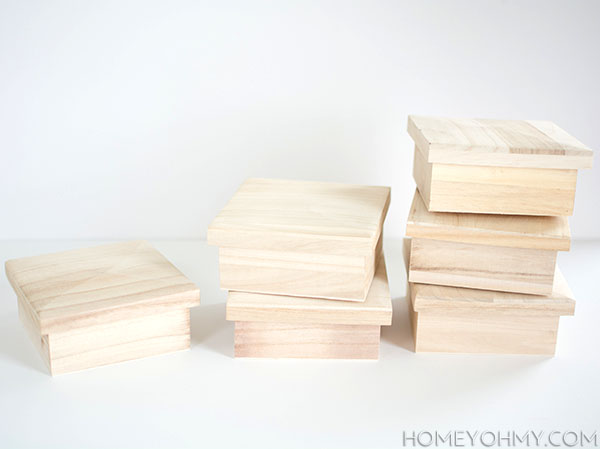 The idea really started when I found these wood boxes at JoAnn, and my initial reaction was to stack them into pedestals. I was thinking outside the box. *insert cheesy smile*
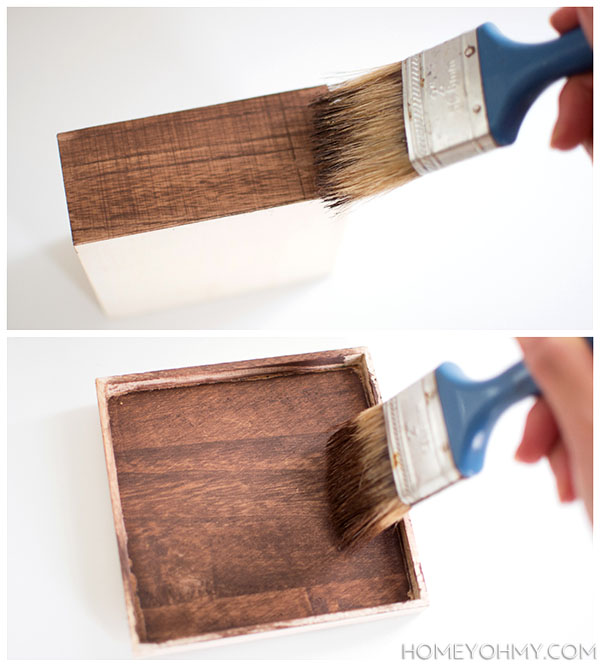
I started off by staining all the boxes and three of the lids for a total of three pedestals. Only the sides that would be externally visible were stained. A little story- the first time I used wood stain, I applied it like paint, and it was a messy, goopy disaster. If you’re unfamiliar with wood staining, a little goes a long way, but if you find that you’ve applied too much, my trick is to use a dry paper towel to buff and spread it out in circular motions. *Bonus tip- wear gloves to save yourself from intensive hand-cleaning later.
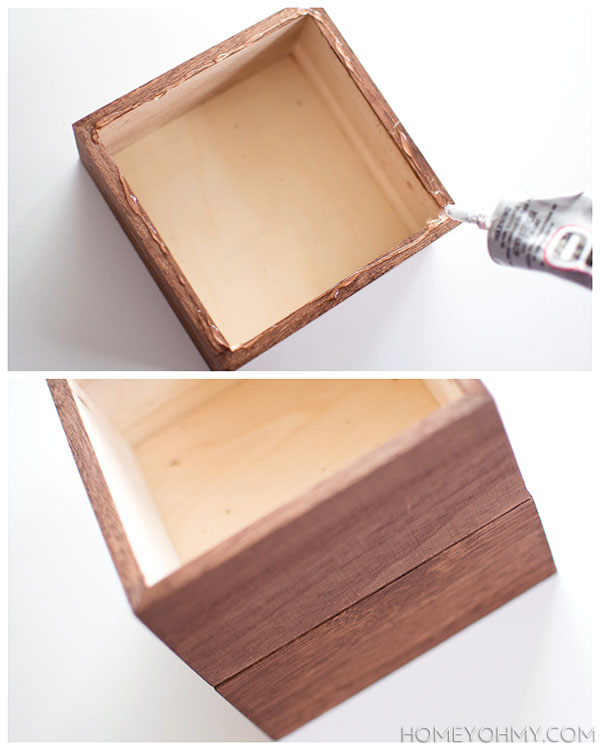 I applied E6000 glue on the top edge of one box, then stacked another box on top. I did this once more with a total of three boxes for the largest pedestal. I’ll get to the reason in a second for why I glued the top box with the opening facing up.
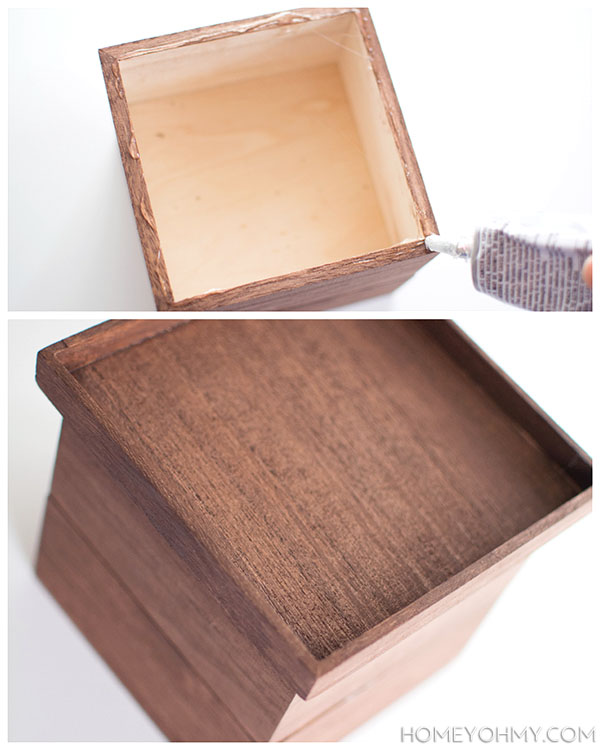 I applied the glue again on the top edge of the box, then placed a lid upside down on top of it. Because the lids for my boxes had a bit of a dome shape, they needed to rest on top of the box opening in order to sit flat. Make sense?
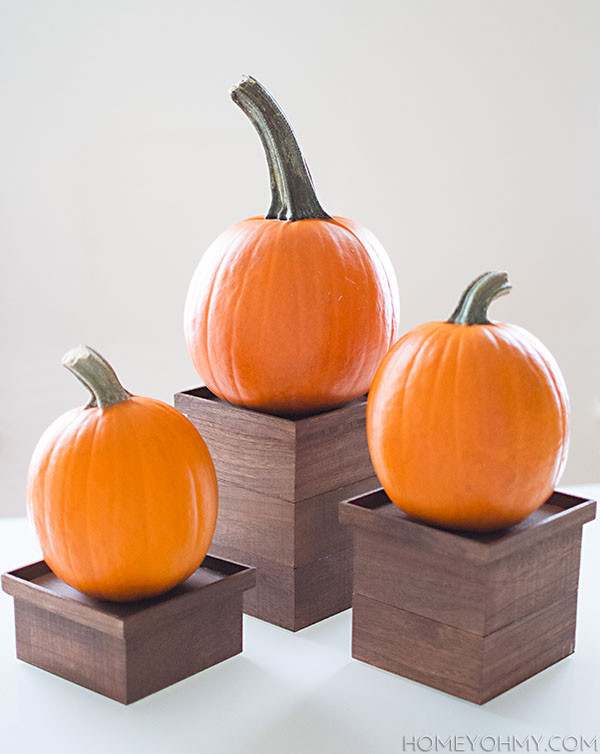 I contemplated all kinds of color options, metallic embellishments, the usual, but opted to keep them really simple and rustic in texture. Traditional fall style trumped over all, but these would be easy to makeover if I were to change my mind later.
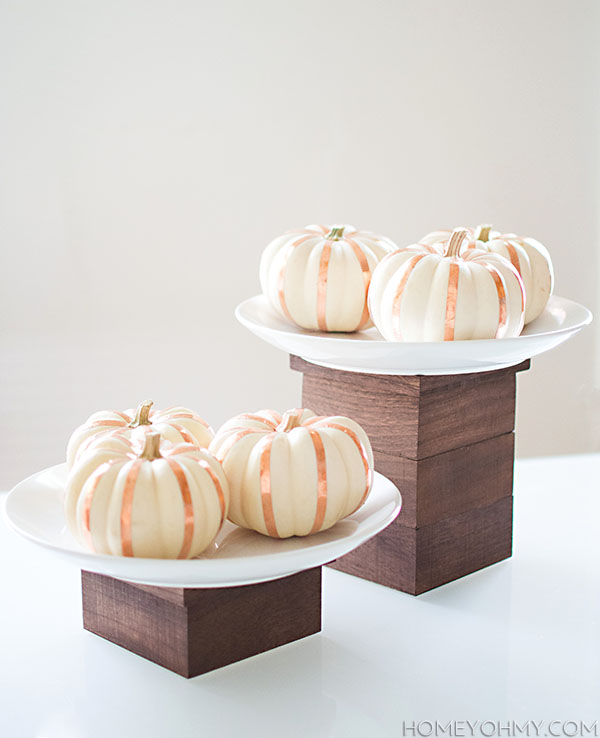 Another reason I decided to make pedestals was because I was potentially in the market for a cake stand, and I knew these pedestals could double as cake stands with the simple addition of plates. Neat, yea? We can pretend my copper striped pumpkins are cupcakes, or not if this happens to be more your thing.
That makes me wonder- do you keep your pumpkins around through Thanksgiving? I always do, at LEAST through Thanksgiving, because I hold on to my pumpkin babies until they rot, which last year was around mid-December. Too long? I think so too, maybe.
Alright guys, I’m heading out early for the week in preparation for a fun Halloween weekend, but I’ll see you guys back here as usual for a new post on Monday. Have a safe and happy Halloween! <3.

These are such a great idea and would be really useful for craft fair stalls! Might have to give them a try as I’m running my first ever stall just before Christmas. Thanks for the inspiration!
That sounds so exciting! I can totally see how these pedestals would come in handy. Congrats on your first stall, Kate!!
I totally get what you mean!! In my head, my ‘tablescapes’ look awesome, but in reality, they never quite turn out how I imagined. It’s usually because I don’t have risers (or the right ones). These are great!! Thanks for sharing the quick tip!!
YUP. I was actually creating a scape that really needed these and I was thinking there HAD to be someone out there with the same scaping woes, haha. Thanks, Katie!
So cute Amy – and these have so many great uses!!
Thanks, Krista! So true, they’re very versatile, which is why I decided to keep them simple!
These are so awesome, Amy! I really want to make a few for my Thanksgiving centerpiece. You are so clever!
What a clever use of simple elements! I’m going to try this for displaying some of the jewelry pieces I sell in boutiques & as jewelry stands for my website photos because they photograph so nicely…hmmm lots of possibilities…Thanks for sharing your great idea!
This is absolutely gorgeous…Featuring you tomorrow at our Work It Wednesday Party..see you there:-)
As always, you are brilliant, Amy! I love how easy you make these seem (and now I have a new idea as to how to use up the extra stain I have lying around :)