It’s official. I love paint.
Paint is the simplest way to dramatically change something, whether you’re upcycling disposable materials or revamping old items you no longer like the look of.
Take for instance my coffee table tray.

While now, I would get any tray and just paint it the color I want, back then I just wanted to get whatever gold tray I could find that was affordable. I didn’t dislike the shiny mosaic pattern on the tray, but I wasn’t fond of it either and still am not. Luckily, the design is actually on a material that’s a lot like contact paper and I was able to strip it off. After that, I was left with a clean slate that I could paint into what is now a tray that I am completely in love with.
The power of paint, y’all. It’s real.
This project was made possible by the following materials:
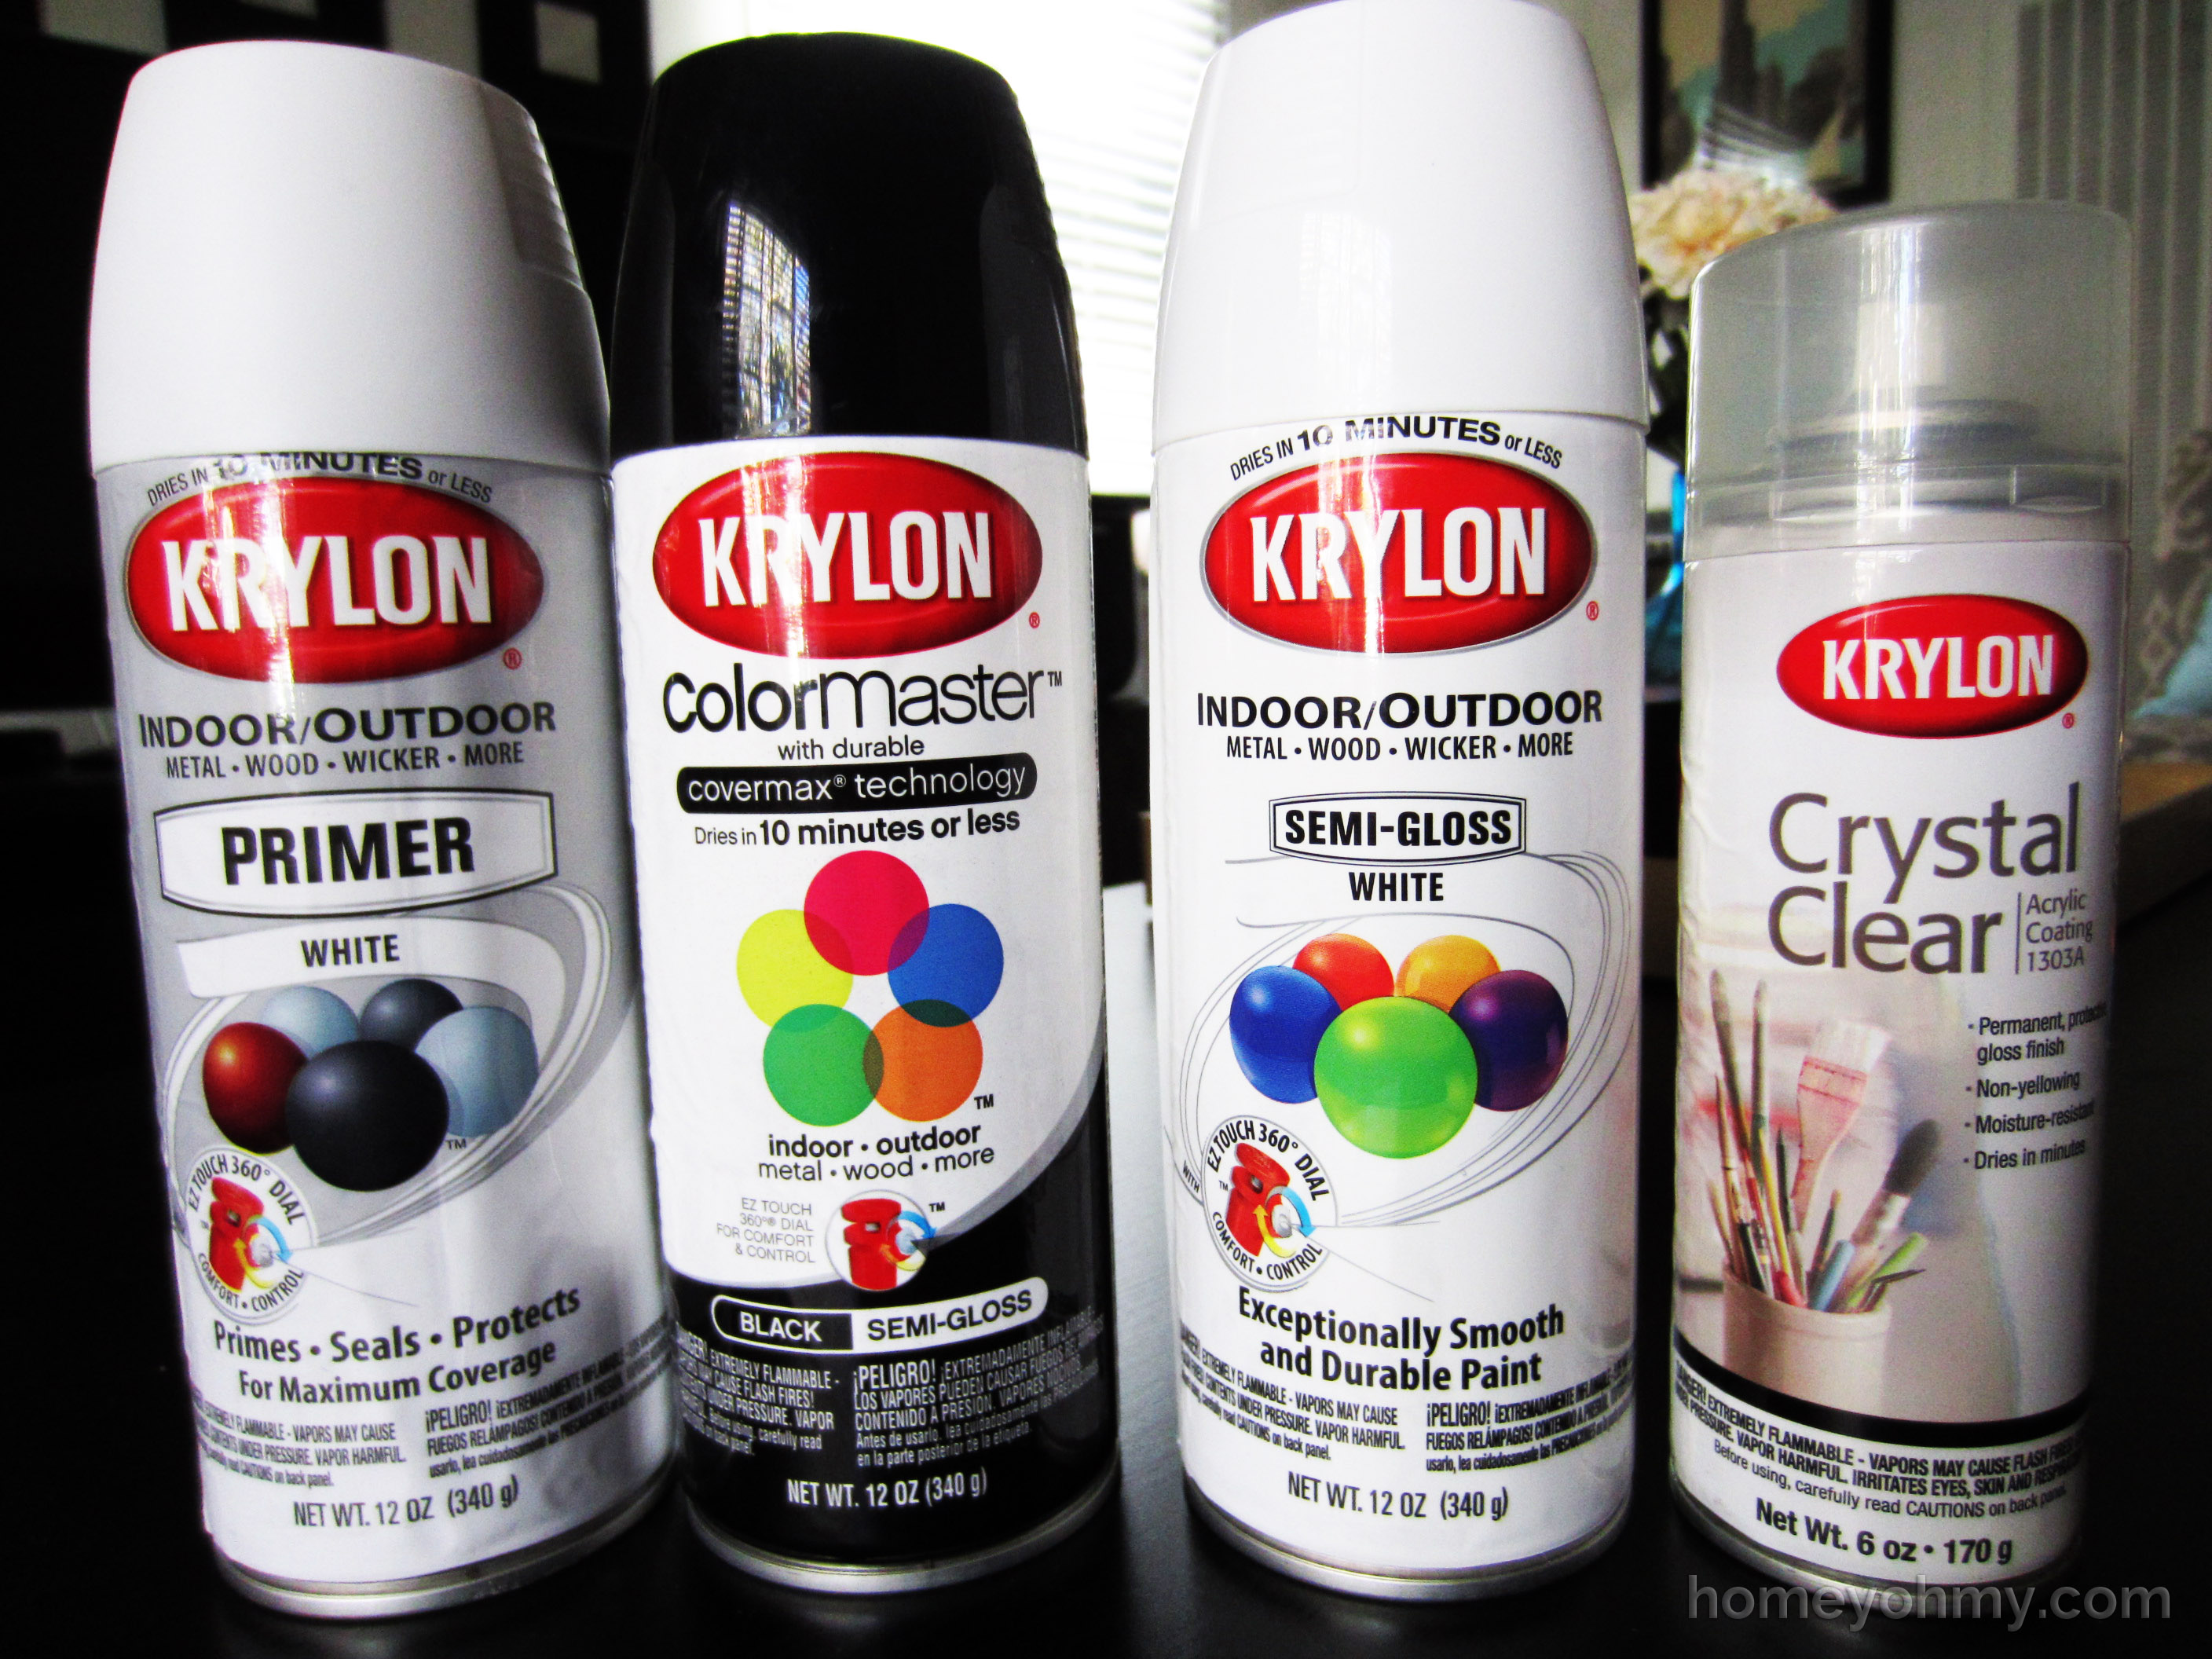
Painters tape, spray paint primer, black and white spray paint in semi-gloss finishes, and clear acrylic spray coating.
There’s also one more item I need to give a shout-out to.

Goo Gone has been a long time favorite of mine. I probably saved hours (I’m serious) using this to help remove the gooey, gunky mess that was beneath the gold mosaic paper on my tray. It’s so Goo Good.
So here’s the tray stripped of the paper and the sticky mess.
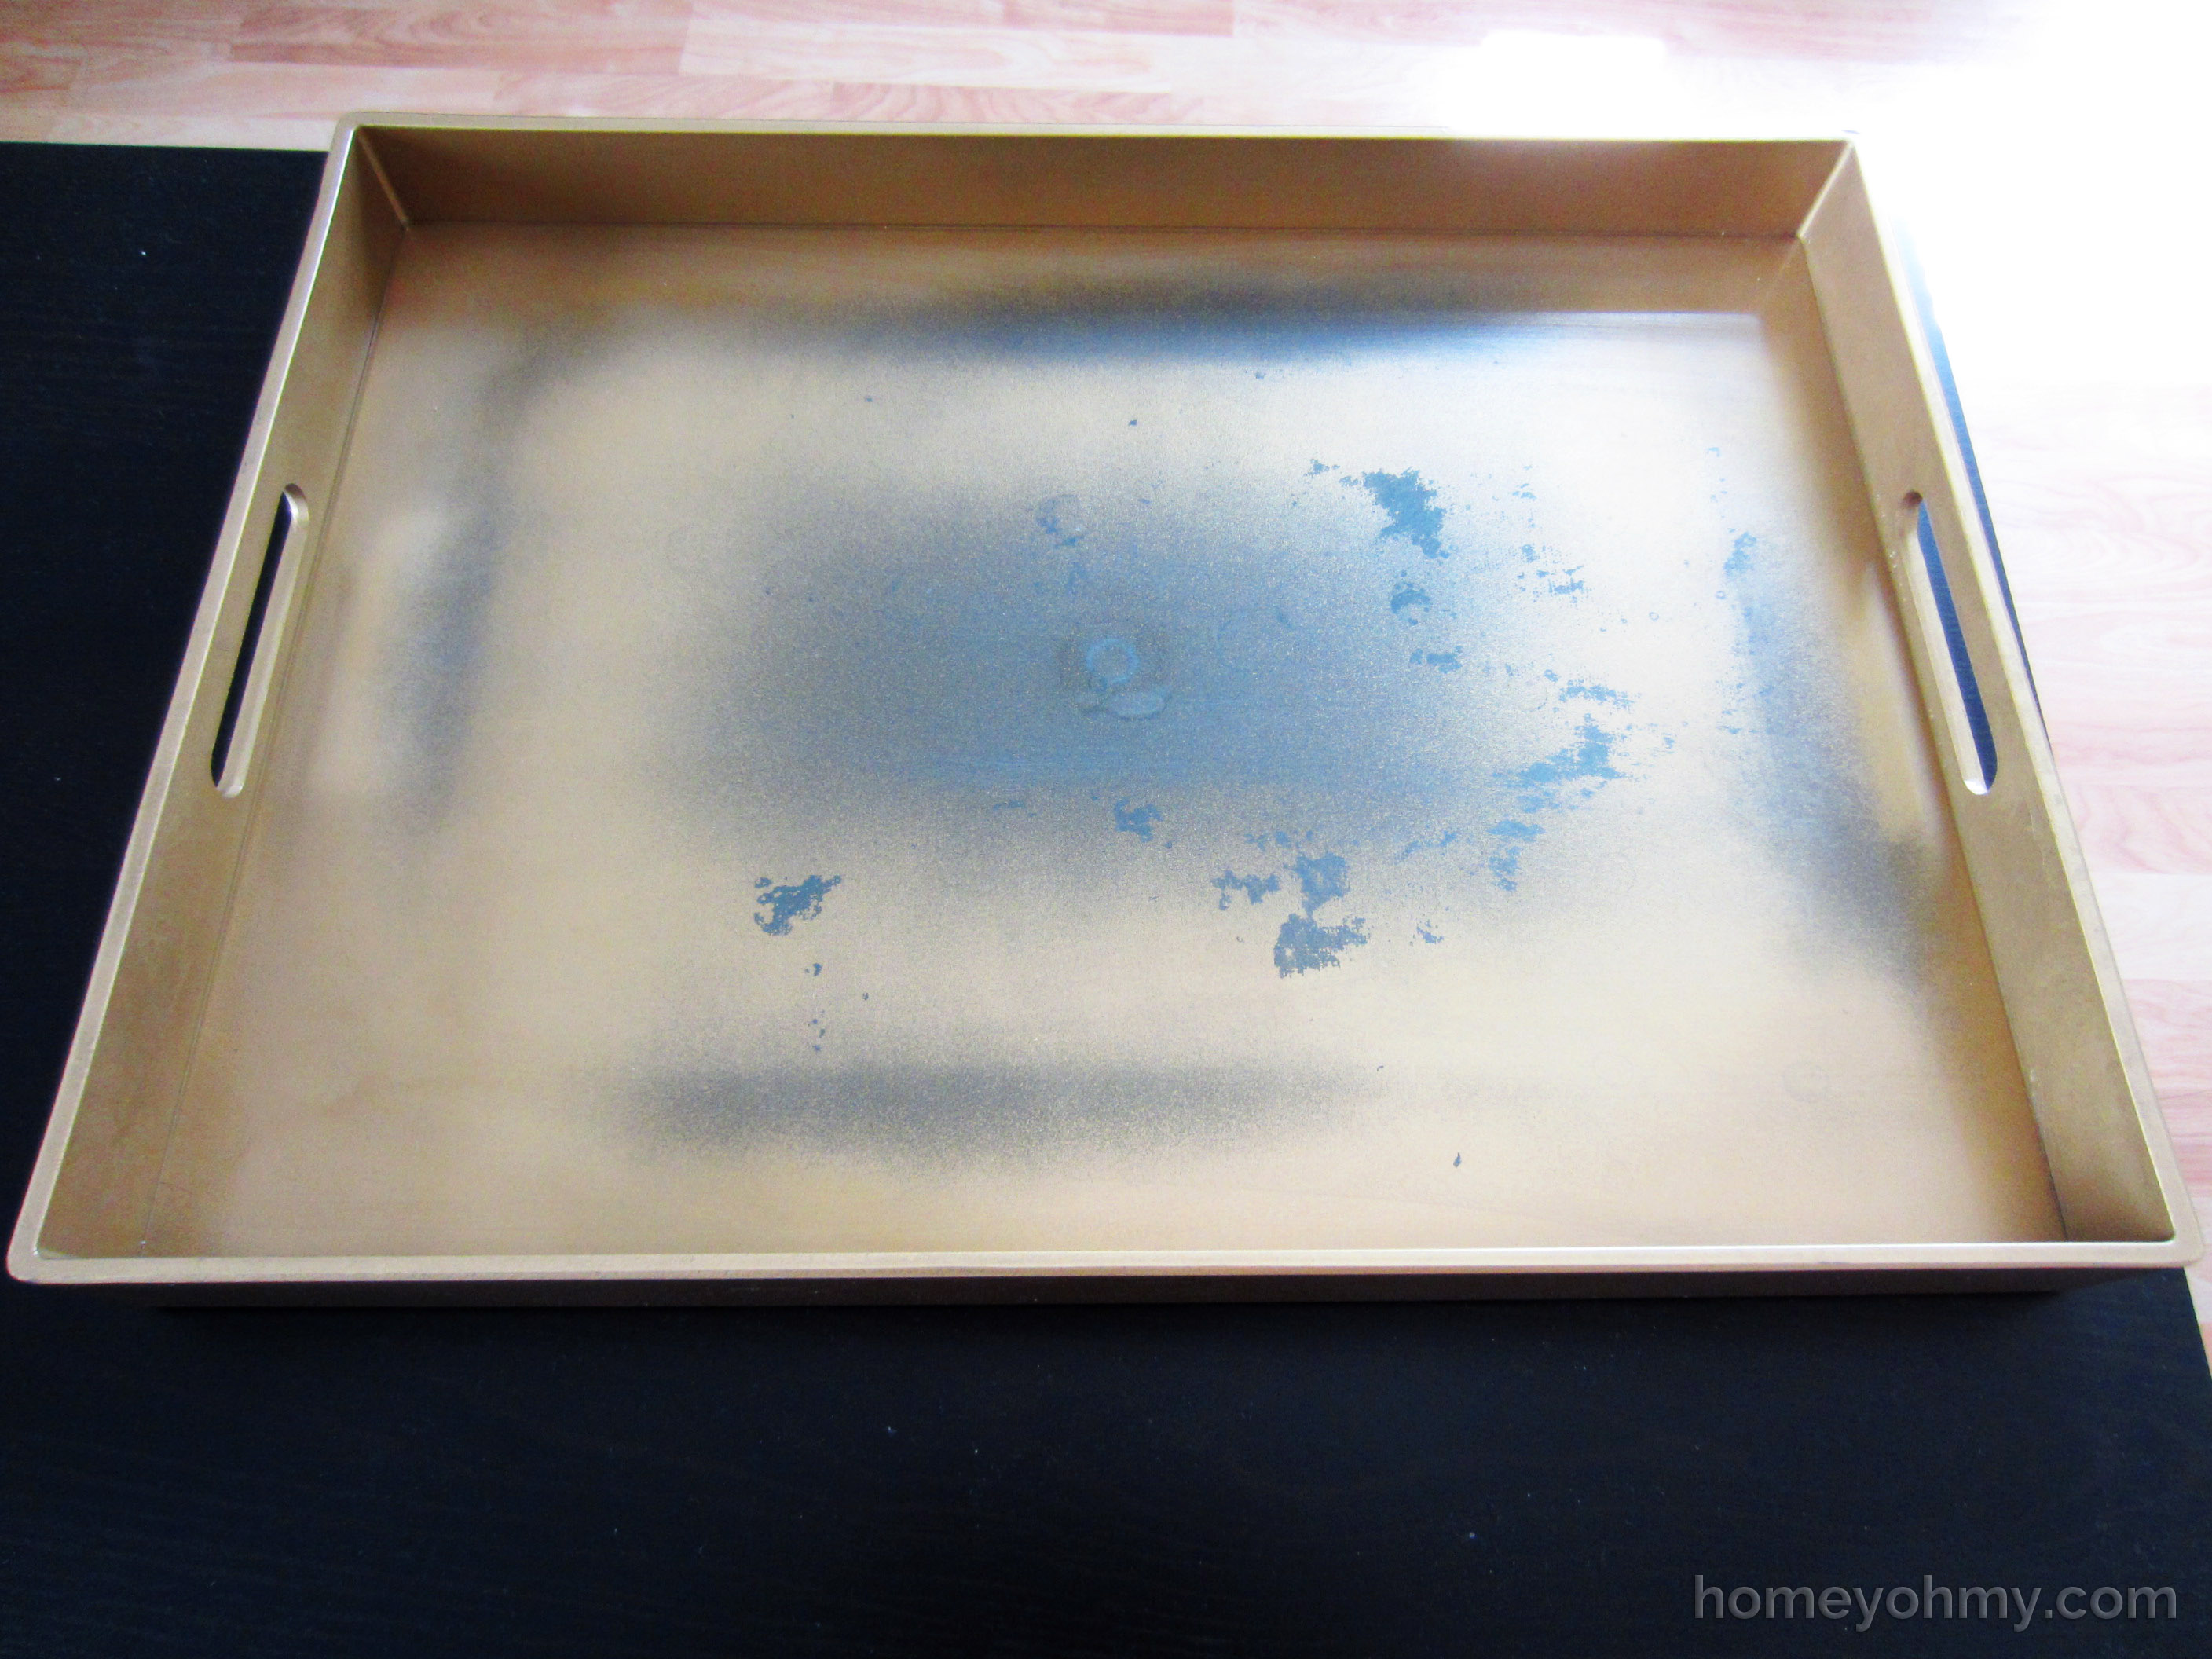
I wanted to keep the sides gold, so I taped them up with painters tape before spraying the tray with primer and then with the white spray paint. If you are new to spray painting or just want to refresh some basics, go check out my post on spray painted wine bottles where I share some tips on how to get the best results possible.
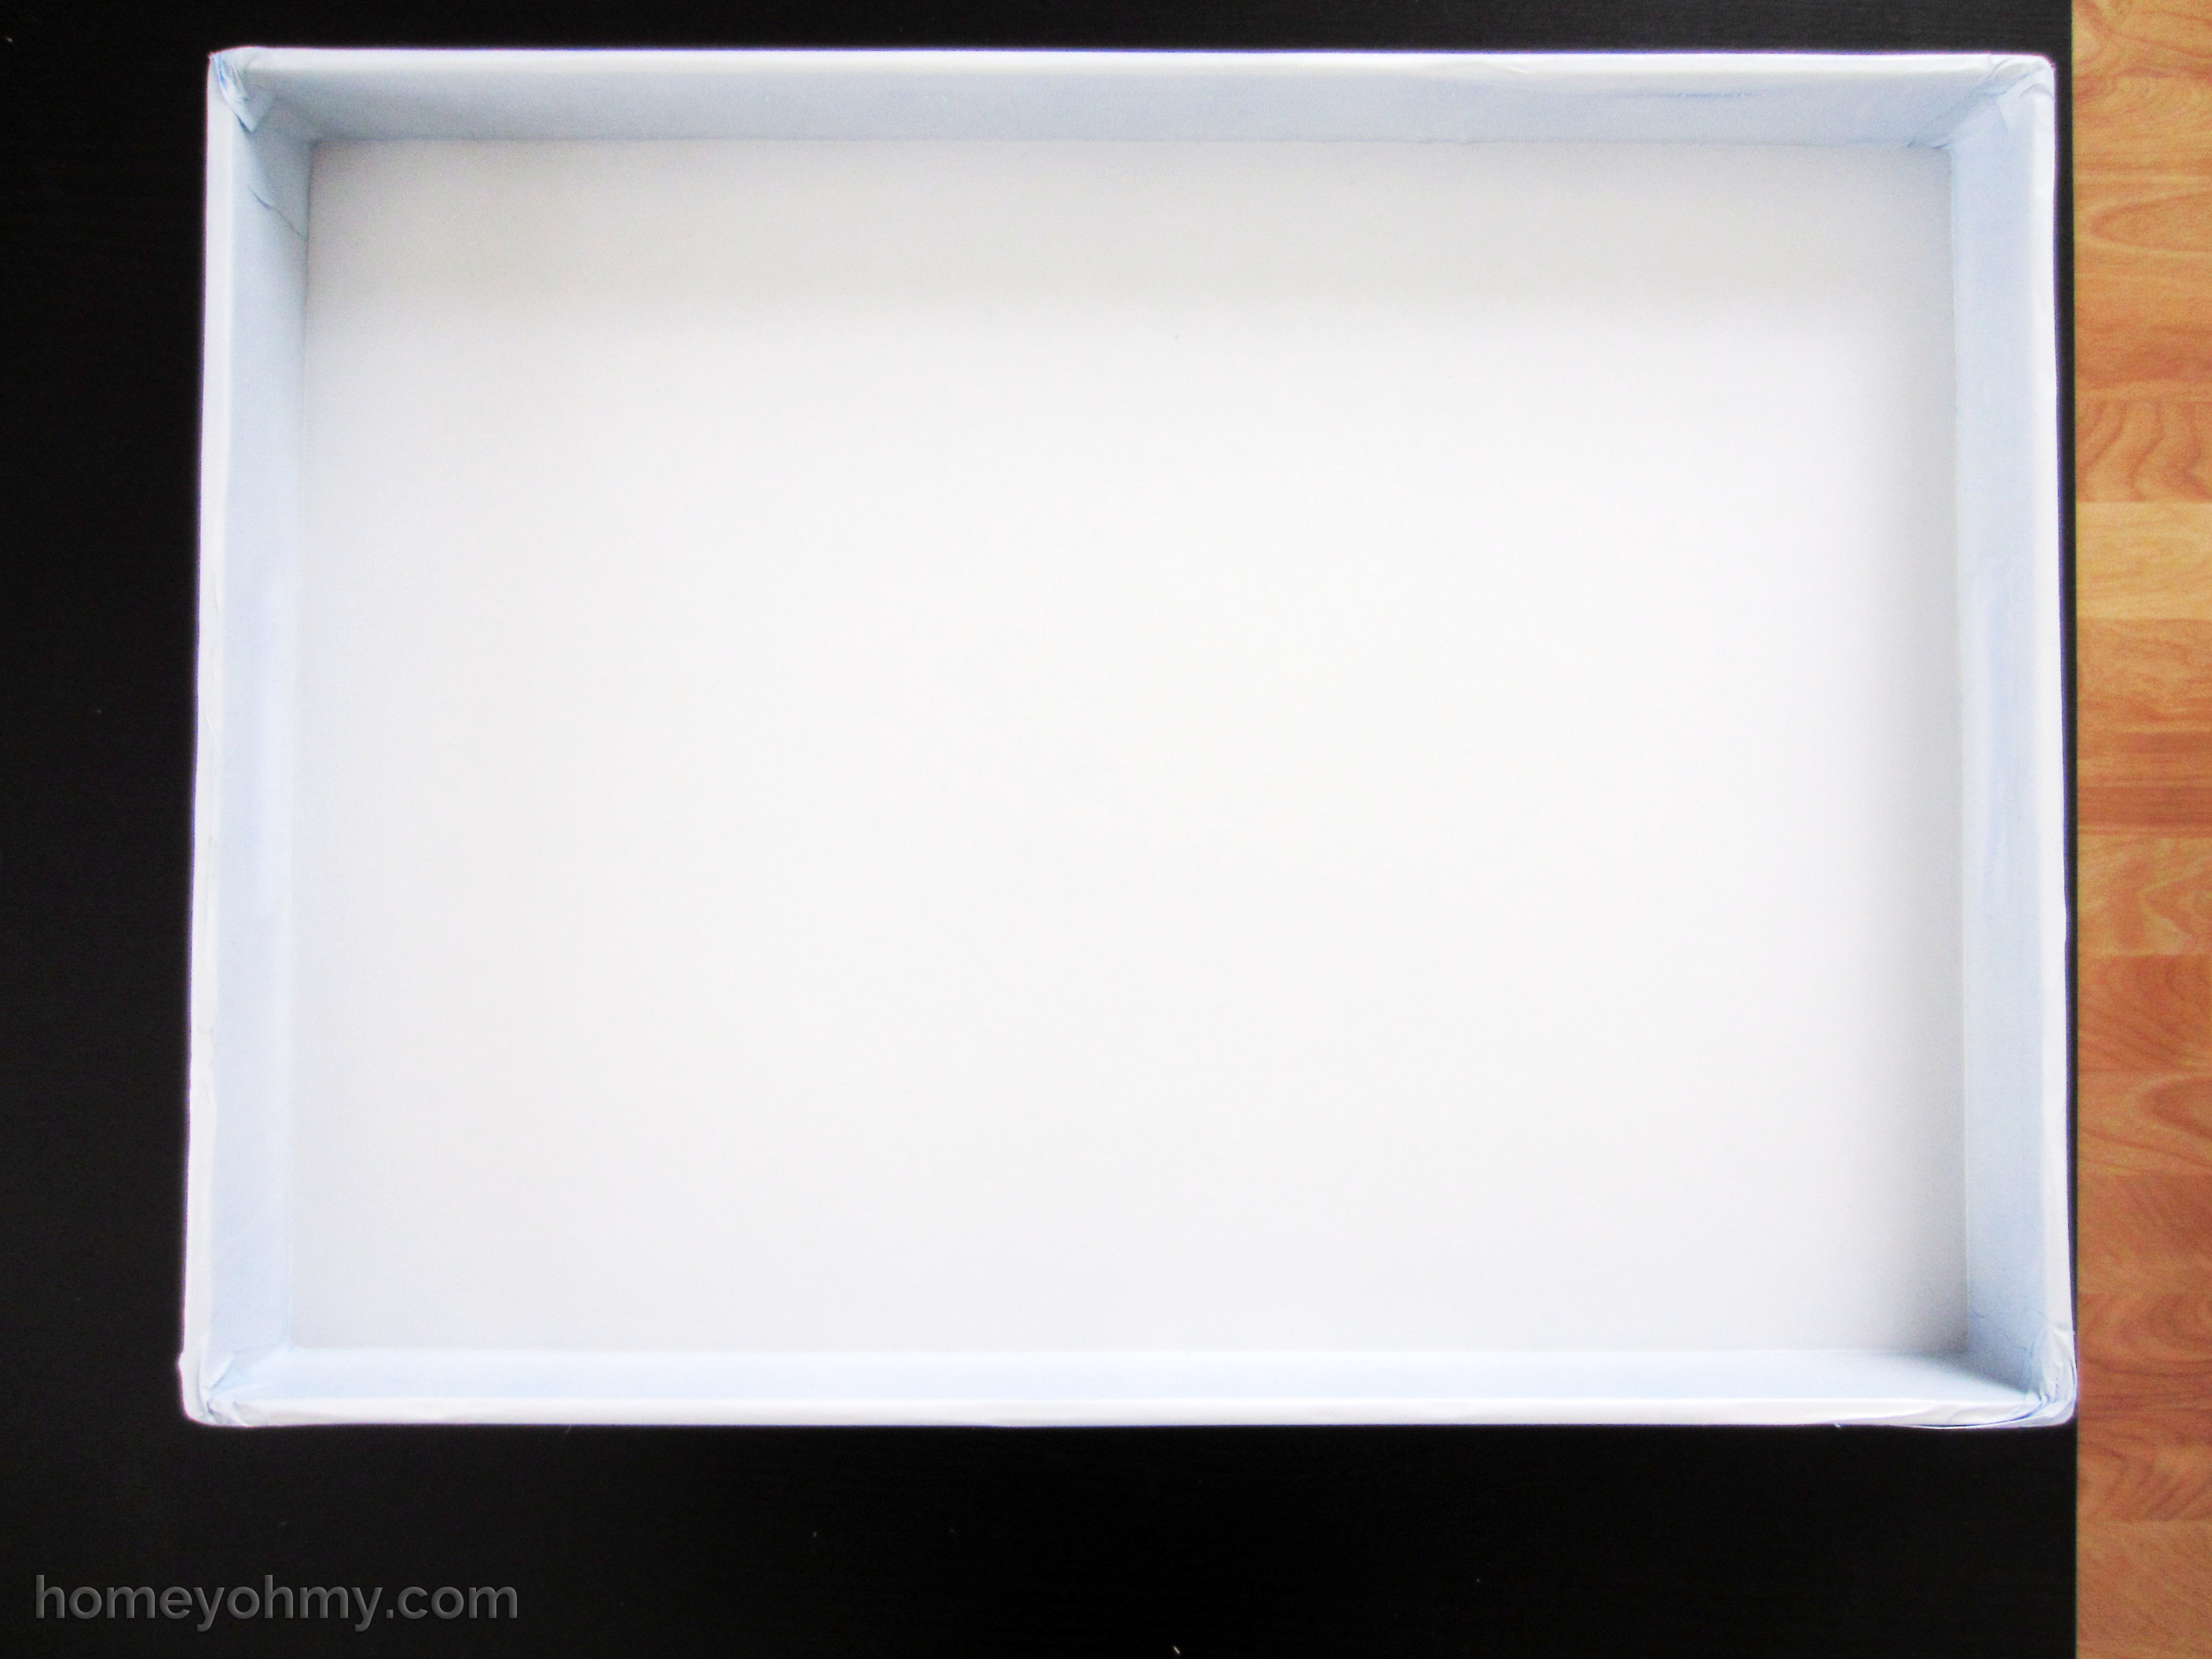
I let this dry overnight to make sure the paint was thoroughly dry before applying the tape in my desired design.
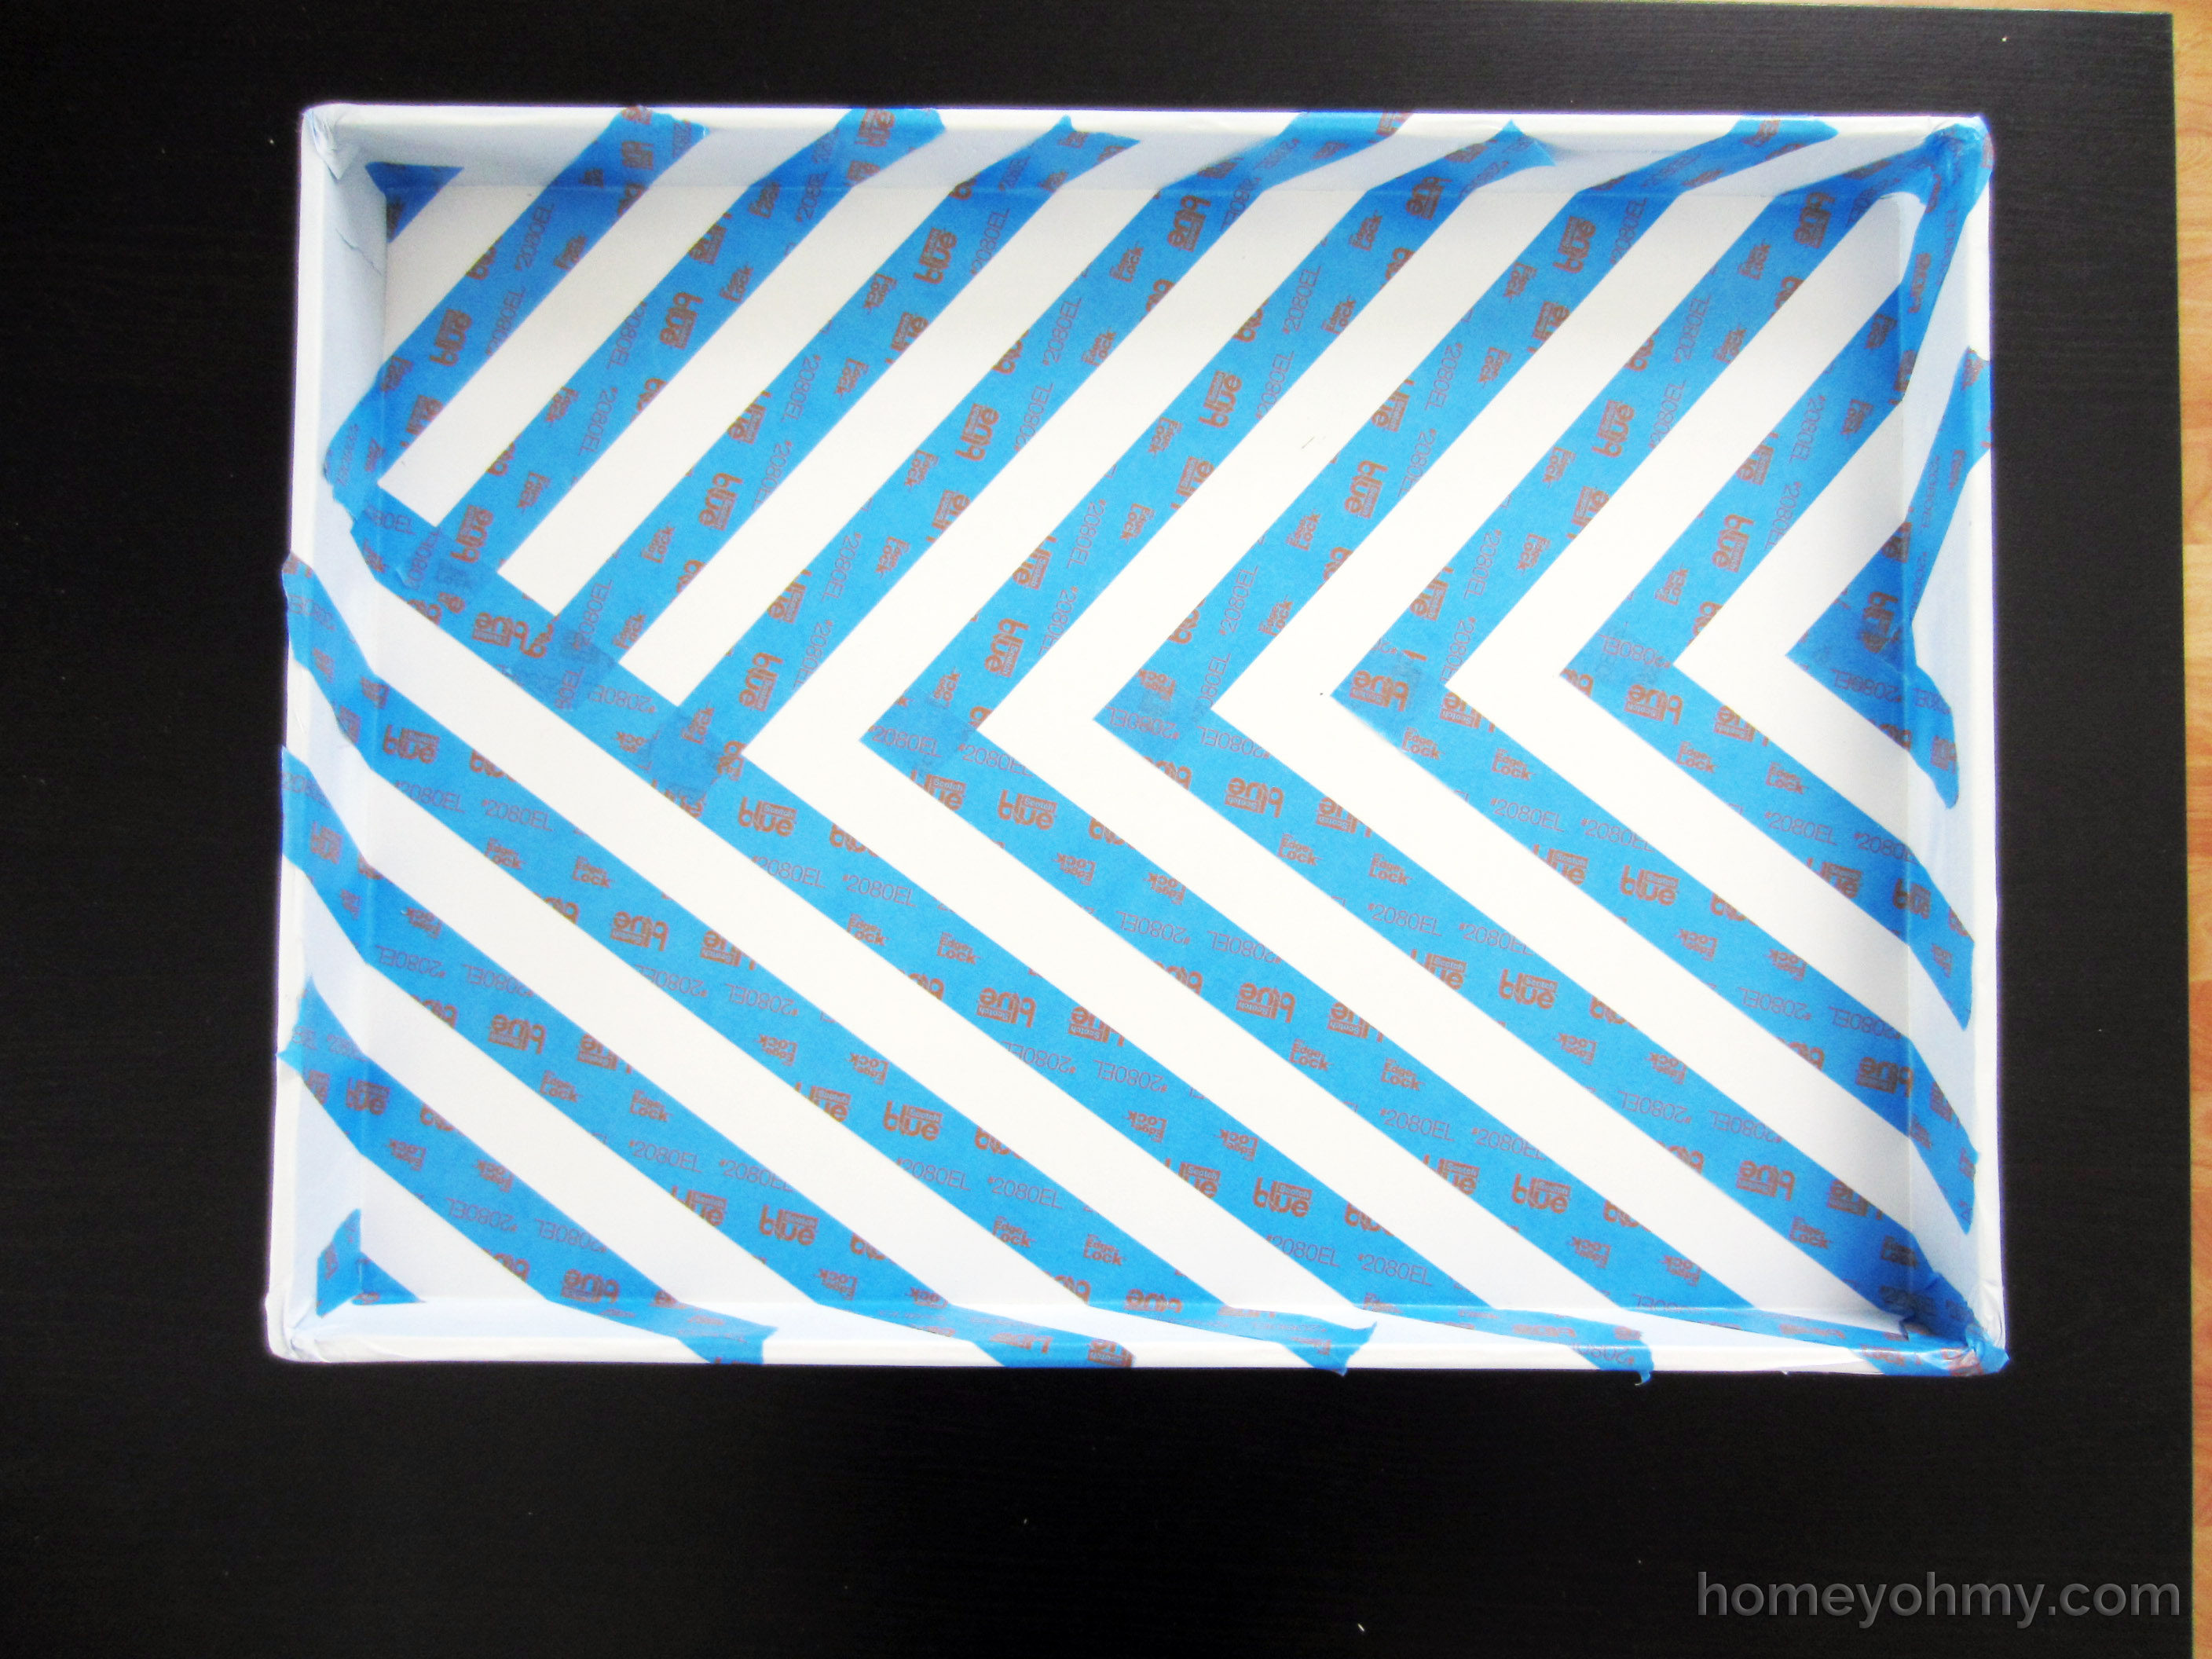
Next, I spray painted the tray black and then removed all the tape. Once it dried I sprayed it over with the clear acrylic coating. This is for protecting the paint, which is important for heavy usage surfaces like this tray. Let it dry for at least 24 hours before handling.
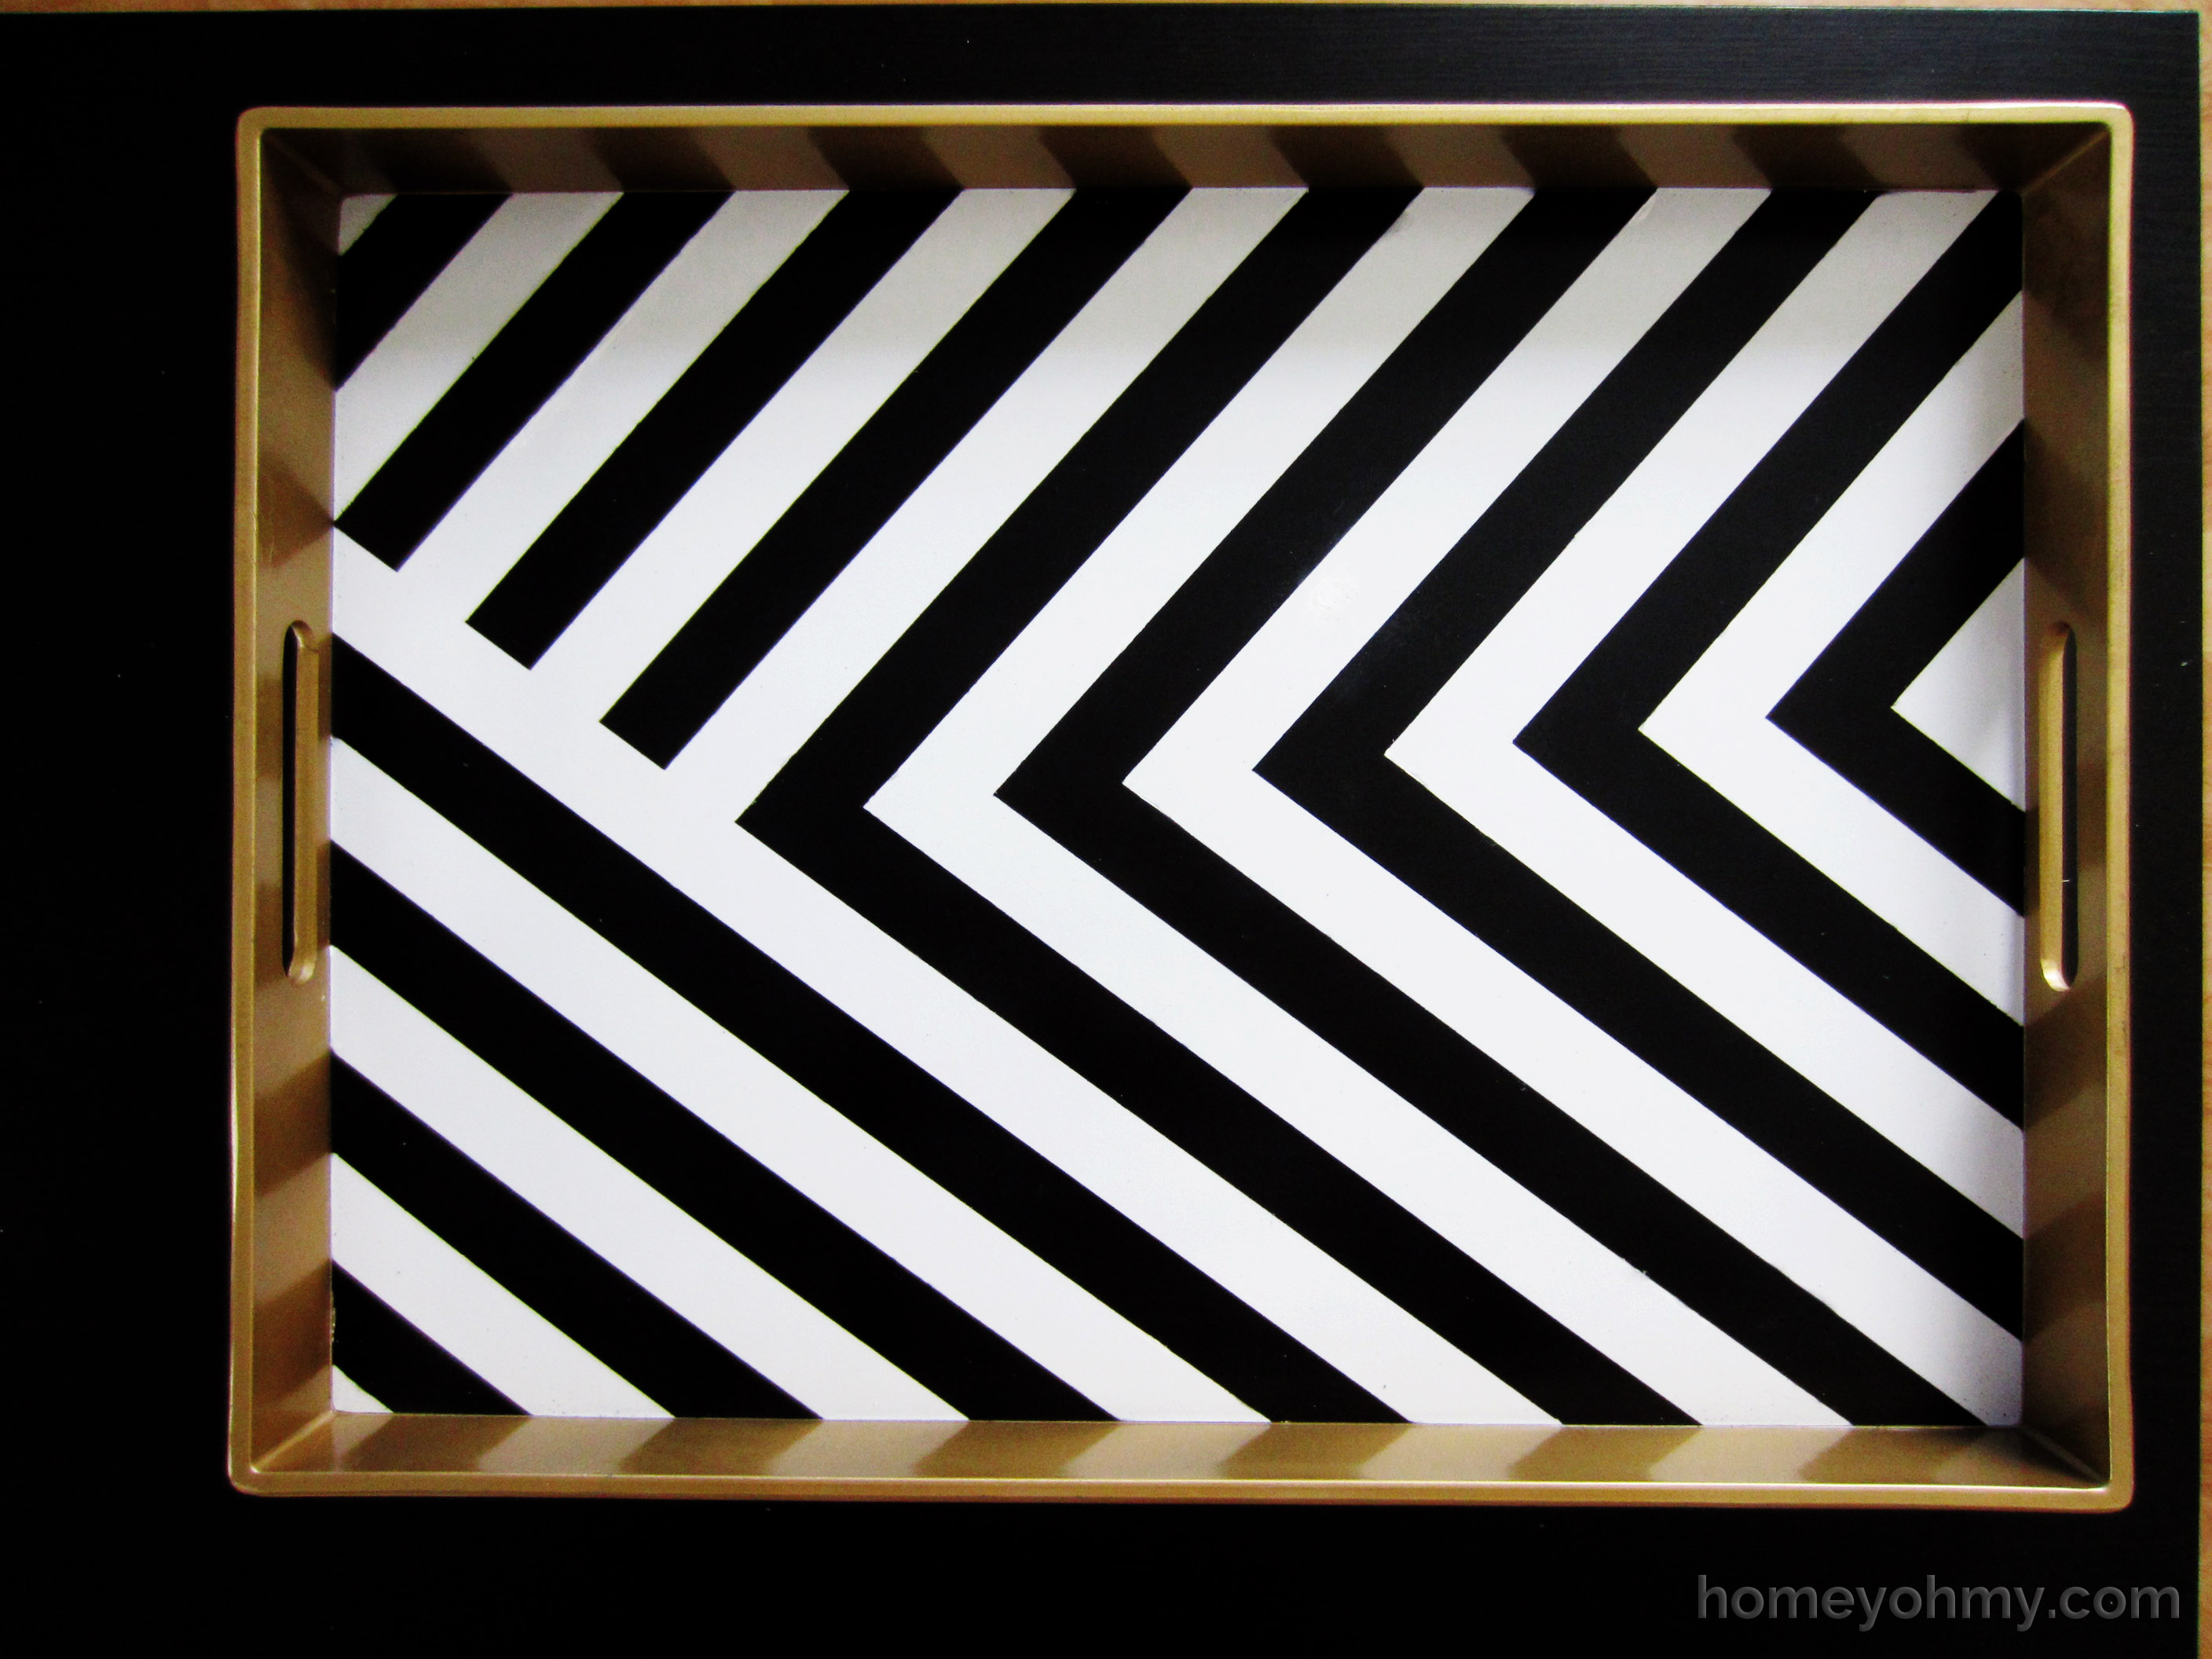
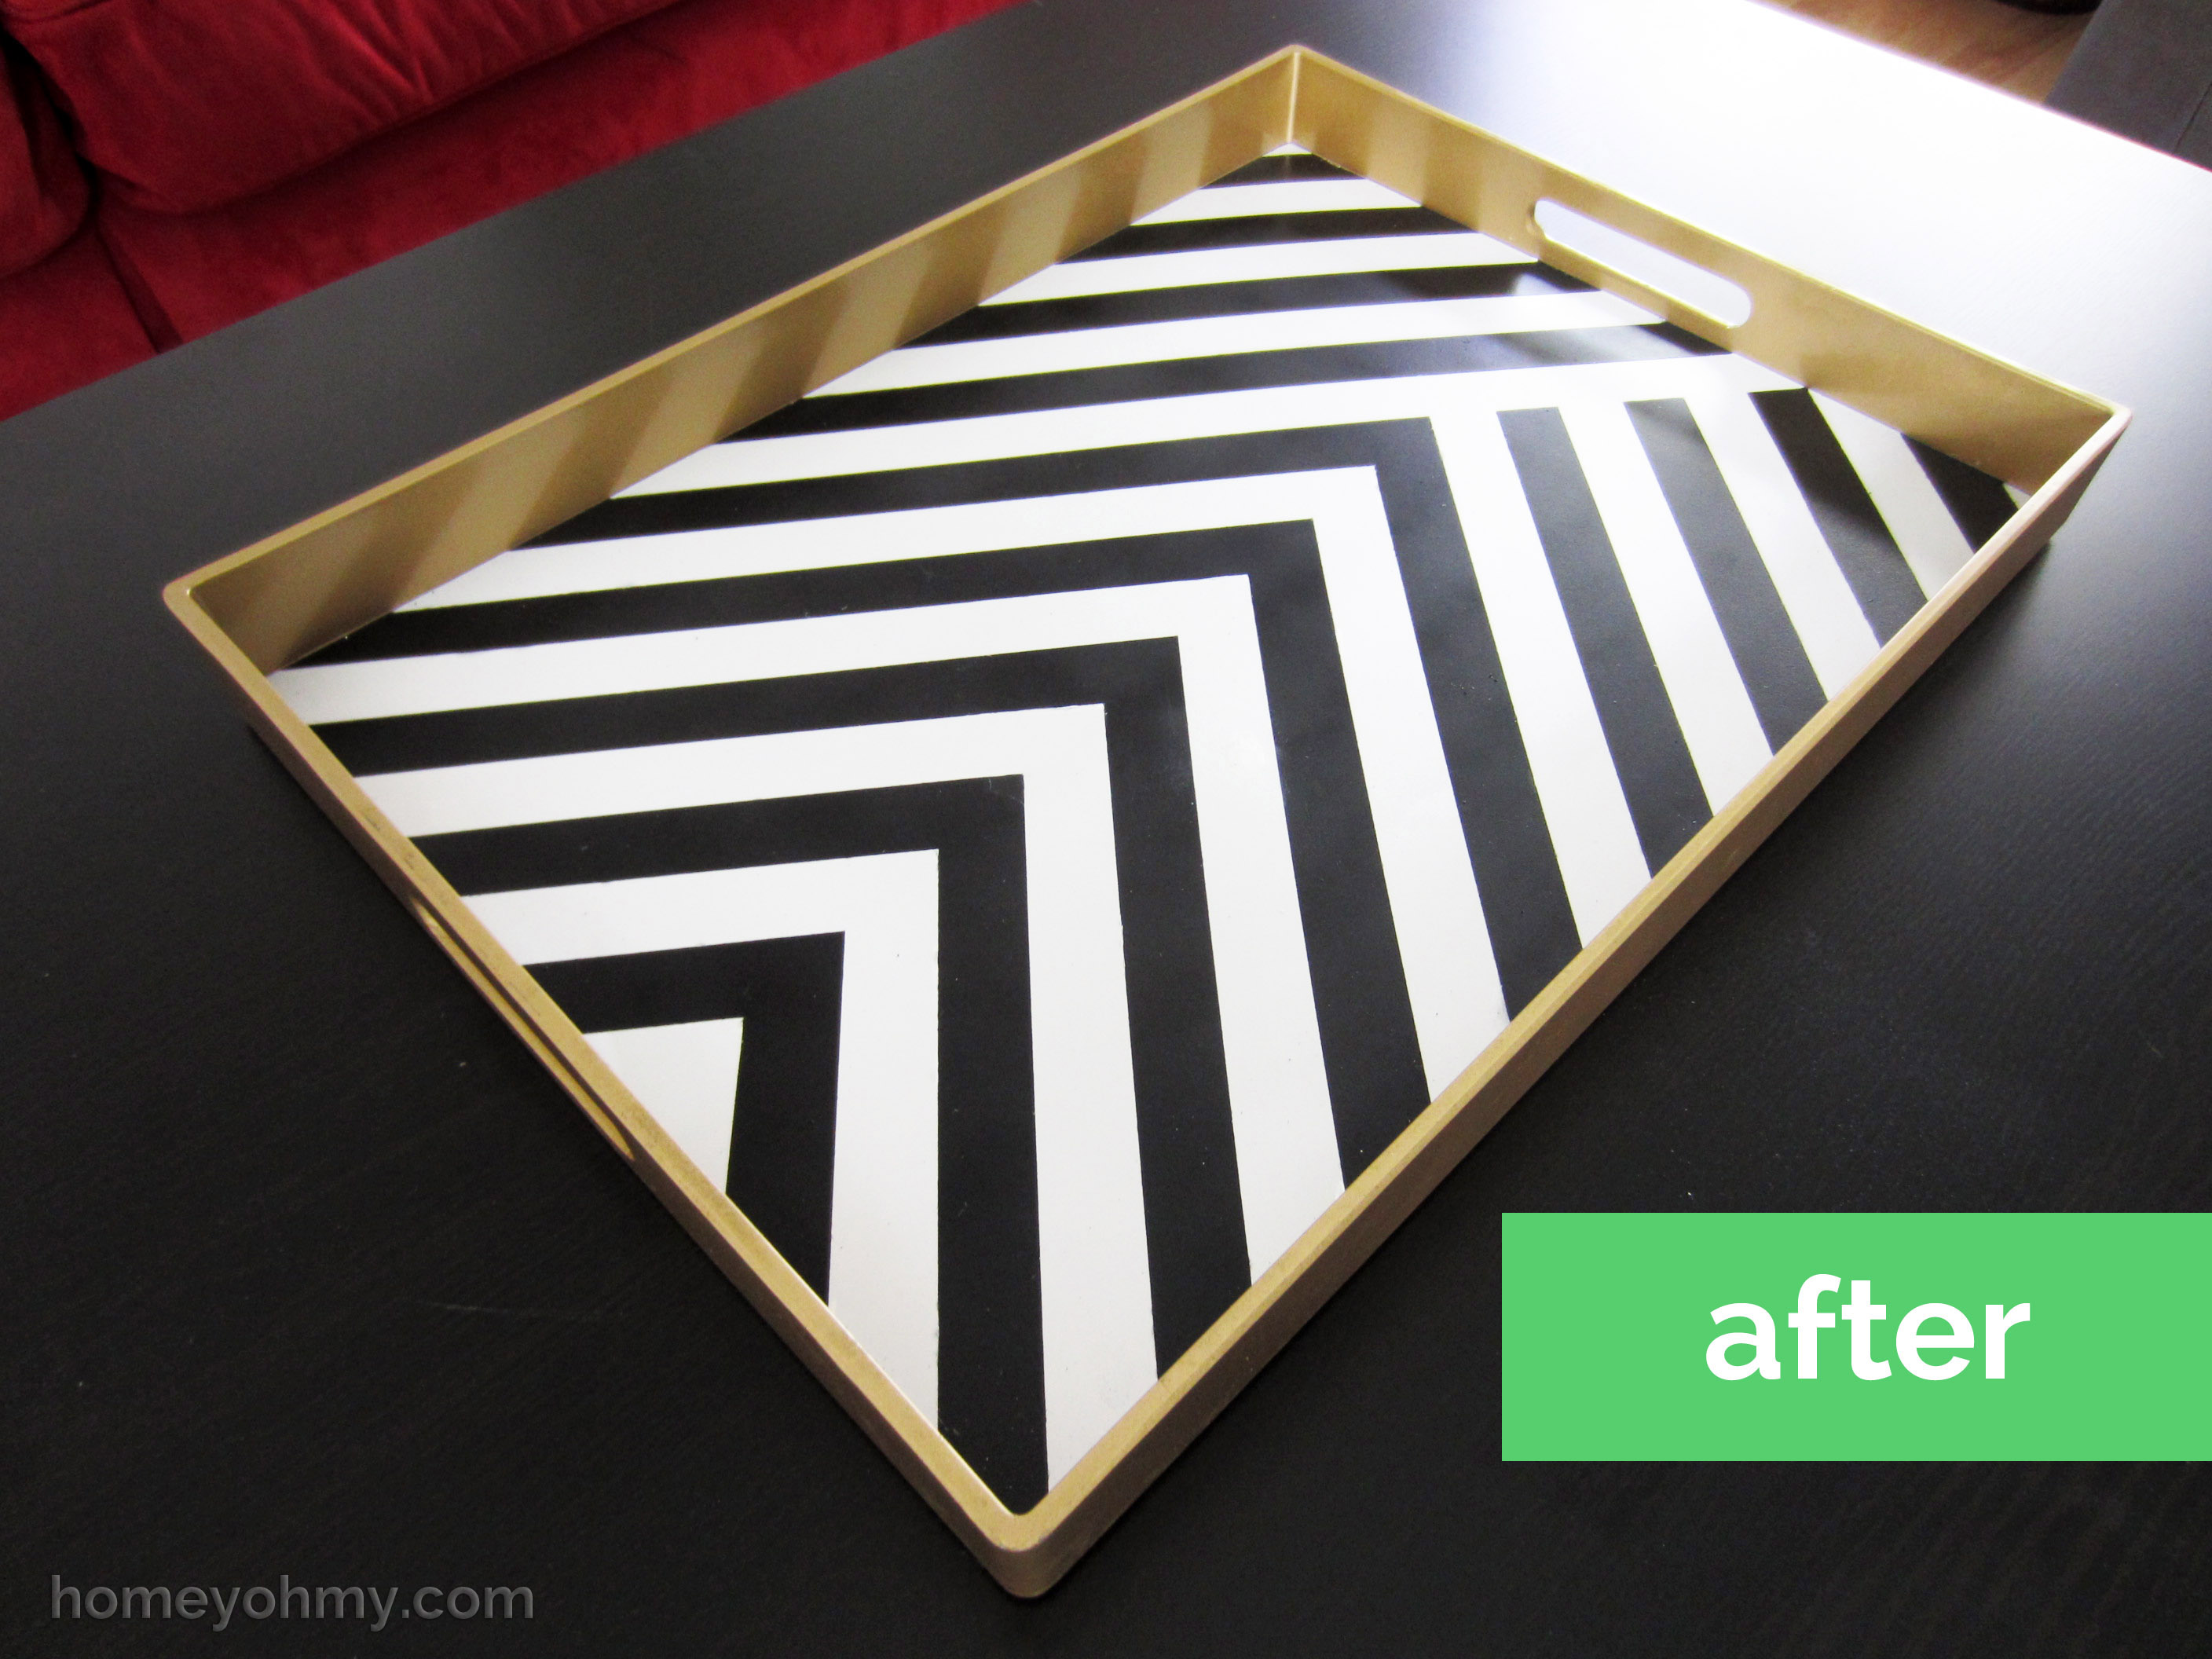
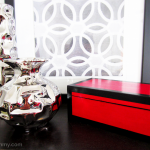
The big reveal! By far the most exciting part.
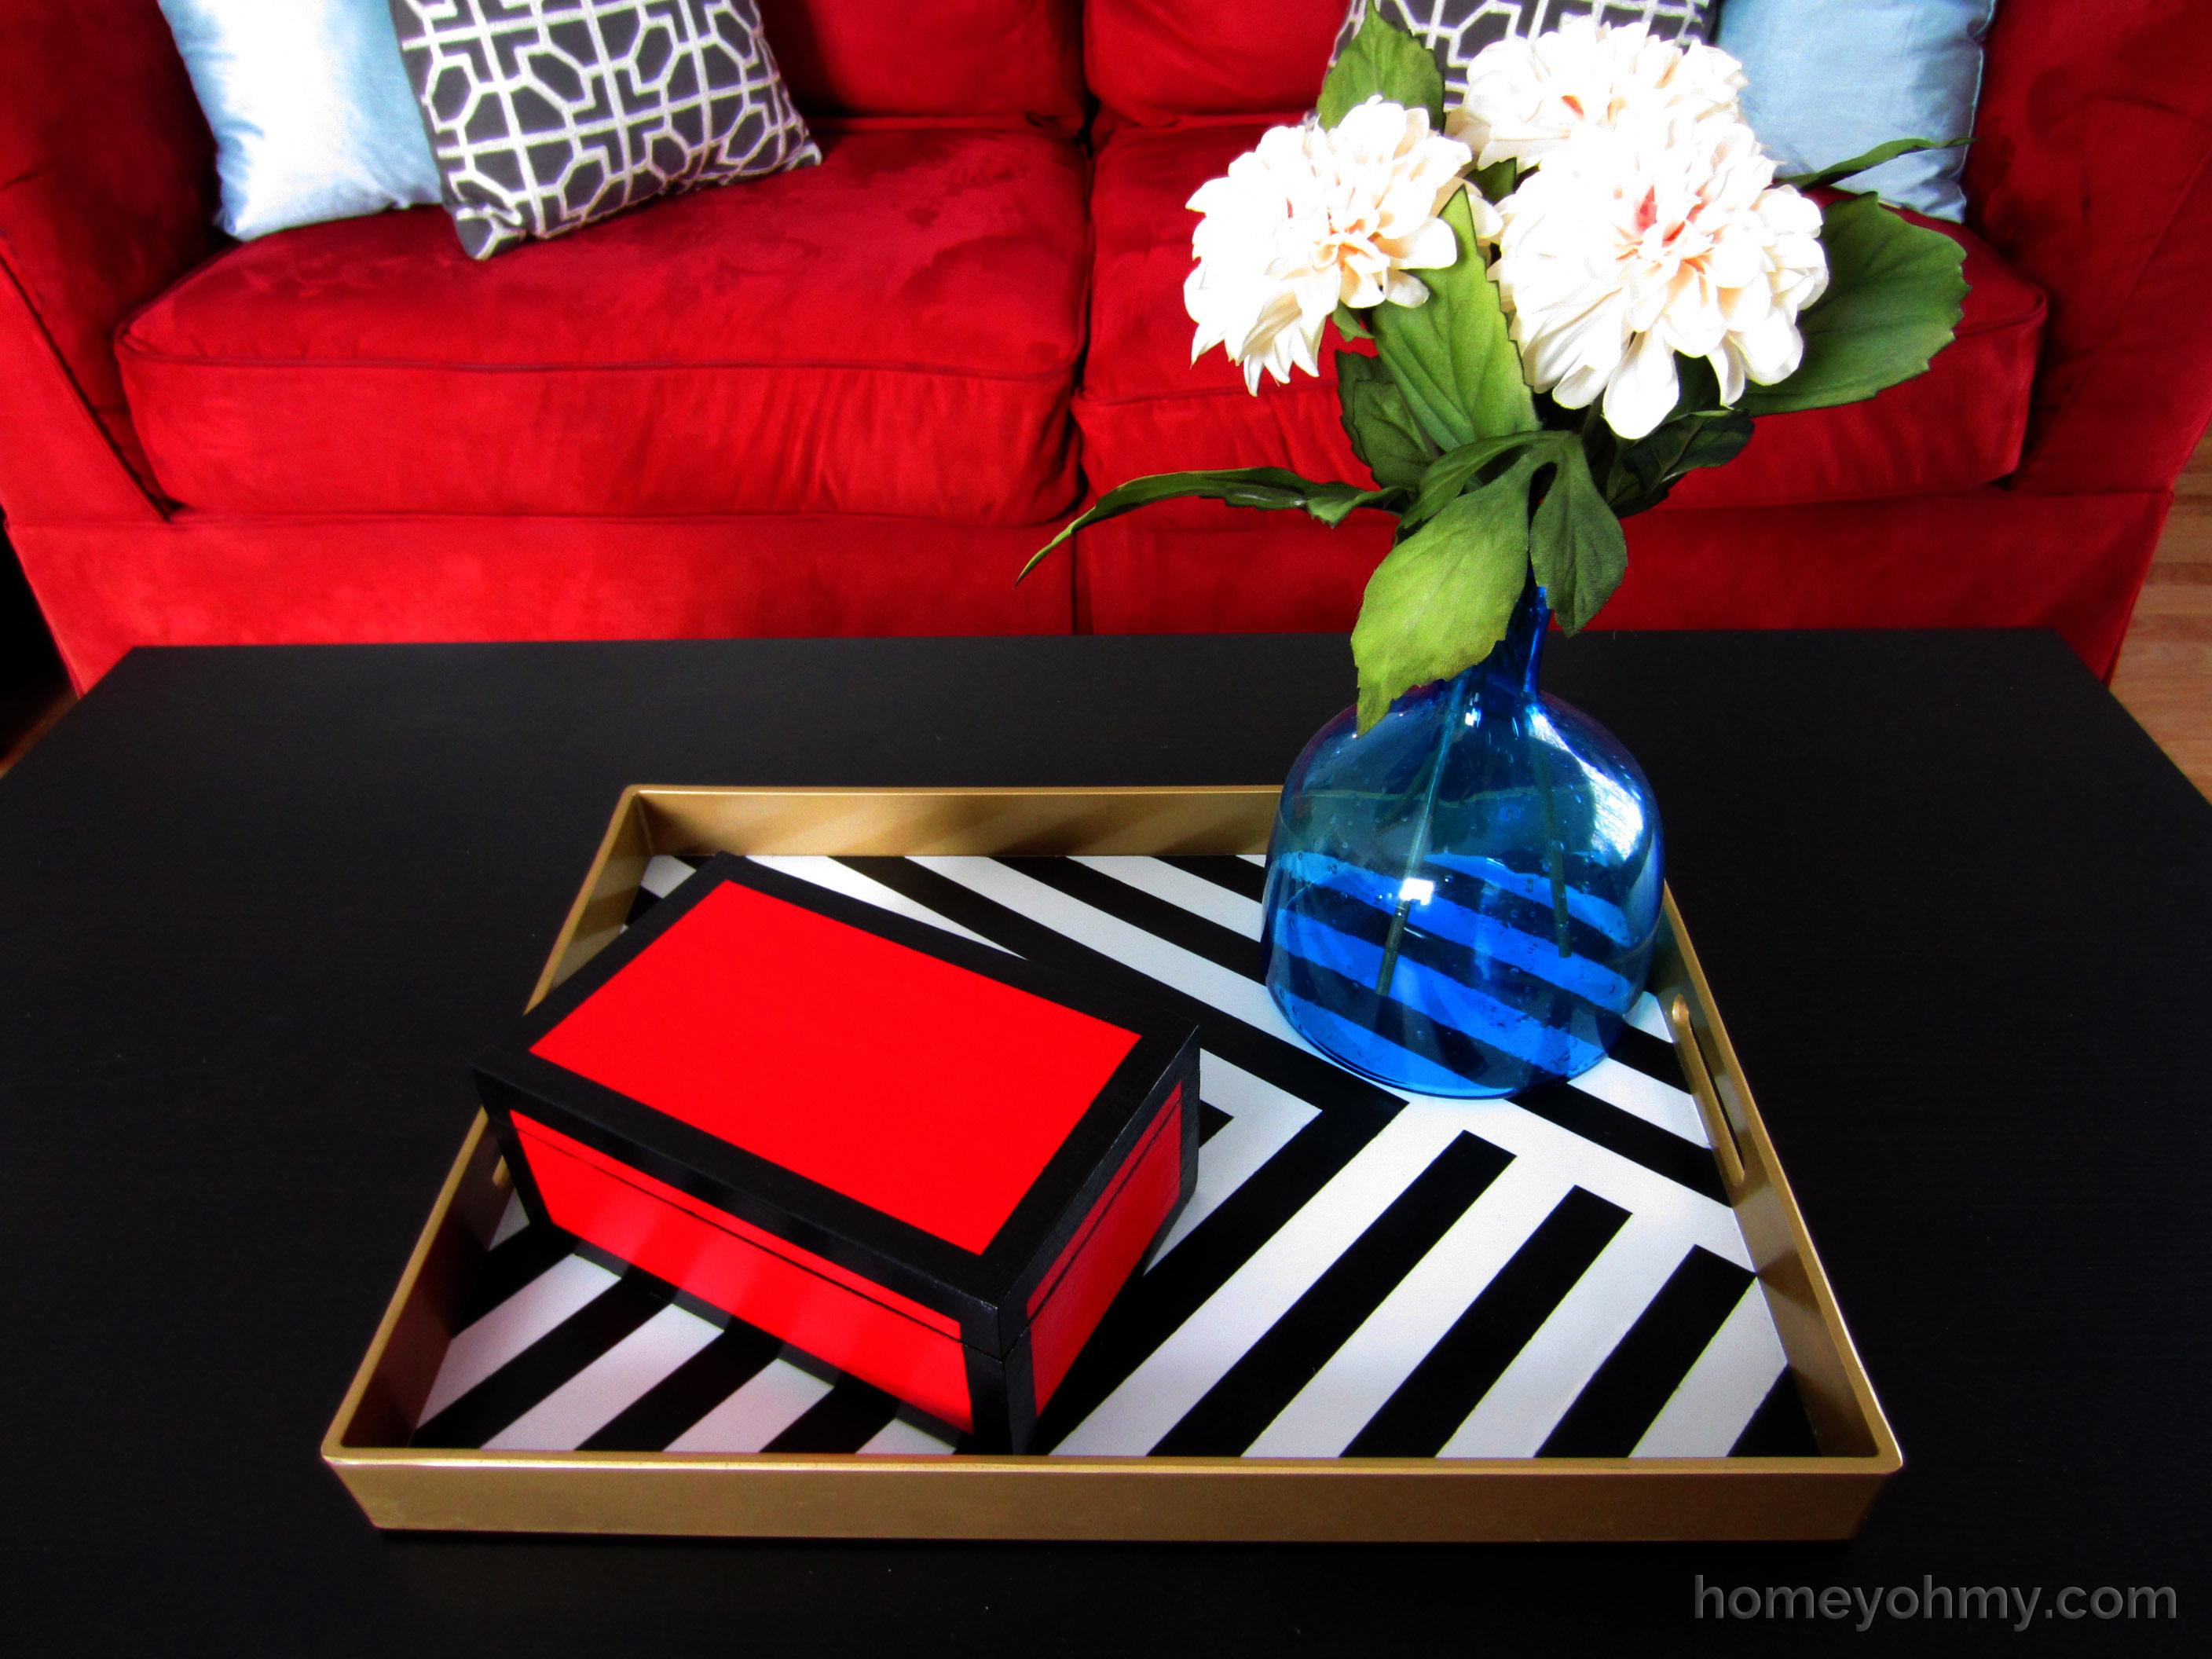
Black, white, and gold, baby. I adore this color combo for how it goes with everything and makes anything look chic. It’s also very fall appropriate. Oh hey, did you notice the cameo appearance by my lacquered box that I recently posted a tutorial on? :P
What do you think of my tray transformation? Do you like my tray better before or after it was painted? I’d love to know what you think.
Thanks for visiting!
Like what you see? Stay connected with me:


This project was featured on:


this is so great! it looks like you bought it that way. I want to do this now…I have a plain wooden tray in my closet right now! I didn’t think about spray paint for that…probably easier.
I love this! It is so adorable! I’m always interested in different projects that I haven’t tried.
Very cute project…such clean lines! Great job! This would be great to link-up to Create It Thursday #22…it’s live now! Hope to see you there!
This turned out lovely. I love the gold with the black and white!
super chic! love it!
Great job! I love it!
Gorgeous!!! I love it black, white, and gold as well. This turned out beautifully!
Love it! Such clean lines are always impressive! And thank you for the Goo Gone tip, I’m going to have to try it :)…it seems like it would save me hours as well!
I love the pattern you chose. It looks so expensive! I’d love if you’d link up to The DIY’ers. http://homecomingmn.blogspot.com/2013/10/diyers-32-and-marathon-weekend.html
That tray looks stunning…nice job!
In LOVE with this tray! So chic.
Stephanie @ http://www.thestyledsoul.com
I absolutely love this!! Fabulous job! Thanks so much for sharing it at Work it Wednesday this week!! Hope to see you back tomorrow:)
Featured you today at Work it Wedneday! Hop over to and grab your button and bring some more of your beautiful stuff to share if you haven’t already:) Have a great day!!
What a beautiful tray! It looks so chic! Love it!
Gorgeous! Thanks for linking up!
So beautiful!
Do you remove the tape once the paint has dried completely? or can you remove while wet? I can’t seem to do this simple thing in a neat way..
Thanks, Ramya! And great question. Remove the tape immediately while the paint is still wet. I’ve found that if I let the paint dry completely before removing the tape, the paint will come off with the tape!
Elegant and contemporary. Girl, you are indredible !