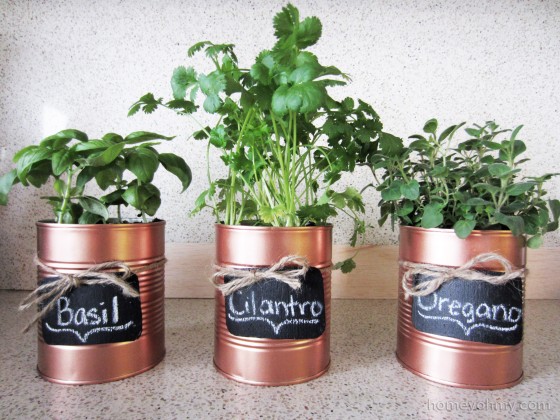
How gorgeous is this copper color??? I didn’t think it was possible… but I may have found another spray paint that I like just as much as my favorite gold spray paint…
Here it is.
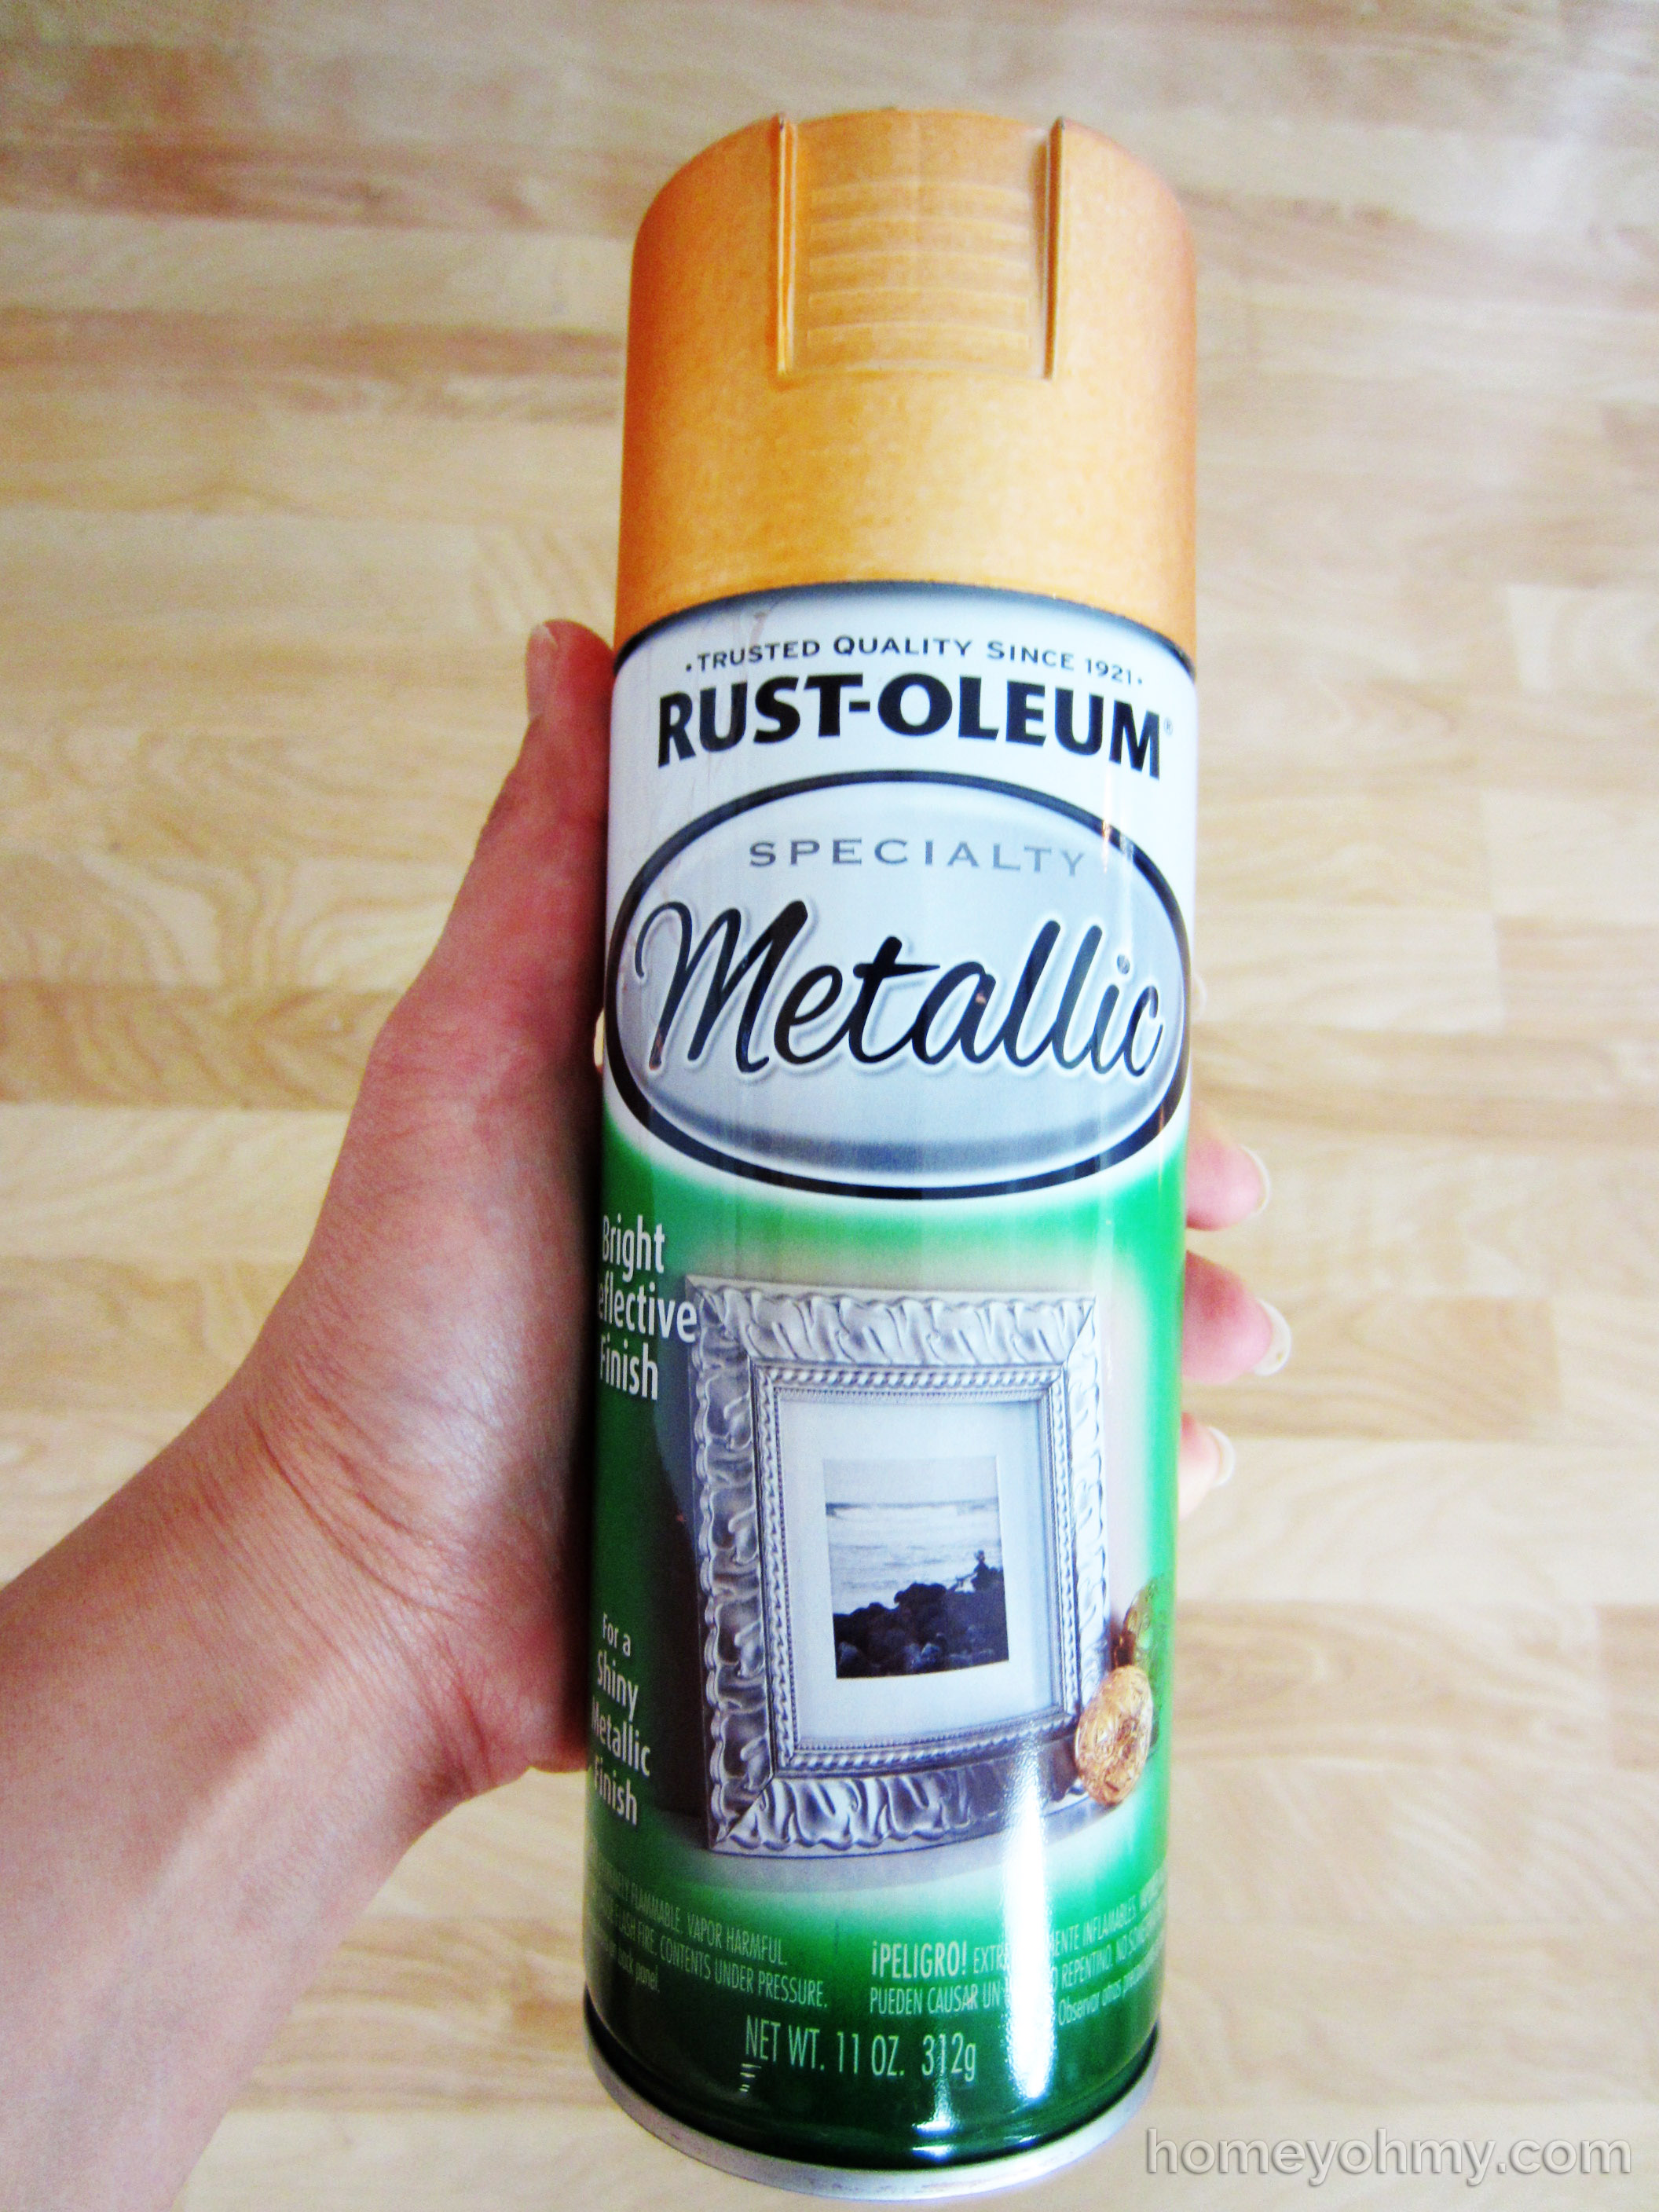
Rustoleum Metallic Spray Paint in Copper. I got mine here (affiliate link). Don’t let the weird orange-y looking cap fool you. This paint has the same beautiful sheen as the gold one that I love so much. I wouldn’t say it’s a chrome finish, but it’s more of a brushed metal look.
Start with some tin cans and remove the labels and any gunk underneath them.
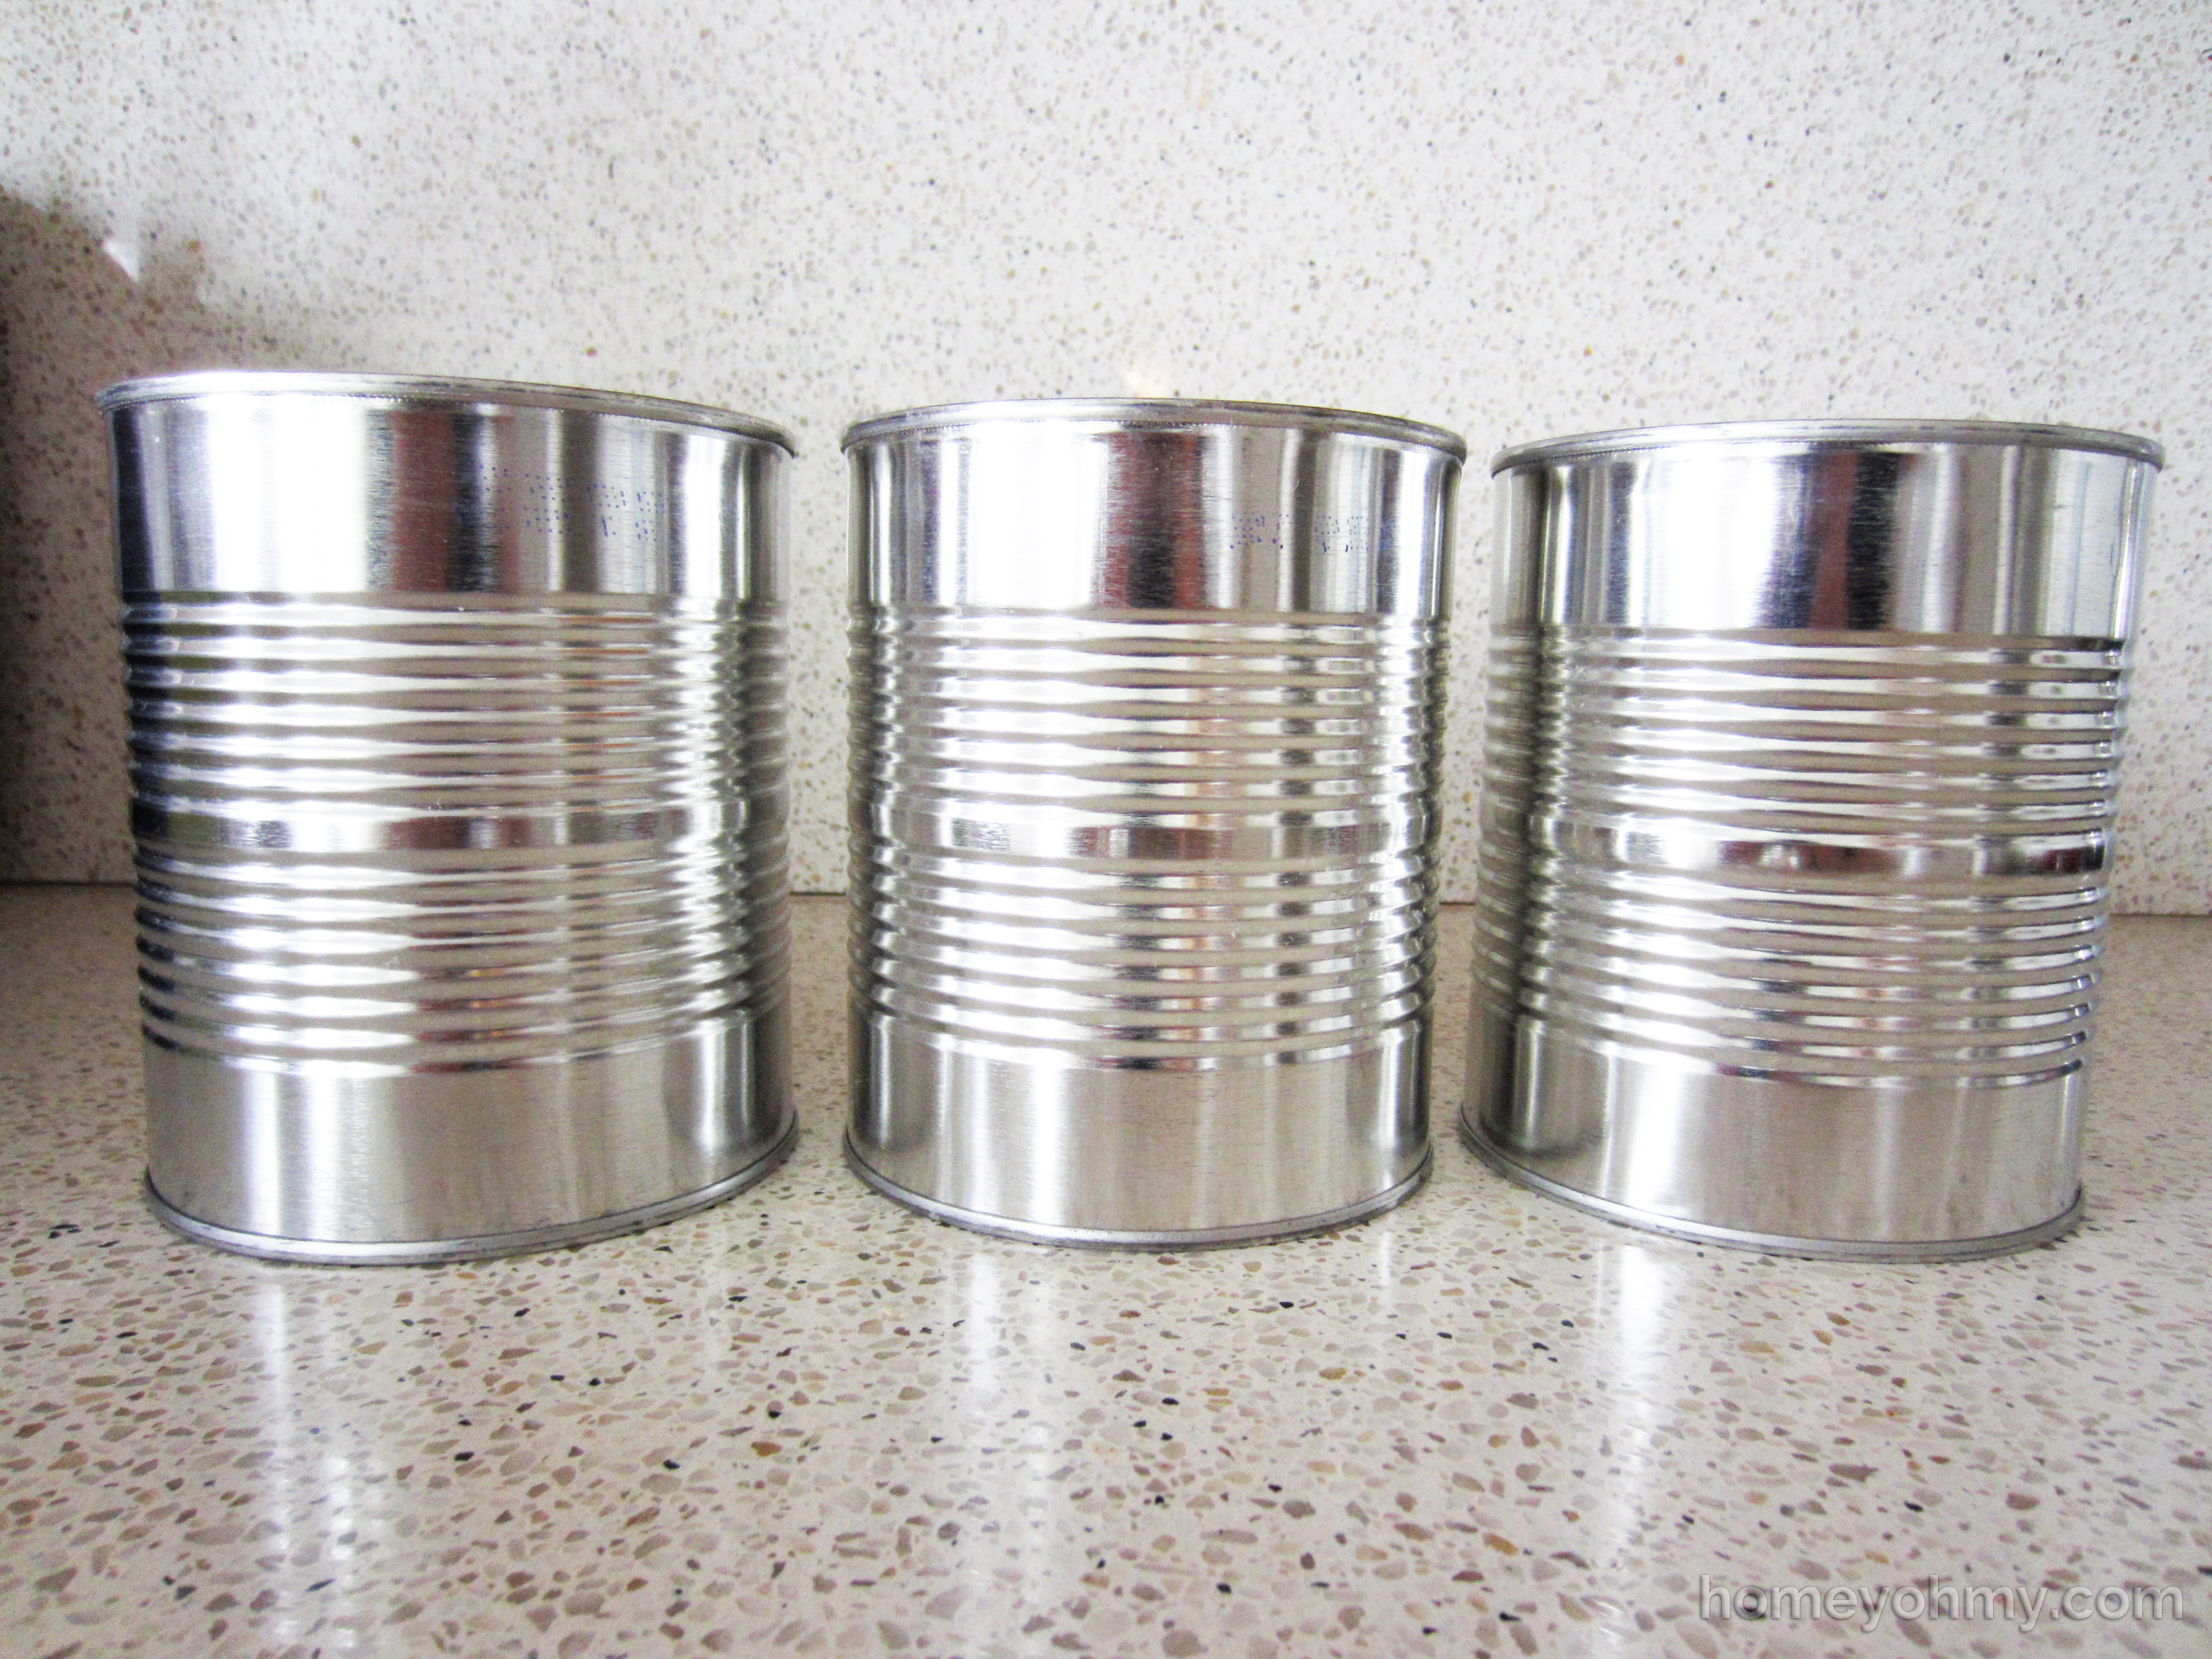
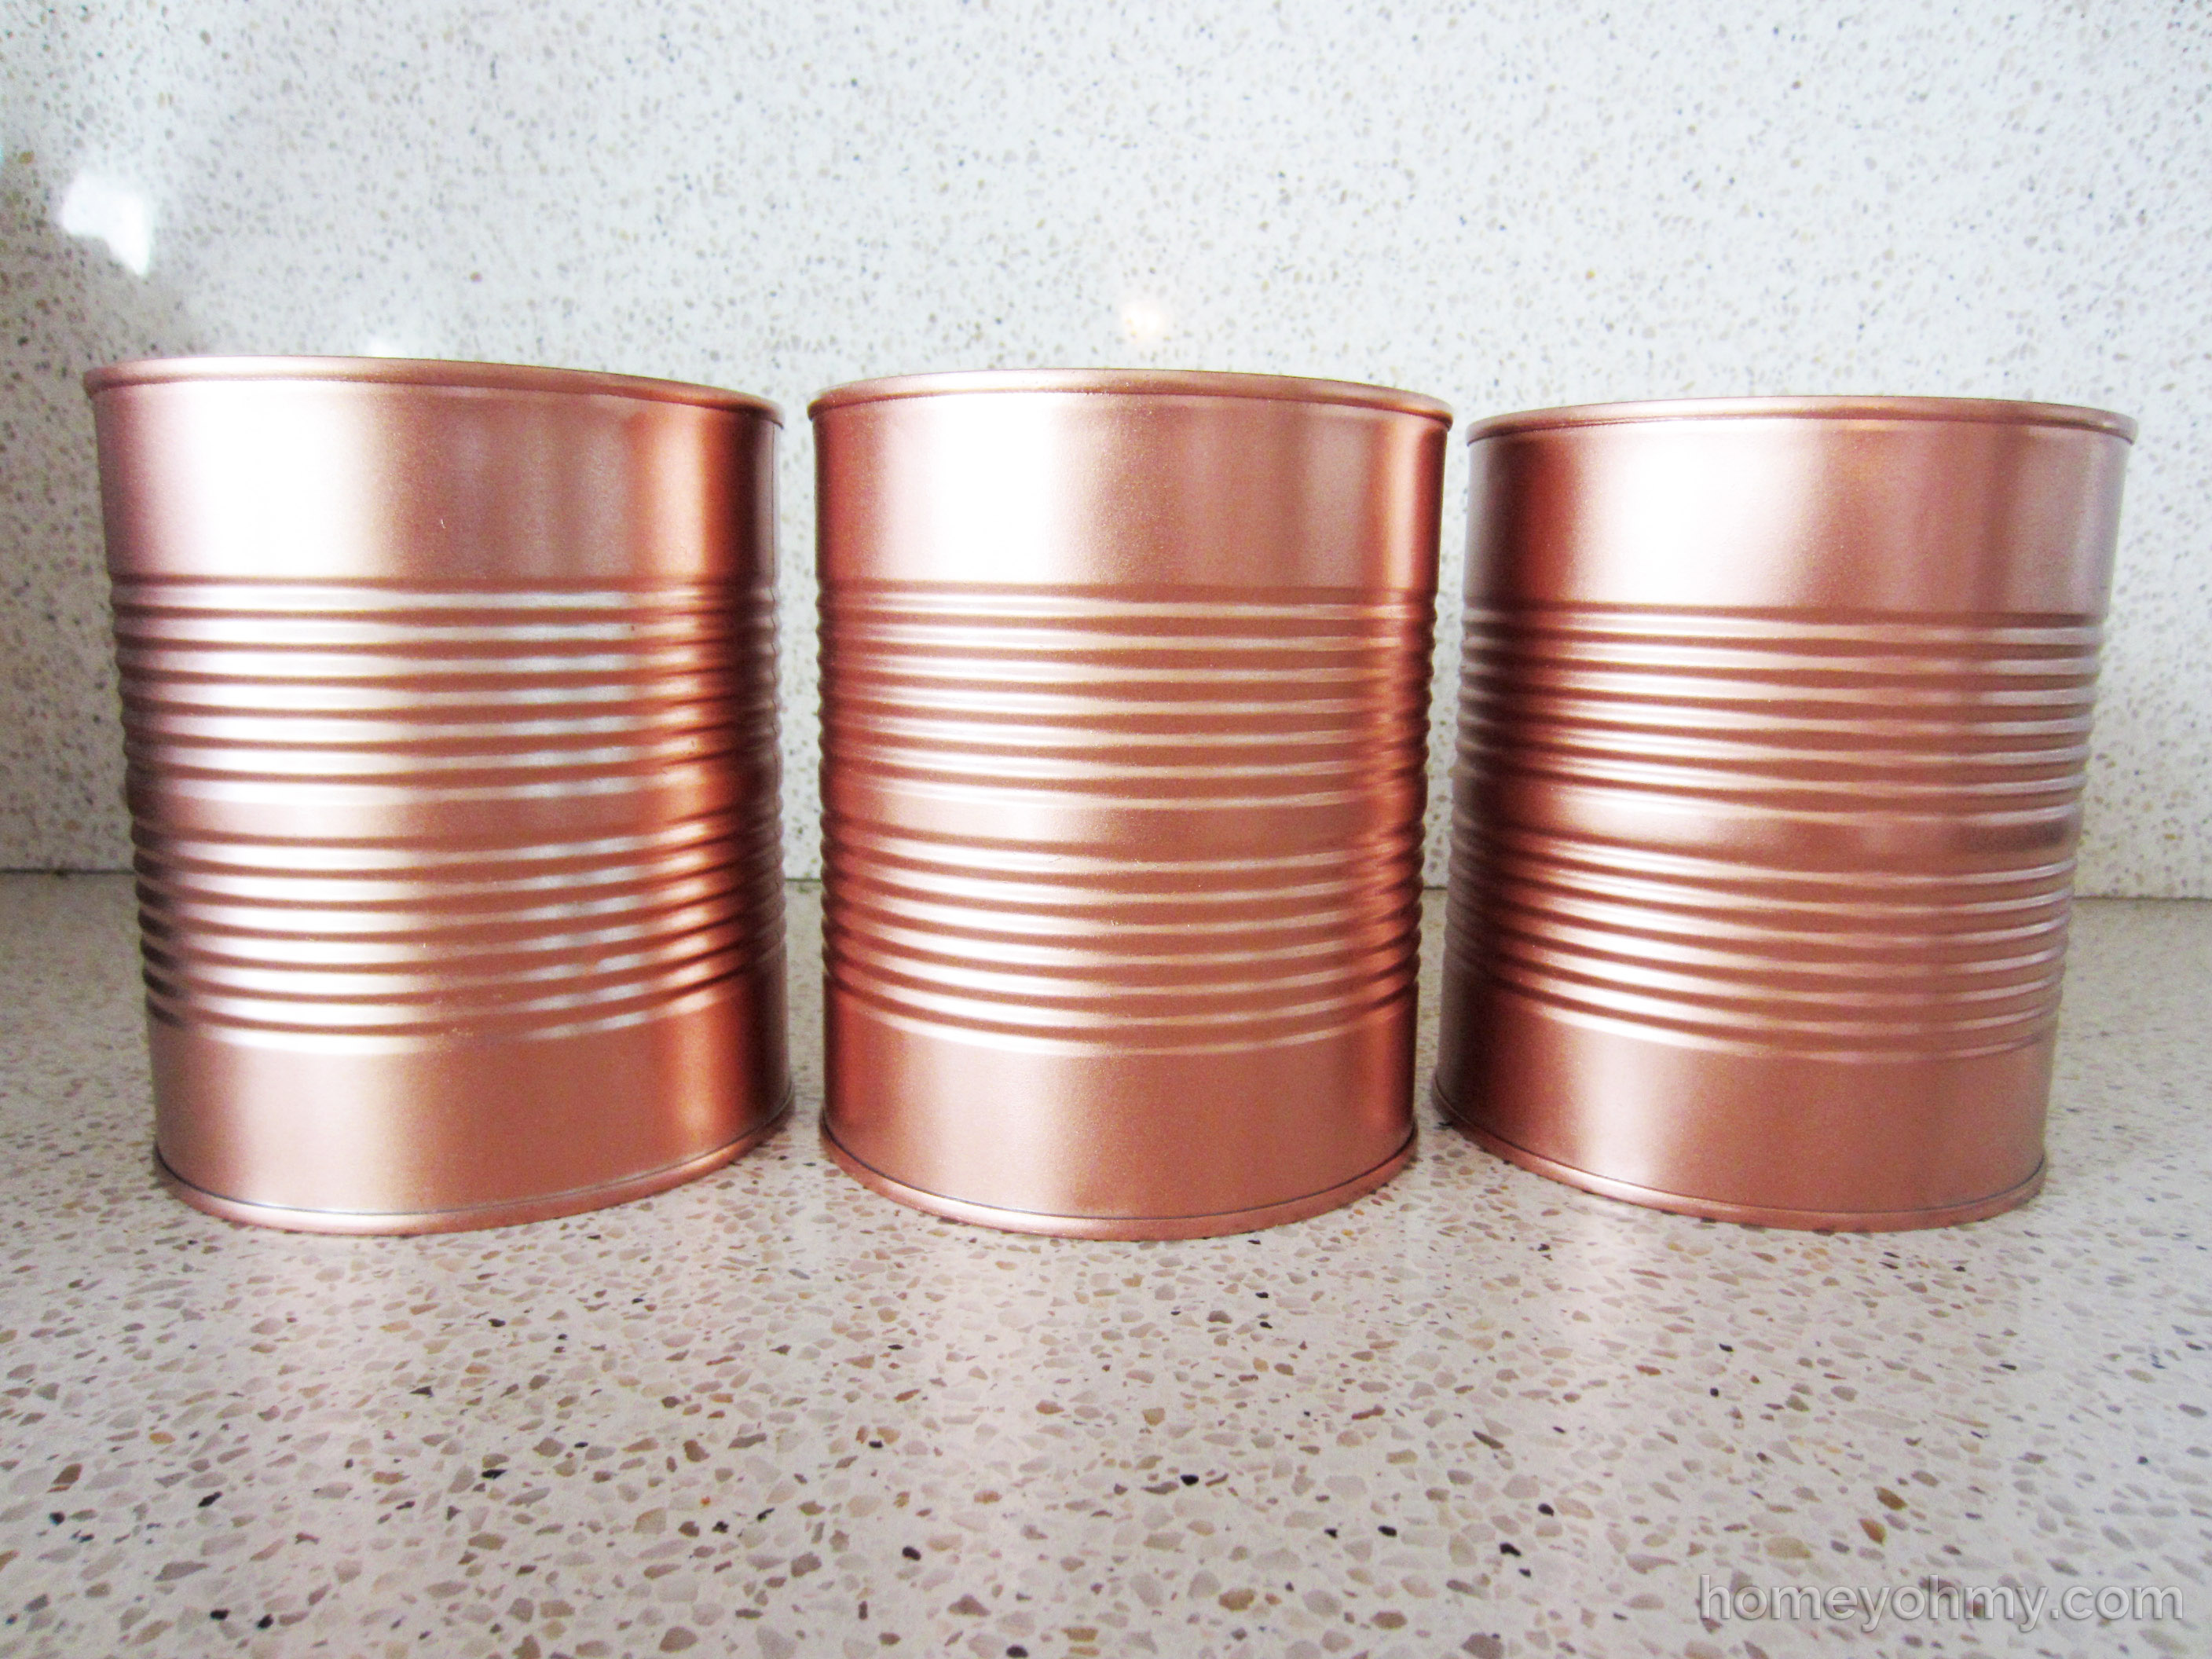
These cans used to hold diced tomatoes and are about 4 inches in diameter each. I actually really like the way they looked originally and you could totally skip the spray painting if you want to keep the silver chrome. If you’re set on making them copper like I was, then place them upside down and spray them in light coats with the copper spray paint. I sprayed about 3 coats. (If you’re new to my blog, then you will not have noticed that I’ve linked my spray painting tips a bajillion times before and I recommend checking them out to review some basics :)).
LOVE.
Ideally I wanted to apply the chalkboard paint directly to the cans, but I realized later that the ridges would get in the way of creating clean lines and writing smoothly with chalk. So, I came up with a plan to make chalkboard tags.
I chose to make the tags out of balsa wood because it’s easy to cut and more durable than something like paper or poster board. The sheet of balsa wood I used was 3 inches wide and 1/16″ thick. Since I conveniently wanted the tags to be 3 inches wide, all I needed to do was measure out the length of each tag and cut accordingly.
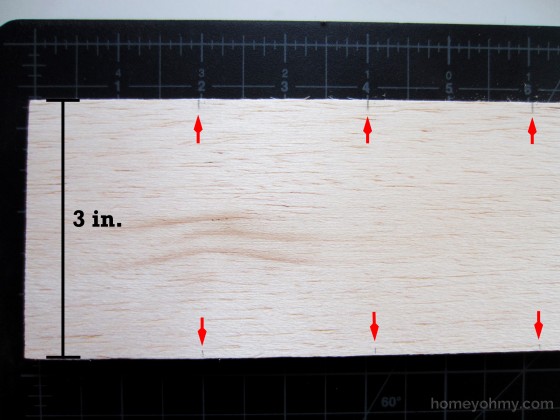
With a pencil, I drew tick marks every two inches (each tag will be two inches long) on both edges of the wood and I did three sets of these for a total of three tags to be cut. Using a ruler, draw a line connecting the tick marks across from each other. These are the lines you’re going to cut along.
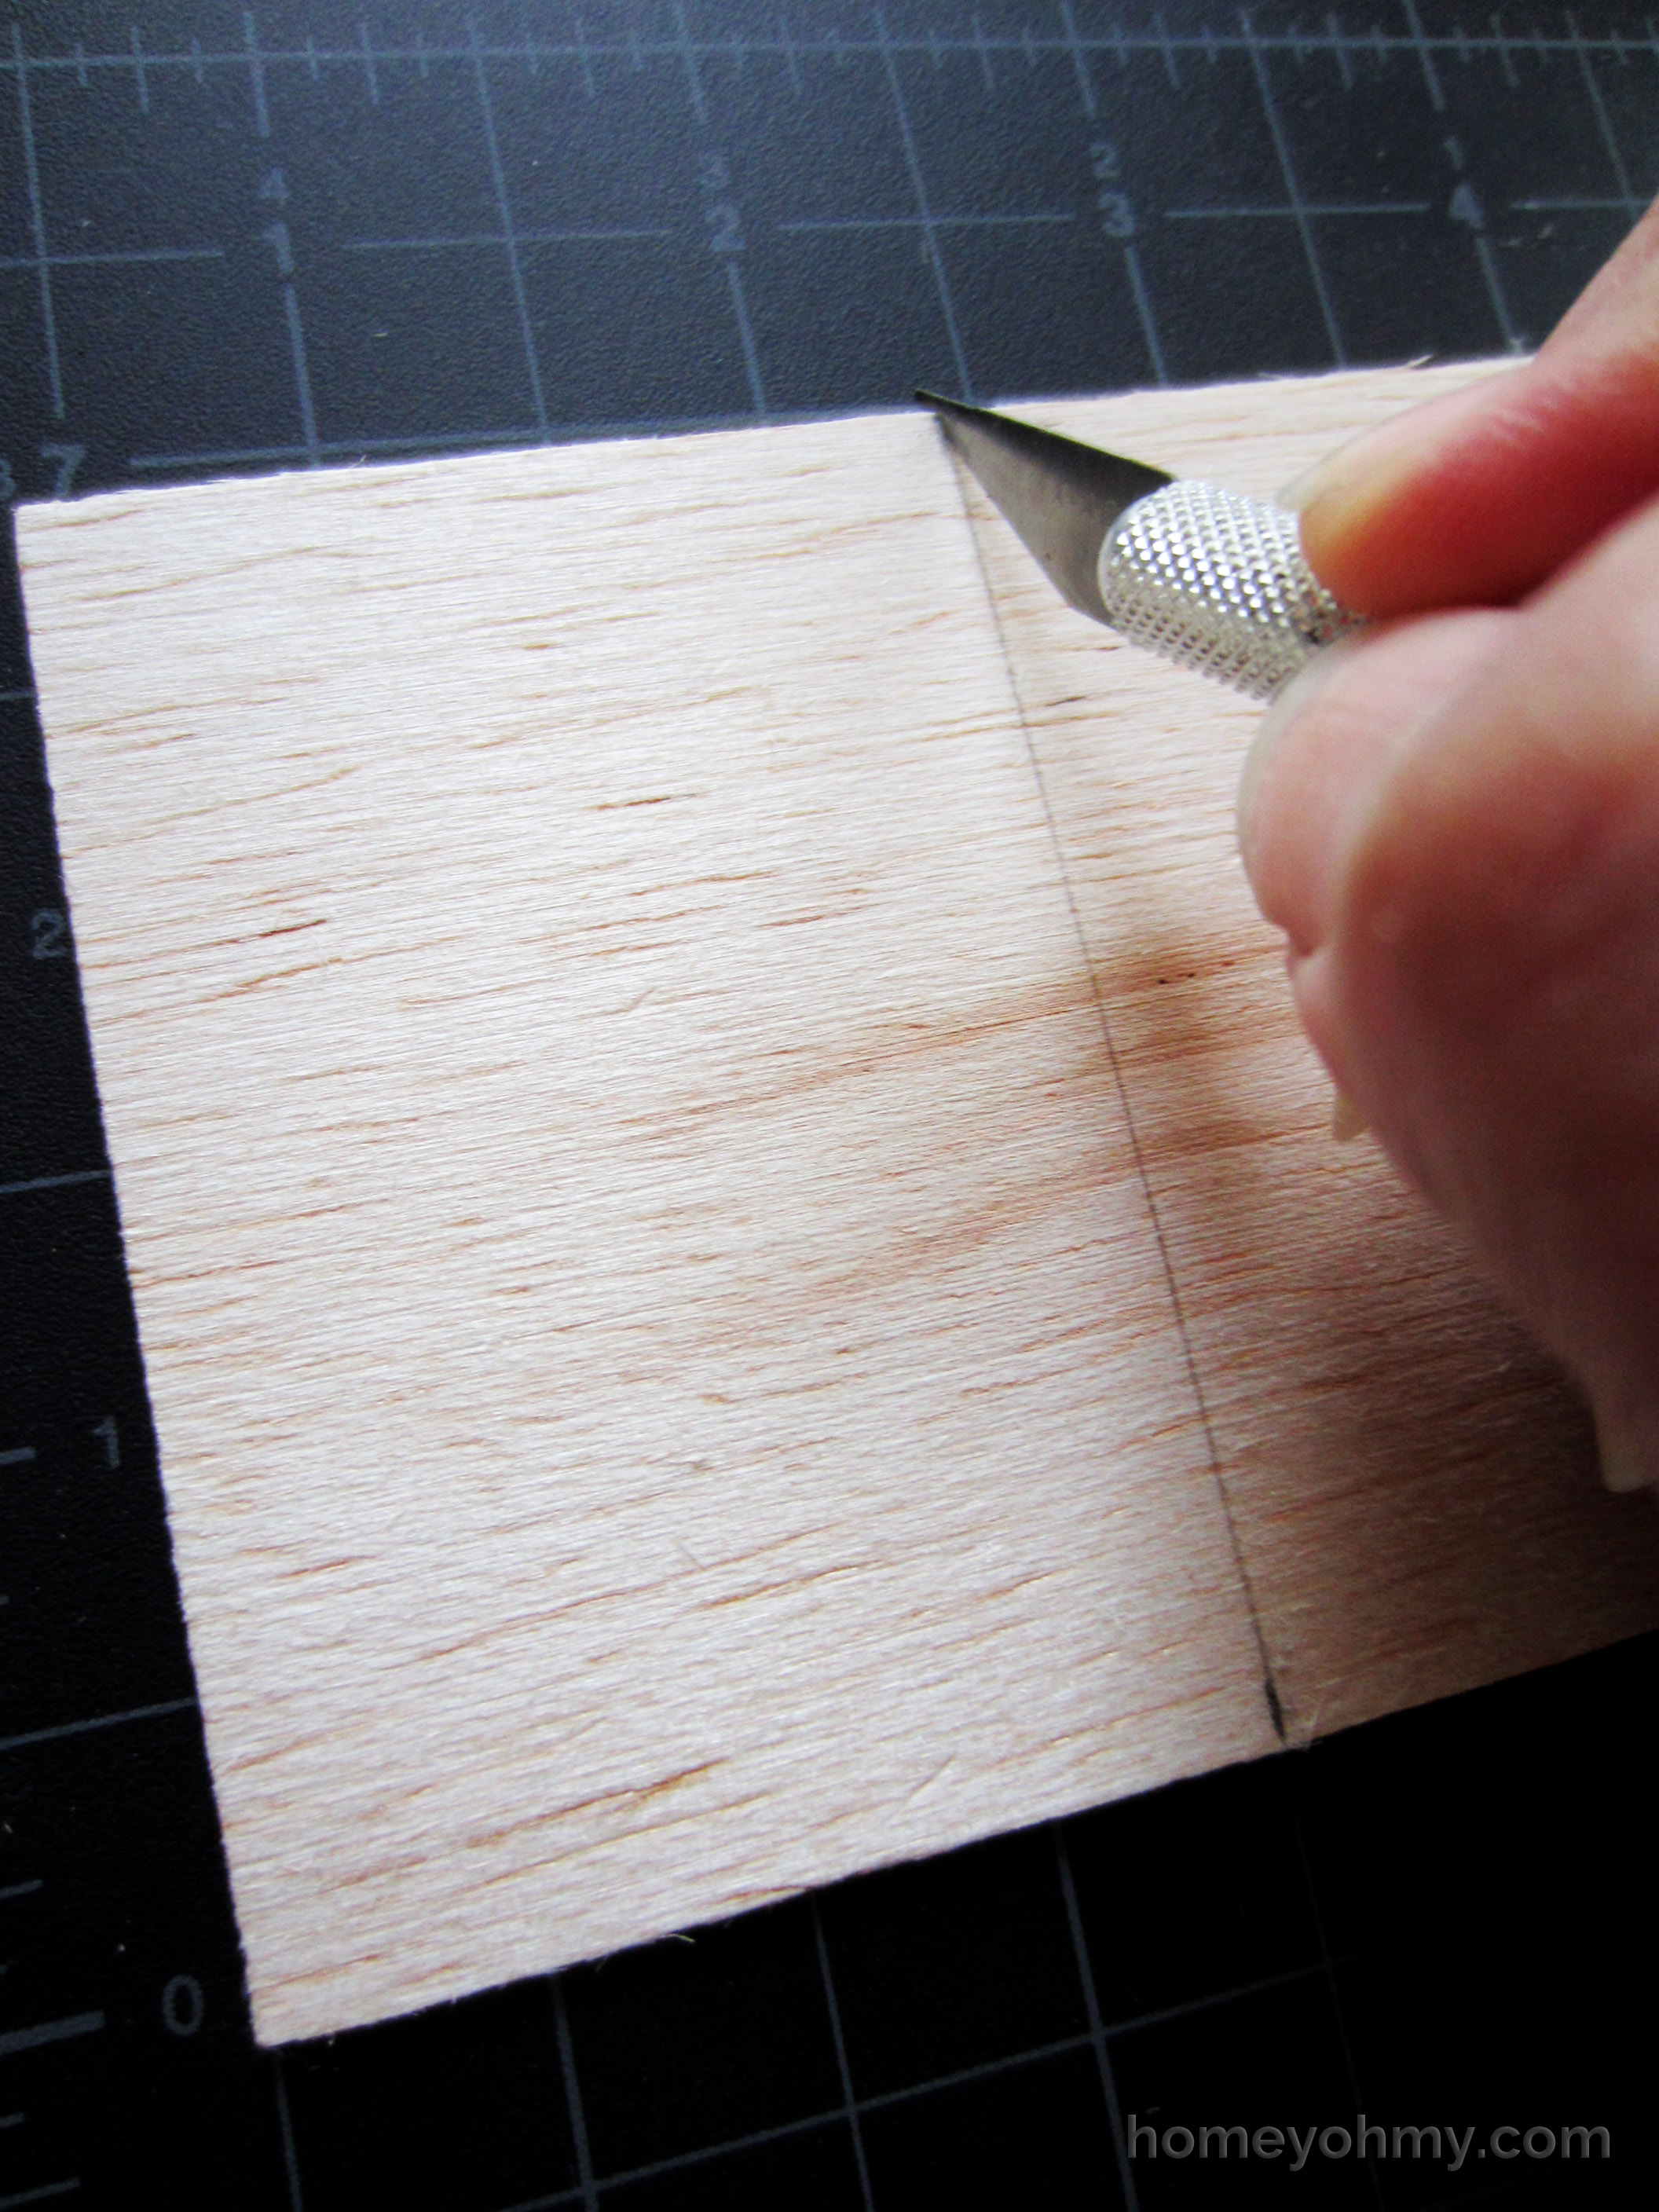
Make sure to work on top of a cutting mat. Lightly go over the line with your X-acto knife first to create a shallow cut, then go over it again with more pressure to cut through the entire piece of wood. The groove will act like a little track that will help keep your knife guided along the line.
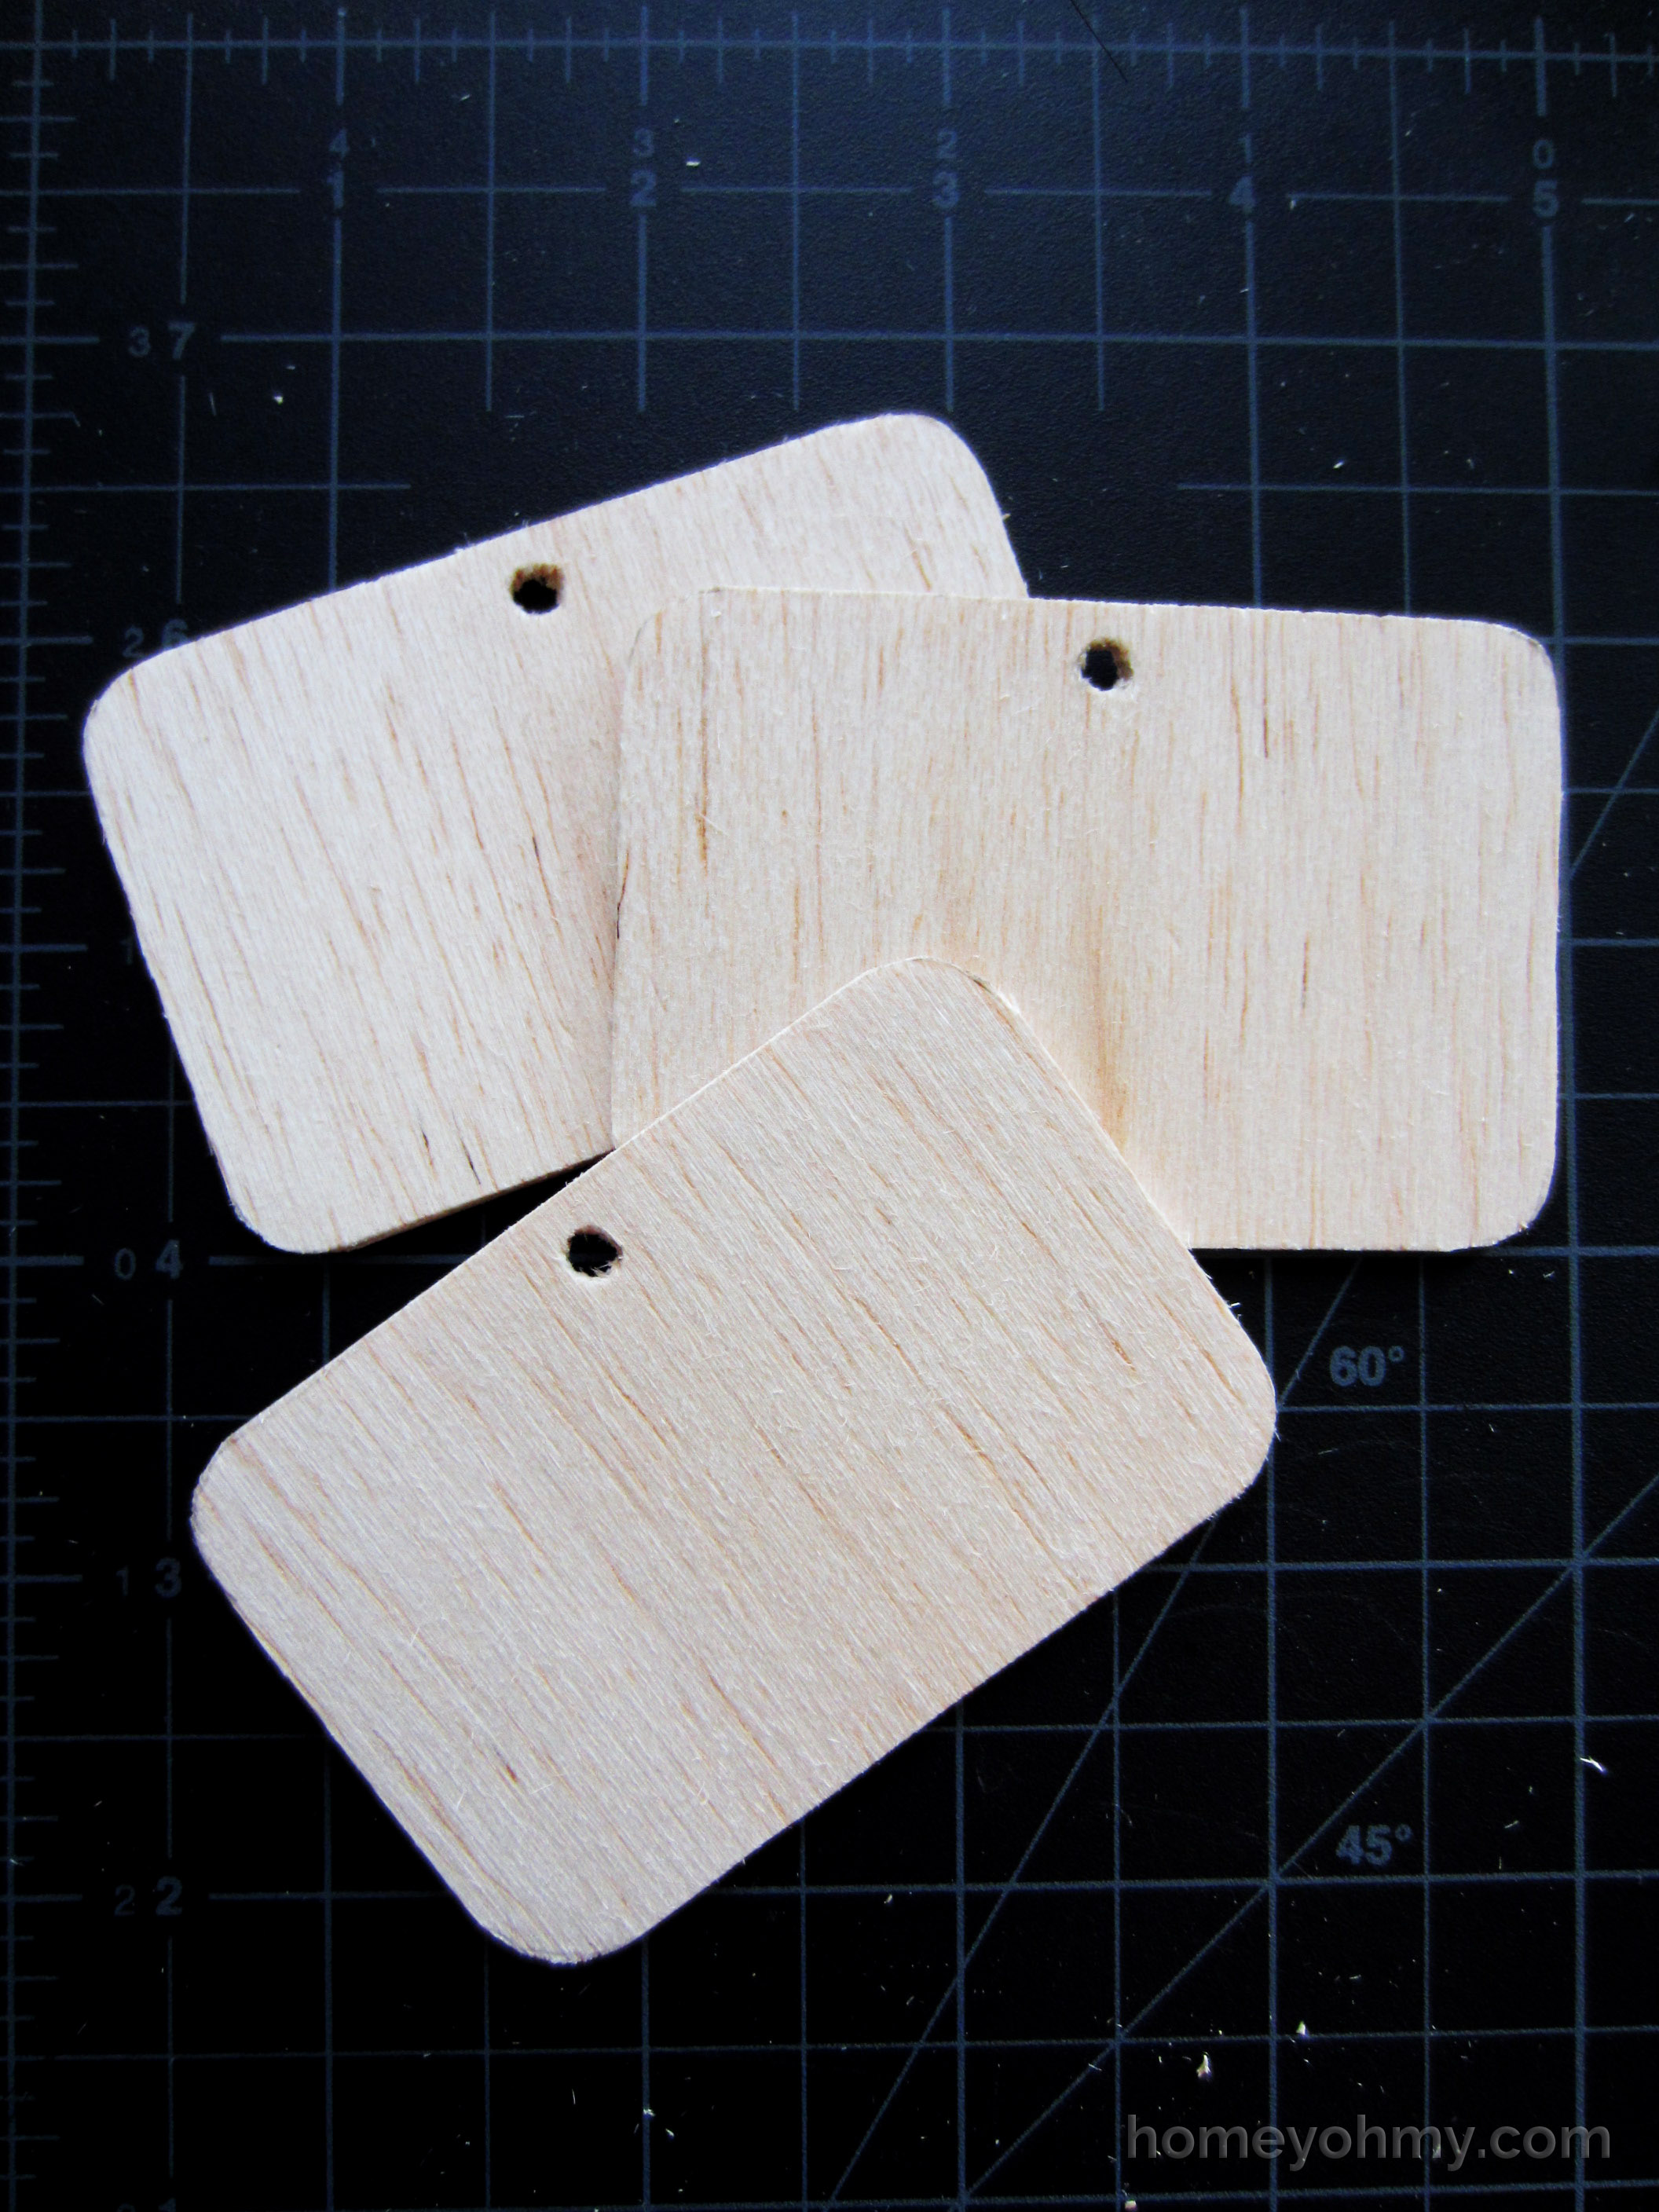
I rounded out the the corners free handed with my X-acto knife and cut out little holes for the twine to go through. First draw a small circle on each tag where you want the holes to be and then cut them out with your knife using more of a poking motion. Keep poking around the circle until the hole is created. Your tags should look something like this.
Paint them with chalkboard paint, allowing each layer to dry 1 hour before adding the next. I applied a total of 4 layers, though the minimum you should paint is 2. I let it dry for 24 hours before rubbing chalk on the surface to prep it for use.
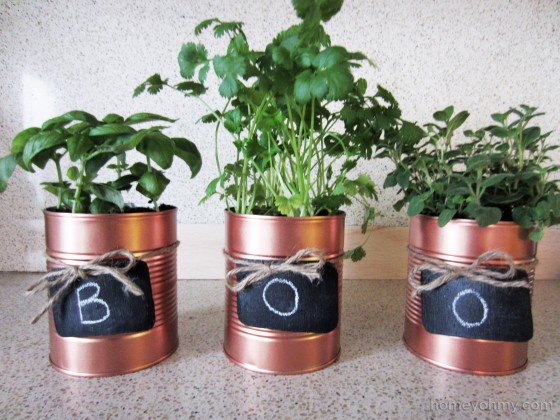
Tie a chalkboard tag around each can with twine, securing it in place with a bow, and you’ll have these *adorable* labeled planters.
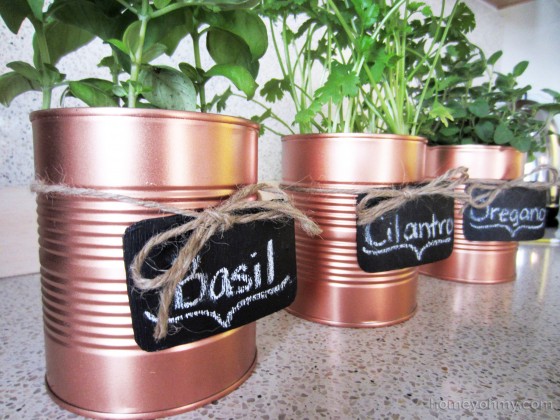
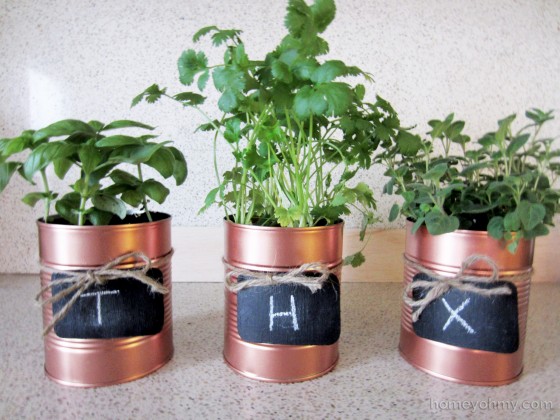
I knew I was going to put my herb plants in these cans and the chalkboard tags are a perfect way to label them. Of course, this doesn’t mean you can’t get creative or festive with what you write on them.
Want some Halloween spirit?
Thanksgiving is around the corner, isn’t it?
Or how about my personal favorite?
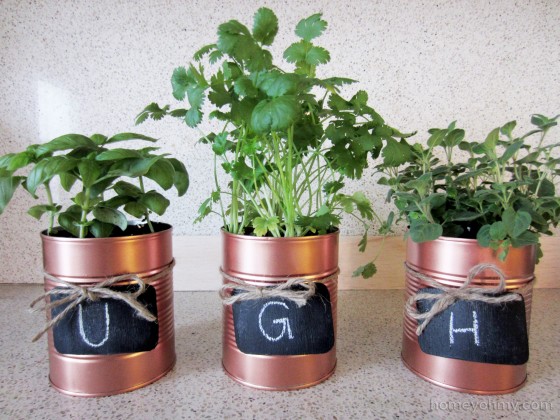
“Ugh” is something I say when I really like something, like UGH so good, or UGH these planters are so cute.
What would you write on the chalkboard tags? Leave me a comment and let’s chat :)
Like what you see? Stay connected with me:


Ugh, these are freaking amazing, I love them!!
That is REALLY freakin cute.
AHH! OMG! 2Q.
Love them. So… you are into spray paint, too? Cool. Your friend, linda
I have to agree on the copper – love it almost or more than gold! I must try this! Thanks for sharing!
Wow I really do love that paint color! I’m pinning it now. I have some picture frames that I have been wanting to spray paint. Thanks for sharing!
Just found your blog through the Best of the Weekend Party. I love these copper planters and I can’t wait to read more of your blog because I love all the table arrangements and decor ideas. Have a great weekend :)
Amy, these are just beautiful and I love them!!! Thank you so much for joining us and sharing at Best of the Weekend! Pinning and sharing this weekend! Have a happy Saturday and a great weekend!
Those looks amazing!! I need that copper spraypaint asap! And your chalkboard labels are adorable :)
These are so cute! I’ve got a greenhouse window in the kitchen but can never seem to find what I like to keep in there. These would be a perfect idea! Love the copper and the chalkboard labels. Ugh.. so stinking cute! ;) Thanks for sharing!
I have an empty space on my kitchen counter and this project will be just the thing to fill it!!!!!!!!!!!!!!!!!!!!!
Love these!
These are SO cute! Great idea.
Oh my word…these are too cute for words!! I have actually been collecting little tin cans like this so I can drill holes and make luminaries that say BOO…but those may just need to wait til next year (or I’ll have to eat more stewed tomatoes) because these are adorable! I’m with you – I LOVE the paint color. They turned out perfect! I really hope you’ll share them with us at our Link it Or Lump It Link Party! http://twoityourself.blogspot.com/2013/10/link-it-or-lump-it-party.html
These turned out awesome! I’m hosting a fall wreath giveaway that you should enter! http://homecomingmn.blogspot.com/2013/10/a-fall-wreath-giveaway.html
These are so great! I love, love, love Rust-O-Leum paint!!!
These look awesome, I was nearly going to ask where you found copper tins from! The power of paint strikes again :) What a great project
Haha “ugh” I love these! They look fantastic and are a great way to grow herbs.
Oh, my! Love them.
Gorgeous color! What a fabulous idea. We’ll be featuring these over at Someday Crafts tomorrow, so come on by :)
Metalic copper spray paint! Thank you
You’ve opened up a whole new world for me. :)
These are wonderful. I adore copper!! I have shared on my fb page – http://www.facebook.com/BeadsBraidsAndBows as part of the Trend Setter series. Thank you for a wonderful tutorial. Lor.xx
LOVE! I will be making these! Thanks for sharing :)
hey, i’m trying to do this but the paint, no matter how thinly i spray it, is dripping off the metal. any thoughts?
Hi Allison! Are you starting the spray off of the can, then sweeping it across? Drips can occur if you point the spray can directly at the surface and spray. A thin layer applied with a swift, sweeping motion should not drip. Let me know if you’ve already tried this, I’m here to help!
Loving the warm copper finish! I’ve heard some people commenting on tarnishing, though – how has the color lasted for you?
Hi! Yes, I’ve noticed the copper spray paint oxidizes over time and starts to get that tarnished look, especially if it comes in contact with water. I would definitely recommend finished it off with multiple protective coats of either polyurethane spray or clear acrylic spray. Either should help!
Darling!! Great Christmas gift idea for people who can’t grow herbs outside year round! I’d write YUM on mine!