 The bulk of my focus lately has been on seriously editing my home, meaning getting rid of things that no longer spark joy and changing things up the way I’ve been saying for “forever” that I’d do. I’ve kept around most of my decor DIYs, and sure, I came to terms with how some just aren’t exciting me anymore. It’s what’s making me look back at past projects a lot lately, thinking about what I still like about them, what I don’t, or how I’d do them differently now. Like these fabric lid boxes I made a while back…
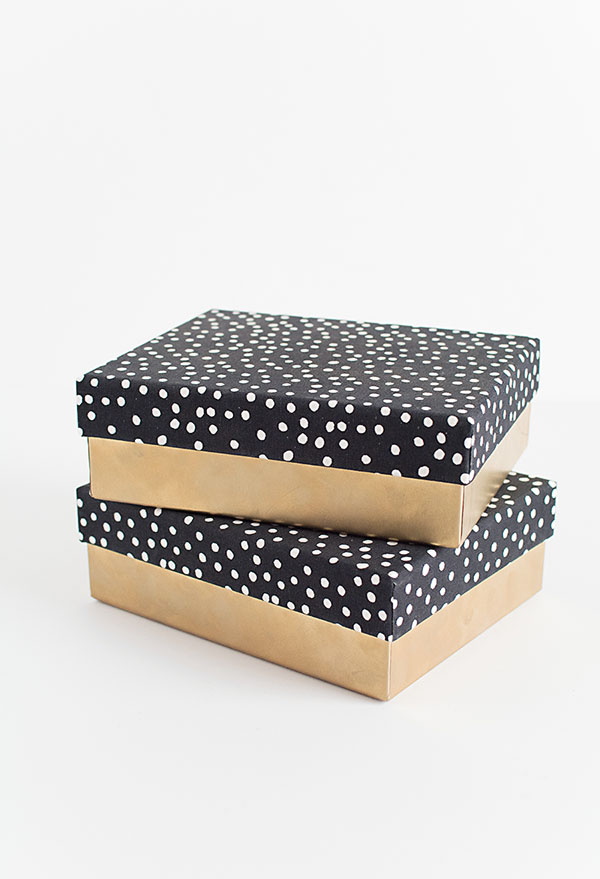 I still think they’re really cute, but I’m craving change for more minimal designs (you’ve noticed this I think!), so I did something about that. We’re re-covering boxes today, guys.
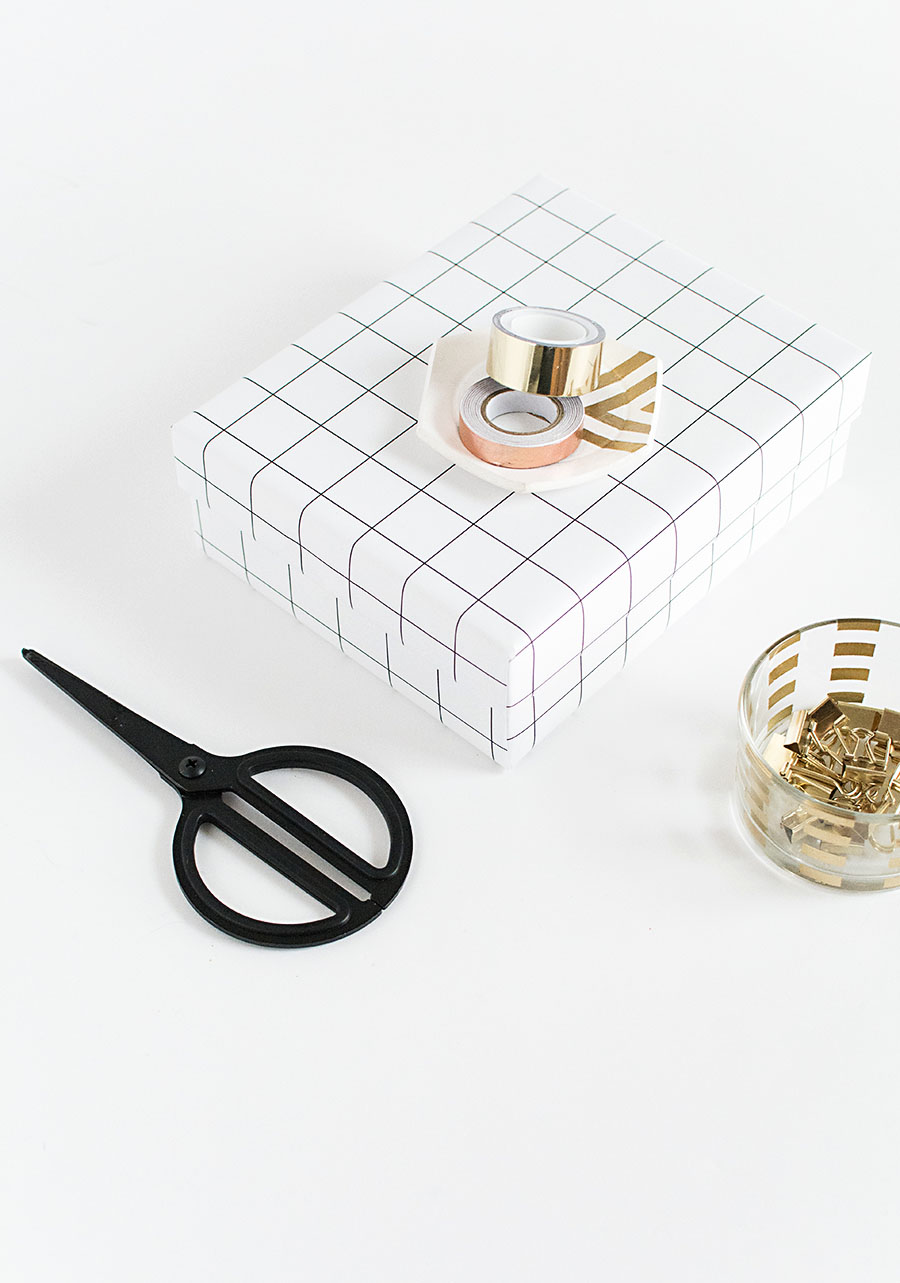
Materials:
–fabric (or wallpaper!)
–Mod Podge
–foam brush
-scissors
-pencil
-ruler
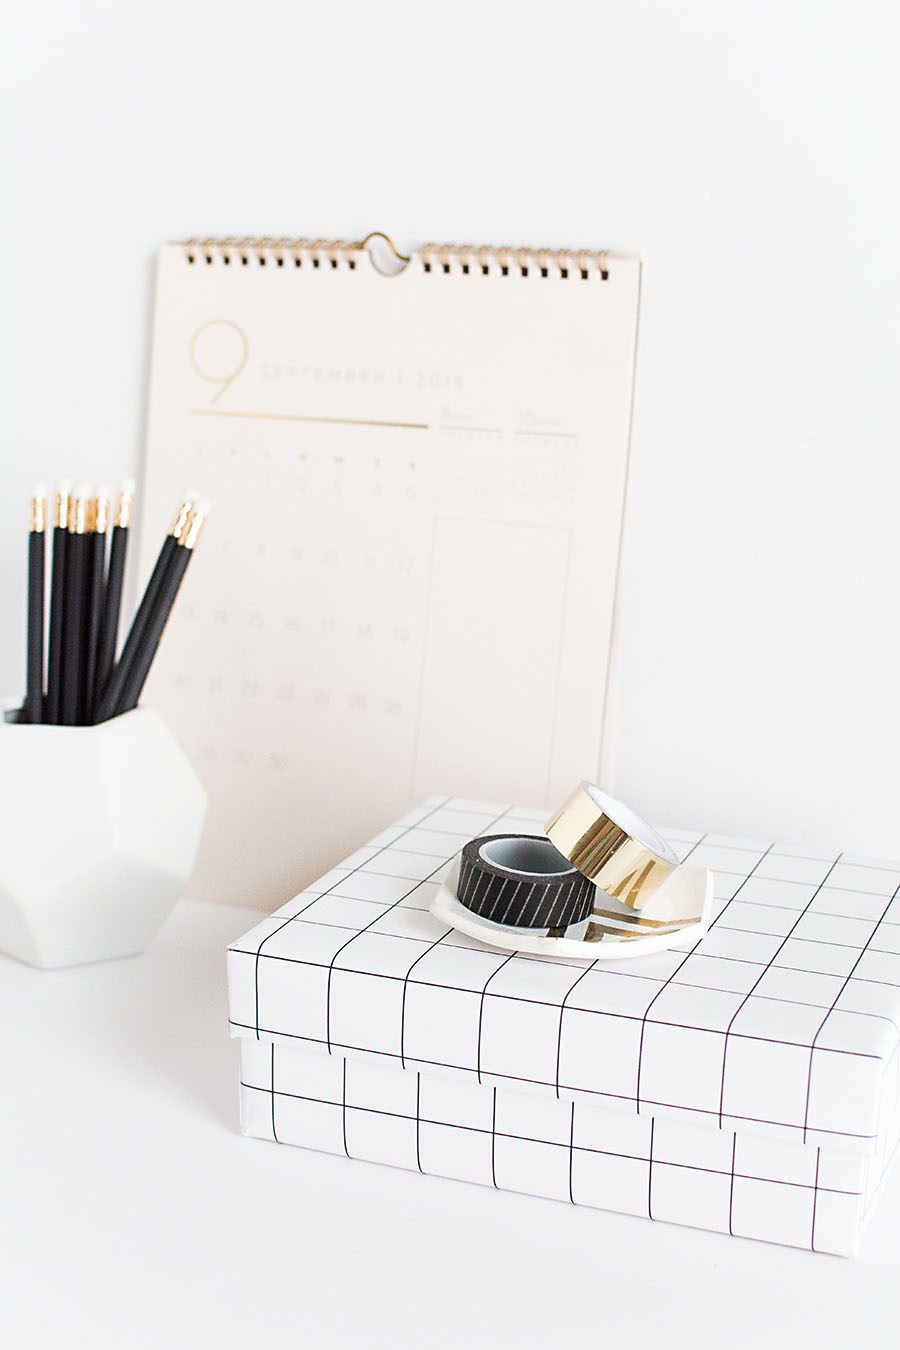
So about why I suggested fabric or wallpaper, but actually used gift wrap… Audrey from This Little Street sent me samples from her new pattern line, and I picked the grid (viva la grid). My initial plan was to use the wallpaper to cover these boxes, but the one I got was the larger scale grid pattern and I preferred the smaller scale grid pattern of the gift wrap that Audrey so generously sent as well. So I used the gift wrap, which would be so amazingly gorgeous for gift wrapping right?? But for this project, it’s not ideal in terms of longevity, which is why I recommend the fabric or wallpaper option. Fabric can follow these exact steps, and wallpaper would be easiest because you’d just peel and stick after all the cutting!
That was long, did you get through it?
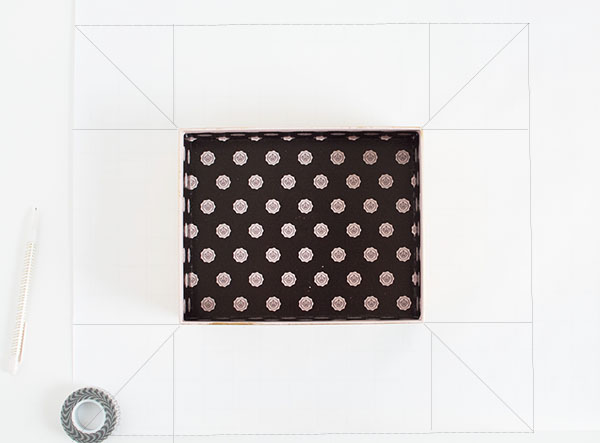
The grey lines are where I made my pencil marks with a ruler. I started by drawing an outline around the box at a distance of about twice the height (a bit less is ok too) of the side of the box (box was about 2.5 inches high, so I measured 4 inches out from each side). Next I drew diagonal lines from each corner of the box to each corner of the outside rectangle. The horizontal lines were drawn straight across from each corner, but the vertical lines were drawn further out from the edge of the box- these are going to create tabs.
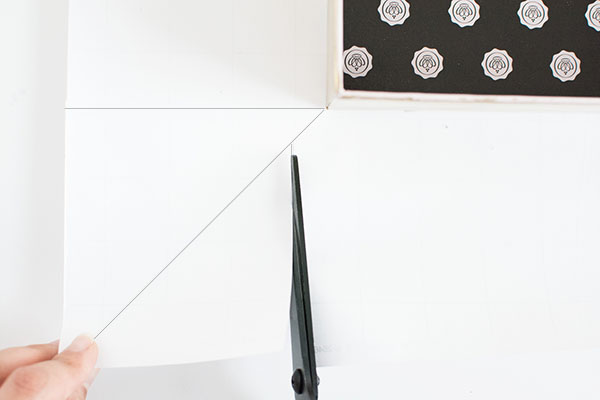 I cut along all the pencil lines which removes these two triangular pieces, one slightly larger than the other.
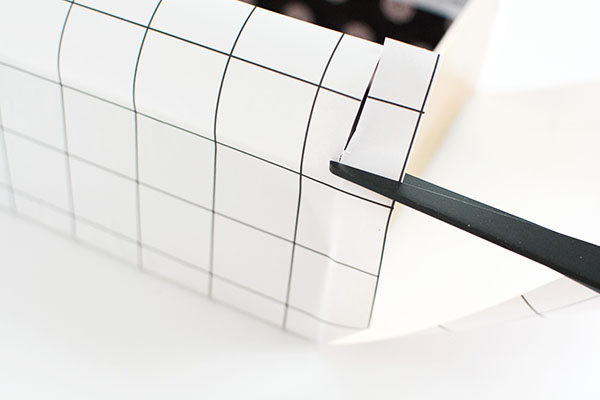 Lifting up one side of paper with tabs, I made a vertical cut and horizontal cut that lines up with the edge and height of the box. This cuts out a rectangular piece as shown in the photo above.
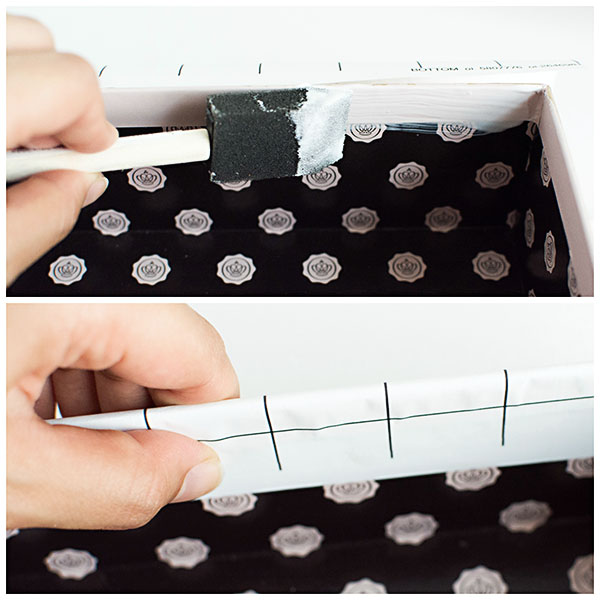 I applied Mod Podge on the inner edge of the box and folded the side of the paper with the tabs over the edge as tightly as possible, then repeated on the opposite side.
 I glued down the tabs over each corner, then folded over each remaining side of paper up and over the edge of the box, using Mod Podge to secure it down on the inner side of the box like before.
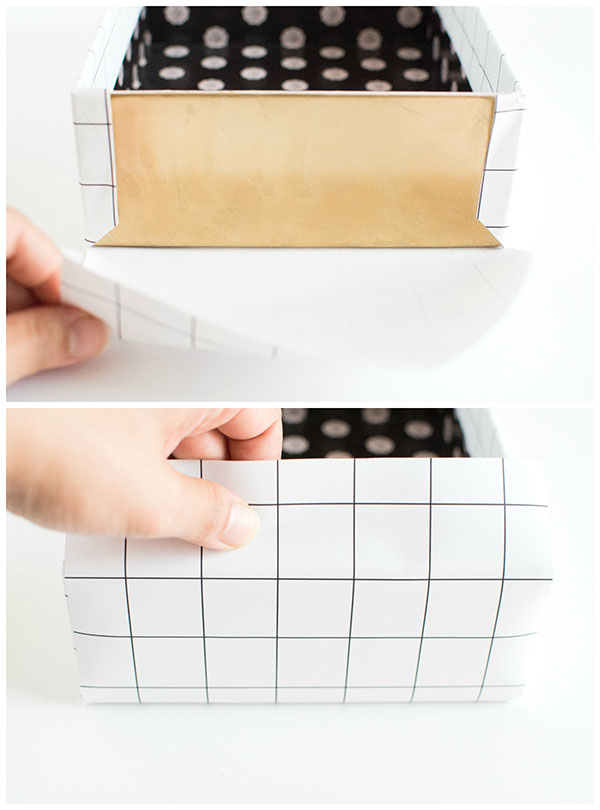
Repeated everything for the lids and done.
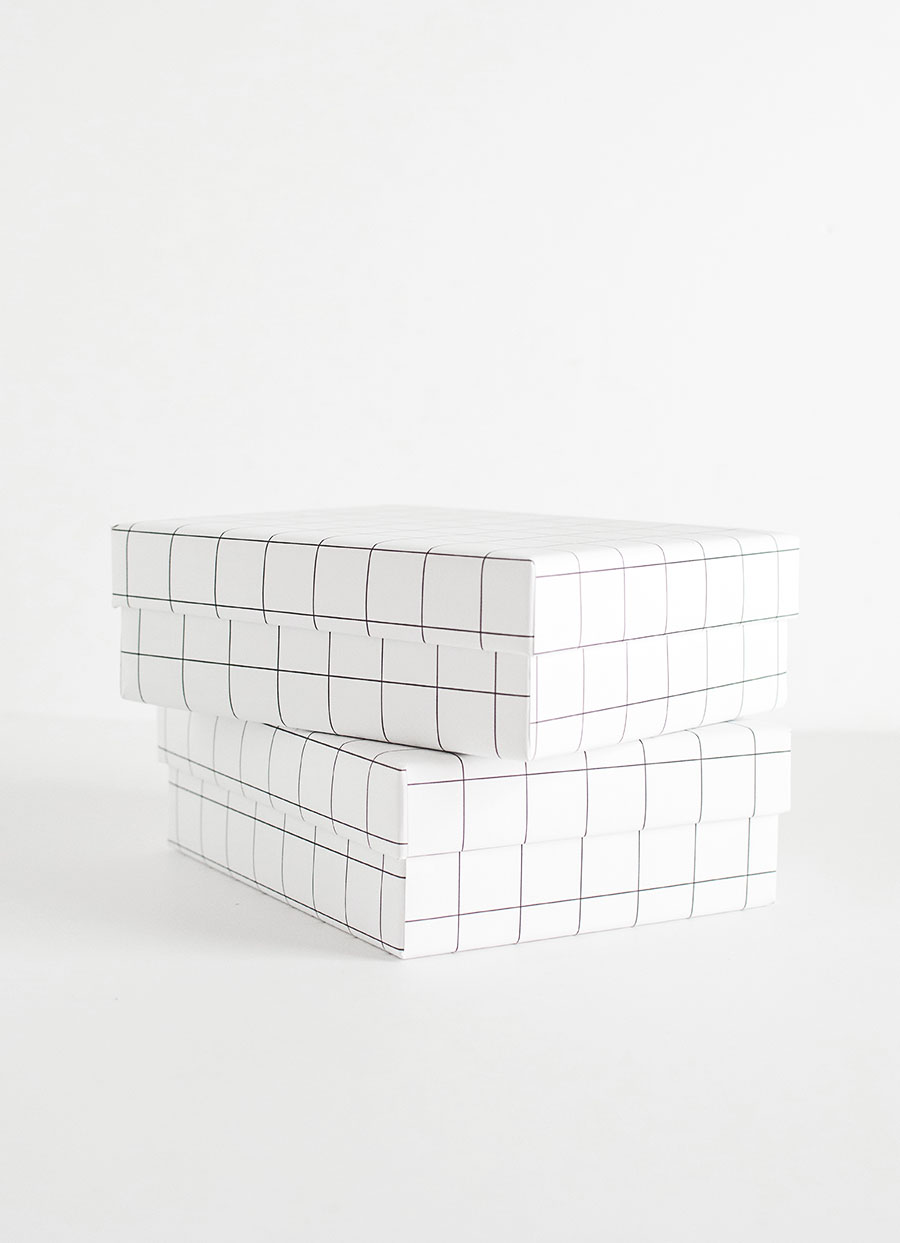
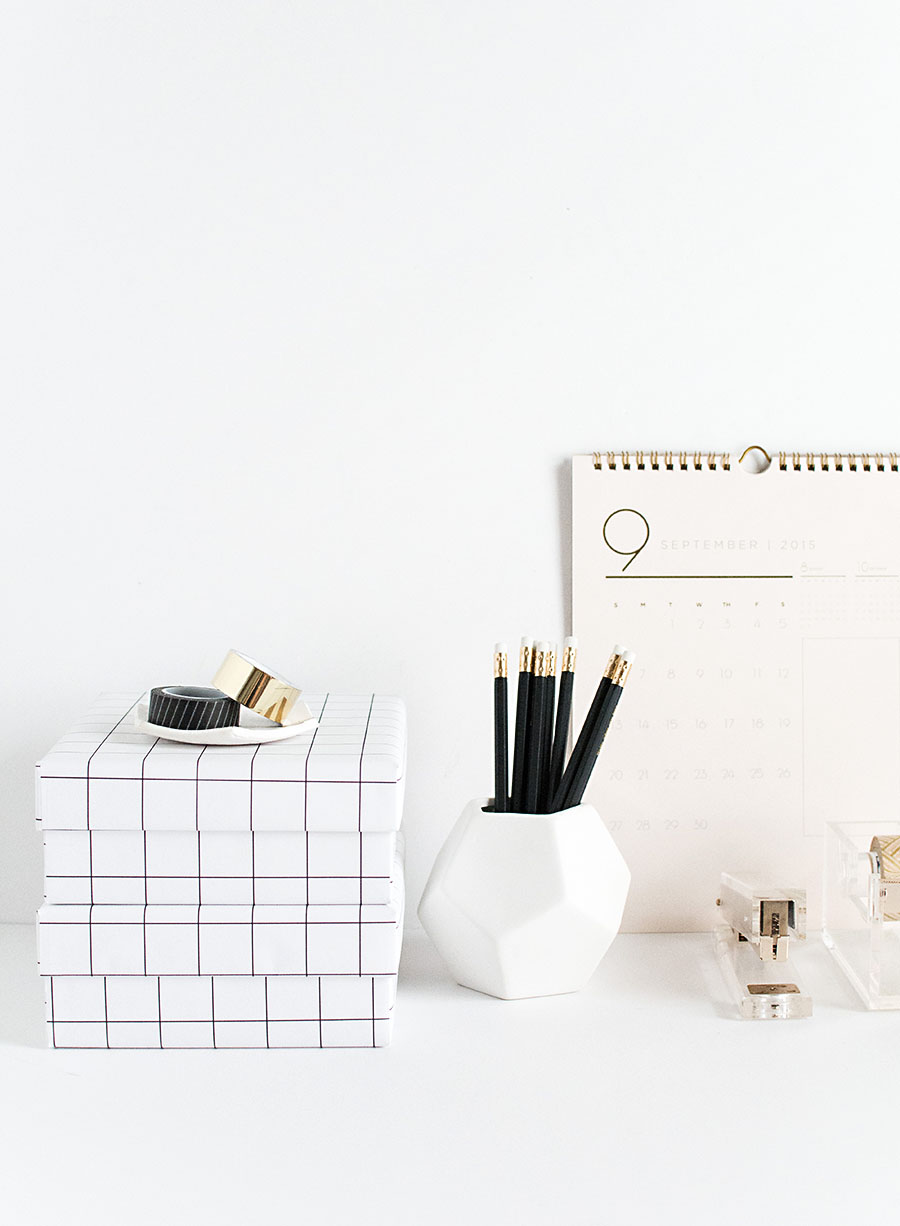 One of the boxes holds my Washi tape (not quite all of them… because they don’t all fit…..) and the other holds small bottles of acrylic paint. I go in and out of these boxes a lottttt so we’ll see how they hold up. The fabric I had on the lids before peeled off really nicely when I removed them for this re-do, which makes me feel good about the potential of changing up these boxes later. For now I’m still obsessed with the grid, black and white, all that good stuff, you already know.
This is also definitely the start of changes I want to make to my work space! These boxes pretty much sum up the style inspiration I’m keeping in mind for that. Thinking a lot more about practical organization and lightening up the little corner. To be continued at a slow pace, ha.
*ALSO* A huge huge huge THANK YOU to everyone who filled out the reader survey so far! You guys are bringin it <3. If you happened to miss that post, you can still fill out the survey here.
Love that paper! And love the minimal look too. Beautiful photos. :)
YES I’ve always wanted to get some grid paper! Thanks Alexis!
Love it…where can I find that paper?or fabric
Thank you! I linked to the source under the materials list of this post. You can find the paper herehere. It comes in fabric, wallpaper, or gift wrap!
These are gorgeous! I love anything grid pattern. It always looks so modern and chic. I’m still looking for a grid laptop cover!
Oooooo I would LOVE a grid laptop cover! I’ll be on the hunt for that, too, excellent idea. Thanks, Andrea!
Just fabulous! I’ve been in a “get rid of everything” mood and next on my list is to re-organize my entire house! It will take a lifetime ;)
Yes yes yes I’m just wanting to get rid of everything!! It feels so good, but totally, it’s going to take me a lifetime too.
I like this pattern, it’s so clean!
Yes! I love how clean it is, too.
Hi there! Lovely photos, where did you get that glam calender/planner from?
Hi, Jennifer! It’s from Target.
A Huffington Post article led me here. I really appreciate your clean, somewhat minimal aesthetic. You’ve a great eye for design. :)